The B7 sign, universally recognised as the Stop sign, is a crucial traffic sign mandating a complete halt. When you encounter this red octagonal sign, you must stop your vehicle entirely at the designated stop line or before entering the intersection. It's vital to yield to all traffic, including vehicles, cyclists, and pedestrians, on the intersecting road before proceeding. This sign is typically placed at junctions with limited visibility or a higher accident risk, ensuring drivers assess the situation fully before rejoining traffic.
This crucial Dutch road sign (B7) demands a full stop and yielding to all traffic, ensuring safety at potentially hazardous points. Master its meaning for your theory test revision and confident driving.
The stop sign is a red octagon with the word STOP and is used where extra safety is needed, for example at blind junctions, busy priority roads, or railway crossings. Unlike a yield sign, it always requires a full stop, even when you see no traffic. You stop at the line, check carefully for vehicles, cyclists, and pedestrians, then yield to them before entering, crossing, or turning onto the main road.
This sign requires you to come to a complete, momentary stop at the stop line, or before the intersection if there is no marked line. After stopping, you must carefully check all directions and give priority to every road user on the intersecting road and on any nearby crossings. Only drive on when you are sure the junction is fully clear and you can cross or turn without creating danger.
Get clear, practical answers to the most common questions about the B7 - Stop and Give Way road sign. Learn how the sign works, what rules it represents, and how it affects real driving situations. This FAQ strengthens your understanding and supports accurate decision making for the Dutch driving theory exam in the Netherlands.
The B7 sign requires you to come to a complete stop at the stop line or intersection. After stopping, you must yield to all traffic and pedestrians on the intersecting road before it is safe to proceed.
Yes, absolutely. The 'Stop' command means a full stop is mandatory, even if you don't see any other traffic. This is a critical rule for safety and a common point tested in the driving theory exam.
Yielding means you must allow all other road users, including cars, trucks, buses, cyclists, and pedestrians, to pass safely before you move off. You should not force them to slow down or swerve to avoid you.
A common mistake is 'rolling through' the stop line without coming to a complete halt, or failing to check for traffic from all directions after stopping. Learners sometimes assume they have priority if they think the road is clear, but the B7 sign always dictates a full stop and yield.
You'll usually find the B7 sign at junctions where visibility is poor, on roads with a higher risk of accidents, or where a main road has priority. It's designed to make drivers pause and carefully assess the situation before entering a potentially busy or complex intersection.
A clear reference image of the B7 - Stop and Give Way road sign used in the Netherlands.

The B7 - Stop and Give Way road sign may also be known by these alternative names or terms.
The B7 - Stop and Give Way road sign is part of the Priority Signs (B) category, which groups together signs with similar rules and functions.
Comparing adjacent and similar road signs, like the Stop sign (B7) and Give Way signs, sharpens your recognition skills. This focused approach to traffic sign comparison aids memory recall and reduces errors, crucial for effective theory test revision.
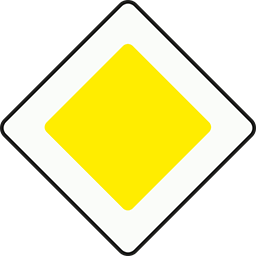
The B1 Priority Road sign means you have the right of way.

The B2 sign marks the end of your priority on the road.

You have priority at the upcoming intersection!

The B4 sign means traffic from the left must yield at this intersection.

You have priority at this intersection where a side road joins from the right.

Master the B6 Give Way Sign: Your Key to Safe Junction Navigation
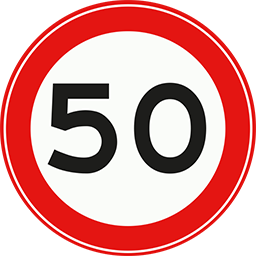
Maximum Speed (A1) Sign: Know Your Limits on Dutch Roads
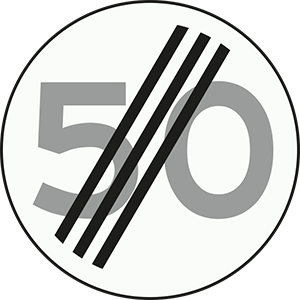
The A2 sign signals the end of a previously posted maximum speed limit.
Improve your recognition of official Dutch traffic signs by exploring related theory modules and complex priority scenario studies. These linked resources bridge the gap between visual identification and applying traffic rules correctly for your CBR exam.
Being involved in a car accident is stressful, but understanding your legal duties in the Netherlands is essential for both immediate safety and long-term legal standing. This article explains the mandatory actions you must take, such as stopping at the scene, offering assistance to anyone injured, and reporting the incident correctly, all of which are important for safe driving practices and the CBR theory exam.
With a full Category A motorcycle license in the Netherlands, you gain the freedom to ride any motorcycle without power or displacement limitations. This guide breaks down what this means legally, contrasting it with the A1 and A2 licenses, and emphasizes that all other Dutch traffic laws, vehicle registration, and roadworthiness requirements remain paramount for safe and legal riding.
Know Your Duties: What to Do After a Road Accident in the Netherlands
Master pedestrian priority to navigate Dutch intersections safely and pass your CBR exam.
The J13 double Saint Andrews cross is used at level crossings where two or more railway tracks intersect the road. It alerts drivers that trains may come from several directions and that a second train can arrive shortly after the first has passed. This increased complexity requires extra observation and patience. After a train has gone, always recheck every track, obey any additional warning devices, and only cross if you can clear the entire crossing smoothly.
The J11 sign indicates an unguarded level crossing where there are no physical barriers to prevent you from entering the railway line. Safety depends entirely on your observation, speed choice, and decision making. You may encounter additional warning devices such as flashing lights or crossbuck signs, but trains always have absolute priority. Approach at a speed that allows you to stop in time, and never enter the crossing unless you can clear it in one movement.
After reviewing the full list of Dutch road signs, deepen your understanding by exploring signs organized by category or practicing with targeted questions. This systematic approach ensures you fully grasp every sign's meaning and application, preparing you thoroughly for your CBR driving theory exam.
View All Dutch Road Signs