
This lesson details the mechanical and safety procedures for connecting and disconnecting your tractor unit and semitrailer. It builds on your knowledge of articulation dynamics to ensure you can perform these tasks safely and efficiently, which is a vital component of the Italian heavy vehicle theory exam.
Lesson content overview
L'operazione di aggancio e sgancio di un semirimorchio al trattore stradale è una delle competenze più critiche per ogni autista di veicoli pesanti. Una procedura eseguita in modo scorretto può avere conseguenze disastrose, dalla perdita del carico al distacco completo del rimorchio durante la marcia, mettendo a rischio la sicurezza propria e quella degli altri utenti della strada. Questa lezione, essenziale per la preparazione all'Italian Goods Vehicle License Theory Course (C, C1, C1E, CE), fornisce una guida dettagliata e passo-passo per comprendere i dispositivi di accoppiamento, le procedure corrette e i controlli di sicurezza indispensabili, in conformità con il Codice della Strada italiano e le normative europee.
La stabilità e la sicurezza di un complesso veicolare (trattore stradale + semirimorchio) dipendono interamente dalla correttezza delle operazioni di aggancio e sgancio. Questi processi non sono semplici manovre meccaniche, ma una serie di azioni precise e controllate che garantiscono l'integrità strutturale del veicolo, il corretto funzionamento dei sistemi frenanti e di illuminazione, e la prevenzione di incidenti gravi. Comprendere la logica sottostante a ogni passaggio e l'importanza di ciascun controllo è fondamentale per prevenire il distacco del rimorchio, la perdita di controllo o guasti ai sistemi vitali.
L'accoppiamento tra un trattore stradale e un semirimorchio avviene attraverso due componenti standardizzati a livello internazionale: la ralla (sul trattore) e il perno ralla (sul semirimorchio). Questi dispositivi sono il cuore della connessione meccanica e consentono la necessaria articolazione tra i due veicoli.
Una piastra circolare e rotante montata sul telaio del trattore stradale, progettata per ricevere il perno ralla del semirimorchio e permettere la rotazione angolare durante la marcia.
La ralla è una piastra robusta, solitamente in acciaio, installata sul telaio posteriore del trattore. Essa agisce come un punto di snodo, permettendo al semirimorchio di oscillare e ruotare rispetto al trattore, il che è essenziale per la manovrabilità e la stabilità del complesso veicolare. Le ralle possono essere di tipo fisso o scorrevole (regolabile), quest'ultima permette di variare la posizione del perno ralla rispetto all'asse posteriore del trattore, ottimizzando la distribuzione del peso e la manovrabilità. È vitale che la ralla sia sempre pulita, ben lubrificata e priva di danni strutturali.
Un robusto perno metallico, solitamente a forma di fungo, montato sulla parte inferiore anteriore del semirimorchio, che si inserisce nella ralla del trattore per creare il collegamento meccanico.
Il perno ralla è il componente che si inserisce fisicamente nella ralla del trattore, fornendo il punto di aggancio principale. Questo perno è progettato per resistere a forze considerevoli e deve essere in perfette condizioni, privo di deformazioni, crepe o usura eccessiva. La sua integrità è fondamentale per prevenire il distacco del rimorchio. Il posizionamento e l'orientamento del perno ralla sono standardizzati per garantire la compatibilità tra trattori e semirimorchi di diversi produttori.
All'interno della ralla, un sistema di ganasce o griffe di bloccaggio è responsabile di afferrare saldamente il perno ralla una volta che questo è stato inserito. Questo meccanismo, una volta chiuso, impedisce il disaccoppiamento accidentale del semirimorchio durante la marcia.
Il corretto funzionamento del meccanismo di bloccaggio è verificato attraverso un indicatore di bloccaggio (spesso una leva o un perno colorato, come rosso o verde) che diventa visibile solo quando il perno ralla è completamente bloccato. Non affidarsi mai solo a segnali acustici; la verifica visiva dell'indicatore è un passaggio obbligatorio e irrinunciabile. In caso di dubbi, l'aggancio non è sicuro.
Attenzione: Un indicatore di bloccaggio che non mostra lo stato di "bloccato" significa che l'aggancio non è sicuro. Non tentare mai di muovere il veicolo in queste condizioni.
L'aggancio di un semirimorchio è un processo che richiede precisione, attenzione e il rispetto di una sequenza specifica di azioni. Ogni passaggio è progettato per garantire la massima sicurezza e stabilità del complesso veicolare.
1. Preparazione e Avvicinamento: Posizionare il trattore in modo che la ralla sia allineata con il perno ralla del semirimorchio. Assicurarsi che il semirimorchio sia stabile (gambe di appoggio abbassate e bloccate) e che l'altezza del perno ralla sia leggermente inferiore a quella della ralla (circa 2-3 cm). Verificare che la ralla sia aperta e pronta a ricevere il perno.
2. Allineamento Preciso: Retrocedere lentamente il trattore, utilizzando gli specchietti retrovisori per monitorare l'allineamento. Il perno ralla deve essere centrato rispetto all'apertura della ralla. Mantenere una bassa velocità per poter correggere eventuali deviazioni.
3. Ingaggio del Perno Ralla: Continuare a retrocedere lentamente fino a quando il perno ralla non si inserisce completamente nella ralla. Si dovrebbe sentire un chiaro scatto o un suono di blocco quando le ganasce si chiudono attorno al perno.
4. Verifica del Bloccaggio: Una volta sentito lo scatto, tirare leggermente in avanti il trattore (il "tug test") per confermare che il bloccaggio sia avvenuto in modo sicuro e che il rimorchio non si stacchi. Contemporaneamente, verificare visivamente l'indicatore di bloccaggio; deve mostrare chiaramente lo stato di "bloccato" (es. leva rientrata, spia verde accesa).
5. Connessione dei Sistemi Elettrici e Frenanti:
Connessioni Elettriche: Collegare il cavo elettrico (a 7 o 13 pin) del trattore al semirimorchio. Questo alimenta le luci di posizione, freno, indicatori di direzione e altri sistemi elettrici.
Connessioni Pneumatiche (Aria): Collegare i tubi dell'aria compressa (solitamente due: uno rosso per l'alimentazione costante, uno giallo per i freni di servizio) alle valvole del semirimorchio. Assicurarsi che le connessioni siano salde e prive di perdite.
6. Sollevamento delle Gambe di Appoggio: Azionare la manovella delle gambe di appoggio (landing gear) del semirimorchio per sollevarle completamente. Assicurarsi che siano bloccate in posizione di trasporto per evitare che striscino sull'asfalto o si danneggino.
7. Test dei Sistemi:
Test Freni: Con il motore acceso e la pressione dell'aria stabilizzata, eseguire un test dei freni di servizio e di stazionamento del semirimorchio. Controllare che il freno di stazionamento del rimorchio si sganci correttamente.
Test Luci: Attivare tutte le luci (posizione, stop, frecce) e verificare visivamente che funzionino correttamente su entrambi i lati del semirimorchio.
8. Controllo Finale e Partenza: Prima di partire, fare un ultimo giro di ispezione visiva per confermare che tutti i collegamenti siano saldi, che le gambe di appoggio siano sollevate e bloccate, e che non ci siano ostacoli intorno al veicolo.
Le connessioni tra trattore e semirimorchio non sono solo meccaniche ma anche funzionali. Il sistema elettrico assicura che il semirimorchio sia visibile e comunichi le intenzioni del conducente (freno, svolta). I sistemi pneumatici, invece, trasferiscono l'aria compressa necessaria per il funzionamento dei freni del semirimorchio.
È fondamentale che i tubi dell'aria e i cavi elettrici siano collegati correttamente e siano liberi da attorcigliamenti, schiacciamenti o usura. Qualsiasi perdita d'aria o malfunzionamento elettrico deve essere immediatamente riparato.
Lo sgancio del semirimorchio è altrettanto critico quanto l'aggancio e richiede una sequenza di operazioni altrettanto rigorosa per garantire che il semirimorchio rimanga stabile e sicuro una volta separato dal trattore.
1. Posizionamento e Messa in Sicurezza del Trattore: Posizionare il complesso veicolare su un terreno il più possibile piano e stabile. Applicare il freno di stazionamento del trattore.
2. Preparazione del Semirimorchio: Assicurarsi che il semirimorchio sia anch'esso frenato. In alcuni casi, potrebbe essere necessario azionare manualmente il freno di stazionamento del semirimorchio.
3. Abbassamento delle Gambe di Appoggio: Azionare la manovella delle gambe di appoggio (landing gear) e abbassarle completamente fino a quando non toccano saldamente il terreno. Assicurarsi che le gambe siano bloccate nella posizione estesa e che il semirimorchio sia stabile e non si muova.
4. Scollegamento delle Connessioni:
Scollegamento Elettrico: Disconnettere con attenzione il cavo elettrico dal semirimorchio, riponendolo nell'apposito alloggiamento sul trattore.
Scollegamento Pneumatico: Disconnettere i tubi dell'aria (rosso e giallo) dalle valvole del semirimorchio e riporli nei loro supporti sul trattore. Assicurarsi che non rimangano penzolanti per evitare danni.
5. Rilascio del Meccanismo di Bloccaggio: Azionare la leva di sblocco della ralla per aprire le ganasce di bloccaggio. Verificare visivamente che l'indicatore di bloccaggio sia ora nella posizione di "sbloccato".
6. Separazione del Trattore dal Semirimorchio: Avanzare lentamente con il trattore per disimpegnare la ralla dal perno ralla. Muoversi con cautela per evitare urti o scuotimenti del semirimorchio.
7. Controllo Finale del Semirimorchio: Una volta che il trattore è completamente separato, ispezionare il semirimorchio per assicurarsi che sia stabile sulle sue gambe di appoggio, che non ci siano parti in contatto con il trattore e che tutte le linee siano state correttamente scollegate.
Supporti meccanici retrattili montati sul semirimorchio che vengono abbassati per sostenerlo quando è sganciato dal trattore stradale, prevenendone il ribaltamento o lo spostamento.
Le gambe di appoggio sono essenziali per la stabilità del semirimorchio quando non è agganciato. Devono essere robuste, in buone condizioni e in grado di sostenere il peso del semirimorchio, anche quando carico. È cruciale abbassarle completamente e assicurarsi che siano bloccate nella posizione estesa prima di rilasciare il perno ralla.
Il Codice della Strada italiano e le normative di sicurezza europee impongono regole stringenti per le operazioni di aggancio e sgancio, sottolineando la responsabilità del conducente.
Molti incidenti legati all'accoppiamento derivano da errori comuni o dalla negligenza di alcune fasi della procedura.
Le procedure di aggancio e sgancio possono richiedere piccole modifiche in base alle condizioni ambientali e al contesto operativo.
Per padroneggiare le operazioni di aggancio e sgancio, è fondamentale interiorizzare i seguenti concetti chiave:
Queste procedure e principi sono la base per garantire la sicurezza stradale e l'efficienza nel trasporto merci, aspetti fondamentali per ottenere e mantenere la licenza per veicoli pesanti in Italia.
Coupling and uncoupling semitrailers involves precise mechanical and safety procedures that every heavy vehicle driver must master. The fifth wheel and kingpin create the core articulated connection, while locking jaws inside the fifth wheel secure the kingpin; these must be verified visually through the locking indicator and confirmed with a tug test. After mechanical coupling, drivers must connect and test both electrical (lighting) and pneumatic (braking) systems, ensuring the semitrailer is fully operational. During uncoupling, landing gear deployment and parking brake application must precede any disconnection to maintain trailer stability. The driver's responsibility is absolute: every safety check is mandatory under Italian road code regulations.
A short set of high-value points that capture the most important learning from this lesson.
The fifth wheel on the tractor and the kingpin on the semitrailer form the essential mechanical connection that allows articulation during driving
Safe coupling requires precise alignment: the kingpin height should be slightly below the fifth wheel (about 2-3 cm) before reversing
The locking indicator (colored pin or lever) must visually confirm the locked state before departure; never rely solely on audible sounds
Both electrical (7 or 13 pin) and pneumatic connections (red and yellow air lines) must be made and tested after mechanical coupling
The tug test (light forward pull) is a mandatory verification that the fifth wheel jaws are fully engaged around the kingpin
Explore all units and lessons included in this driving theory course.
The locking indicator must show 'locked' status before you drive; if uncertain, recouple the semitrailer
Two pneumatic lines exist: red supplies constant air pressure, yellow controls service brakes
Landing gear must be fully lowered and locked before releasing the fifth wheel during uncoupling
The driver bears full legal responsibility for verifying safe coupling before every departure
Perform a full lights and brakes test after coupling to ensure trailer visibility and braking capability
Driving away without visually confirming the locking indicator is in the locked position
Failing to connect or testing the electrical and pneumatic lines, resulting in non-functional lights or brakes
Uncoupling on a slope without applying the trailer parking brake, risking uncontrolled movement
Forgetting to lower the landing gear before releasing the fifth wheel, which can cause the trailer to tip forward
Relying only on air pressure indicators or sounds instead of performing the physical tug test and visual check
Lesson content overview
A short set of high-value points that capture the most important learning from this lesson.
The fifth wheel on the tractor and the kingpin on the semitrailer form the essential mechanical connection that allows articulation during driving
Safe coupling requires precise alignment: the kingpin height should be slightly below the fifth wheel (about 2-3 cm) before reversing
The locking indicator (colored pin or lever) must visually confirm the locked state before departure; never rely solely on audible sounds
Both electrical (7 or 13 pin) and pneumatic connections (red and yellow air lines) must be made and tested after mechanical coupling
The tug test (light forward pull) is a mandatory verification that the fifth wheel jaws are fully engaged around the kingpin
Explore all units and lessons included in this driving theory course.
The locking indicator must show 'locked' status before you drive; if uncertain, recouple the semitrailer
Two pneumatic lines exist: red supplies constant air pressure, yellow controls service brakes
Landing gear must be fully lowered and locked before releasing the fifth wheel during uncoupling
The driver bears full legal responsibility for verifying safe coupling before every departure
Perform a full lights and brakes test after coupling to ensure trailer visibility and braking capability
Driving away without visually confirming the locking indicator is in the locked position
Failing to connect or testing the electrical and pneumatic lines, resulting in non-functional lights or brakes
Uncoupling on a slope without applying the trailer parking brake, risking uncontrolled movement
Forgetting to lower the landing gear before releasing the fifth wheel, which can cause the trailer to tip forward
Relying only on air pressure indicators or sounds instead of performing the physical tug test and visual check
Explore search topics learners often look for when studying Coupling Devices and Procedures. These topics reflect common questions about road rules, driving situations, safety guidance, and lesson level theory preparation for learners in Italy.
Browse additional driving theory lessons that cover connected traffic rules, road signs, and common driving situations related to this topic. Improve your understanding of how different rules interact across everyday traffic scenarios.
Explore the specific steps and critical checks for safely coupling and uncoupling tractor units and semitrailers. This lesson covers the mechanics of the fifth wheel and kingpin, ensuring secure connections according to Italian road law.
This lesson provides a detailed, safety-focused procedure for detaching a tractor from a semitrailer. It covers selecting a suitable, firm, and level location, correctly deploying the trailer's landing gear to support its weight, and disconnecting the air and electrical lines in the proper order. Following these systematic steps is essential to prevent the trailer from tipping over or rolling away, ensuring the safety of the driver and anyone nearby.

This lesson introduces the common types of trailers and semitrailers, explaining the key differences between them. It covers semitrailers that connect via a fifth wheel and full trailers that use a drawbar coupling, detailing the advantages and typical uses for each configuration. Learners will be able to identify various trailer designs, such as flatbeds, tankers, and refrigerated units, and understand their specific operational considerations.

This lesson explains how the braking, lighting, and ABS systems of a trailer are powered and controlled by the tractor unit. It details the purpose of the red (emergency) and yellow (service) air lines and the multi-pin electrical connector, providing a clear procedure for connecting them in the correct sequence. Learners will understand the importance of these connections for safe braking and legal lighting operation.

This lesson focuses on a key dynamic behavior of articulated vehicles known as 'off-tracking' or 'cut-in'. It explains why, during a turn, the trailer's wheels follow a path inside that of the tractor's wheels, which requires the driver to make wider turns to avoid hitting curbs, signs, or other vehicles. Understanding and anticipating off-tracking is a fundamental skill for safely maneuvering a combination vehicle, especially in tight spaces.

This lesson bridges the gap between general traffic laws and their specific application to heavy goods vehicles. It examines how rules regarding speed limits, lane discipline, overtaking, and priority are modified or have special considerations for trucks due to their size, weight, and reduced maneuverability. Drivers will learn to correctly interpret road signs and signals within the context of operating a large vehicle, ensuring safe and compliant integration with other traffic.

This lesson provides instruction on the challenging skill of reversing a large vehicle. It covers techniques for straight-line reversing and the more complex task of reversing an articulated vehicle around a corner, explaining how steering inputs have an opposite effect on the trailer. The lesson also stresses the importance of slow, controlled speed, constant observation, and using a guide (banksman) whenever possible for maximum safety.

This lesson provides a comprehensive overview of the essential documentation required for both the driver and the vehicle. It covers the driver's license (patente), CQC card, vehicle registration (carta di circolazione), insurance certificate, and transport-specific documents like the cargo manifest. Learners will understand the importance of ensuring all documents are valid and readily available for inspection by authorities to avoid legal penalties and operational delays.

This lesson details the specific rules and safety considerations for driving through the extensive tunnels and high viaducts common in Italy. It covers pre-entry checks, maintaining a safe following distance, and the correct procedures to follow in case of a breakdown or fire inside a tunnel. The lesson also addresses the hazard of strong crosswinds on exposed viaducts and how to maintain vehicle control.

This lesson explains the principles of safe load management to maintain vehicle stability and comply with legal requirements. It covers how to properly distribute and secure cargo inside the vehicle, the rules for using roof racks, and the specific signaling required for loads that project beyond the vehicle's rear. The content also provides a basic introduction to the rules and safety considerations when towing a small trailer.

This lesson focuses on the specific regulations and techniques for operating a heavy vehicle on high-speed motorways. It covers mandatory lane discipline for trucks, the rules governing overtaking other heavy vehicles, and the specific speed limits that apply. Best practices for merging onto and exiting the motorway, maintaining safe following distances, and using the hard shoulder only in genuine emergencies are also detailed.
Understand how coupling devices like the fifth wheel and kingpin affect vehicle stability. This lesson delves into the critical role of secure connections and their impact on the behaviour of articulated vehicles on Italian roads.
This lesson focuses on a key dynamic behavior of articulated vehicles known as 'off-tracking' or 'cut-in'. It explains why, during a turn, the trailer's wheels follow a path inside that of the tractor's wheels, which requires the driver to make wider turns to avoid hitting curbs, signs, or other vehicles. Understanding and anticipating off-tracking is a fundamental skill for safely maneuvering a combination vehicle, especially in tight spaces.

This lesson addresses two major hazards of articulated vehicle operation: jack-knifing and rear swing. It explains how a jack-knife occurs when the trailer skids and pushes the tractor into a sharp, uncontrolled angle, often due to harsh braking or slippery conditions, and covers prevention and correction techniques. The lesson also describes rear swing (tail swing), where the back of the trailer swings wide during tight turns, posing a risk to nearby objects and people.
This lesson provides a detailed, safety-focused procedure for detaching a tractor from a semitrailer. It covers selecting a suitable, firm, and level location, correctly deploying the trailer's landing gear to support its weight, and disconnecting the air and electrical lines in the proper order. Following these systematic steps is essential to prevent the trailer from tipping over or rolling away, ensuring the safety of the driver and anyone nearby.
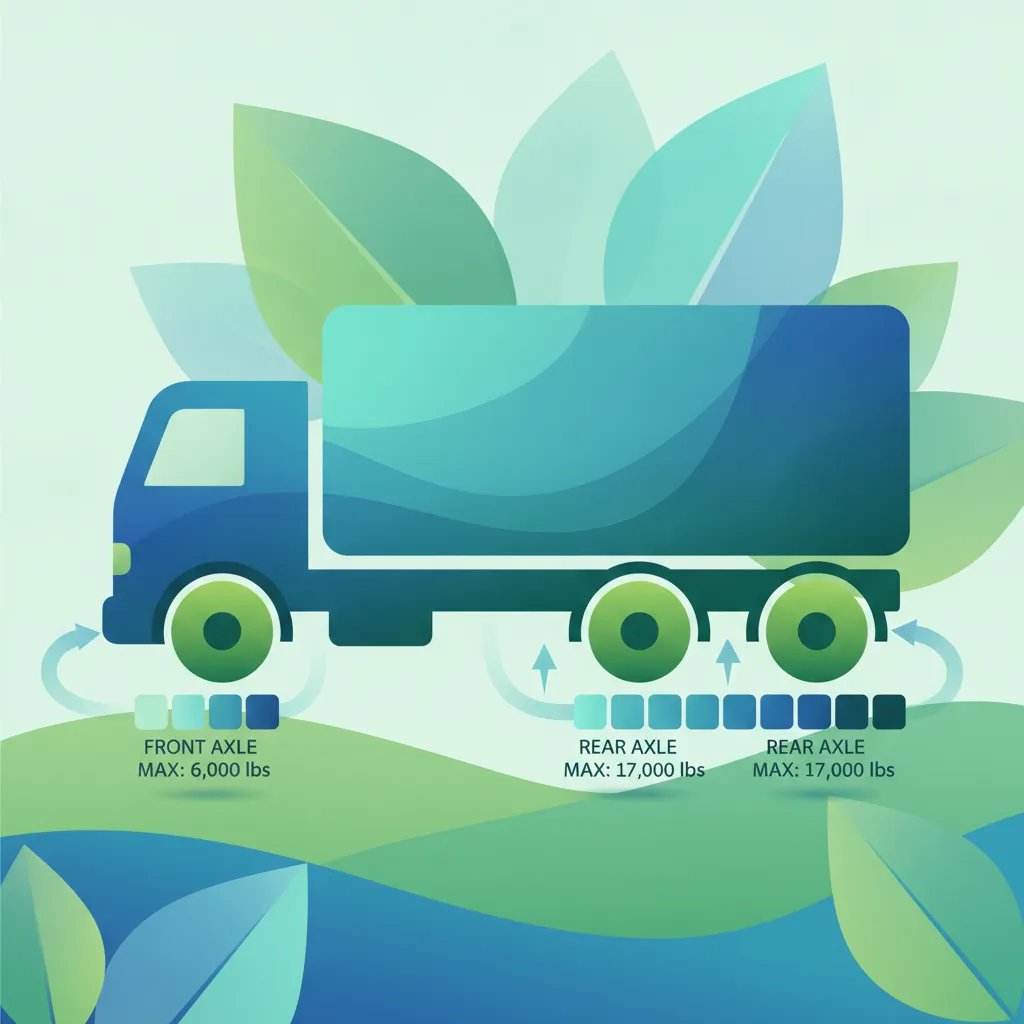
This lesson details the legal restrictions on the weight that can be supported by a single axle or a group of axles. It explains the importance of distributing the load correctly across the vehicle's length to prevent exceeding these limits, which can cause significant road damage and compromise vehicle safety. Learners will understand the relationship between load placement, axle pressure, and overall stability, particularly during braking and cornering.

This lesson focuses on the steering mechanisms that enable drivers to control heavy vehicles, with a particular emphasis on power-assisted hydraulic systems. It covers the key components, from the steering wheel to the linkages connected to the wheels, and explains how to perform basic checks for responsiveness and fluid levels. Learners will understand how proper steering function is critical for maintaining directional control and overall vehicle safety.

This lesson explains the critical concept of the center of gravity (CoG) and its direct impact on a vehicle's susceptibility to rolling over. It demonstrates how placing heavy items high up raises the CoG, making the vehicle less stable in corners or during evasive maneuvers. Learners will understand the importance of loading the heaviest goods as low and as centrally as possible to maximize stability and reduce rollover risk.
This lesson introduces modern Advanced Driver-Assistance Systems (ADAS) found in many contemporary vehicles. It explains the function of features such as lane-keeping assist, blind-spot monitoring, and adaptive cruise control. Crucially, the content emphasizes that these are assistance systems and do not replace the driver's responsibility to remain fully attentive and in control of the vehicle at all times.
Find clear answers to common questions learners have about Coupling Devices and Procedures. Learn how the lesson is structured, which driving theory objectives it supports, and how it fits into the overall learning path of units and curriculum progression in Italy. These explanations help you understand key concepts, lesson flow, and exam focused study goals.
The primary indicator is the visual check of the locking jaw securely surrounding the kingpin shank, often verified by the safety release lever returning to the locked position and a successful 'tug test' in a low gear to ensure the mechanism holds.
Uncoupling on an incline poses a major risk of the trailer rolling away or the kingpin binding in the fifth wheel, making it impossible to separate the units safely. Always ensure the landing gear is fully extended on stable ground.
The landing gear is designed to bear the full weight of the trailer when it is not connected to the tractor. It must be lowered until it touches the ground and then engaged to take the load before you disconnect the fifth wheel and air lines.
A common mistake is incorrectly color-coding the emergency and service lines, which can lead to the trailer brakes locking up or failing to release. Always follow the standardized layout and ensure they are connected and tested before moving the vehicle.
Start searching now to pinpoint exactly which Italian driving theory topics, road signs, or traffic rules you need to master. Use our advanced filters to build a custom practice session and ensure you're fully prepared for every aspect of your official driving licence exam.