This lesson explores the physics of slowing down your moped or scooter, a critical skill for passing your German AM theory exam. You will learn to calculate total stopping distances and understand how speed and surface conditions dictate your braking effectiveness in real-world traffic.

Lesson content overview
Mastering braking techniques and understanding stopping distances are fundamental skills for anyone operating a moped, scooter, or light quadricycle under the German AM licence. This knowledge is not just about passing a theory exam; it is critical for ensuring your safety and the safety of others on the road. By accurately assessing the space and time required to bring your vehicle to a complete stop, you can anticipate hazards, maintain safe following distances, and react effectively in unexpected situations. This lesson provides a comprehensive breakdown of these vital concepts, helping you develop the necessary defensive driving mindset for all road conditions.
When you need to stop your vehicle, the process isn't instantaneous. It involves a sequence of events, from perceiving a hazard to the vehicle coming to a standstill. The entire distance covered during this sequence is known as the total stopping distance. This crucial measurement is divided into two primary components: reaction distance and braking distance. Understanding both elements is essential for predicting how much space you truly need to stop safely.
Reaction distance accounts for the time it takes for a driver to see a hazard, process the information, decide to brake, and then move their foot or hand to activate the braking system. This period, known as reaction time (or perception-reaction time), is typically around one second for an alert driver in optimal conditions. However, various factors can significantly lengthen this crucial time.
Factors that can influence a driver's reaction time and, consequently, their reaction distance include:
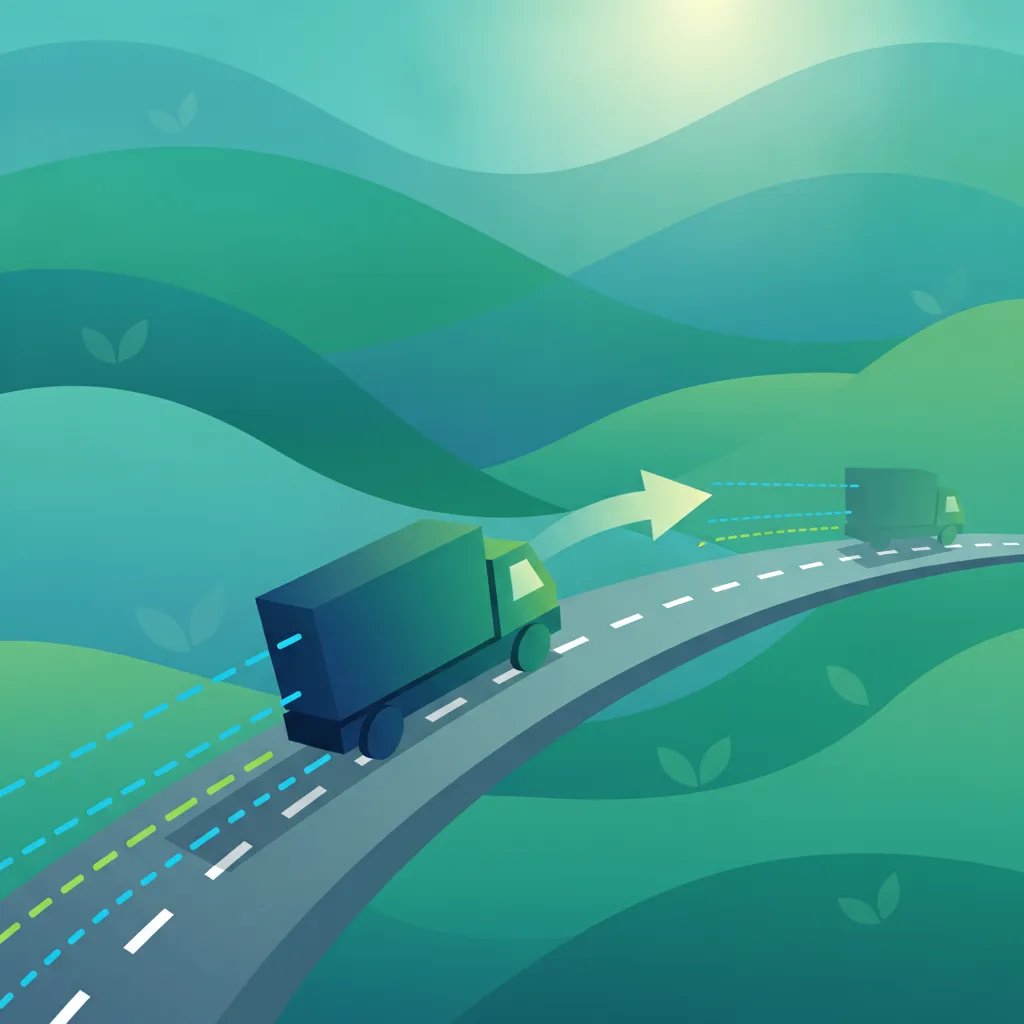
The relationship between speed and reaction distance is direct: the faster you are travelling, the further your vehicle will cover during your reaction time. For example, at a speed of 50 km/h (approximately 14 metres per second), a one-second reaction time means your vehicle will travel about 14 metres before you even begin to brake. This distance represents a significant portion of your total stopping distance, especially at higher speeds.
Once you initiate braking, the vehicle begins to decelerate. The distance it covers during this deceleration phase is the braking distance. Unlike reaction distance, which is primarily influenced by human factors, braking distance is largely determined by the physics of the vehicle and the road environment.
Key factors that critically influence braking distance include:
It's a common misunderstanding to think braking distance is solely about how hard you press the brake. While brake pressure is part of it, the available grip from the road surface is equally, if not more, important. Even with the best brakes, a slippery surface will lead to a long braking distance.
The total stopping distance is the sum of these two components:
Total Stopping Distance = Reaction Distance + Braking Distance
This equation highlights why both human alertness and vehicle/road conditions are equally important for safe driving. Ignoring either component can lead to misjudging the space required to stop, potentially resulting in a collision.
Let's consider some illustrative data for a typical moped or scooter on a dry road with an alert rider and good brakes:
These figures are approximate and can vary significantly based on the factors discussed. The key takeaway is the drastic increase in required stopping space at higher speeds. This reinforces the critical importance of speed adjustment, especially in urban areas or challenging conditions.
Effective braking on two-wheeled vehicles like mopeds and scooters requires specific techniques to maintain stability and maximise stopping power. Due to their inherent instability compared to cars, weight transfer during braking is a critical consideration.
Progressive braking is the standard technique for most everyday stops. It involves:
This method prevents abrupt weight transfer, which could destabilise the moped or scooter, and ensures that the tyres are not overloaded with sudden braking force, reducing the risk of skidding. It also makes for a more comfortable ride for any passenger.
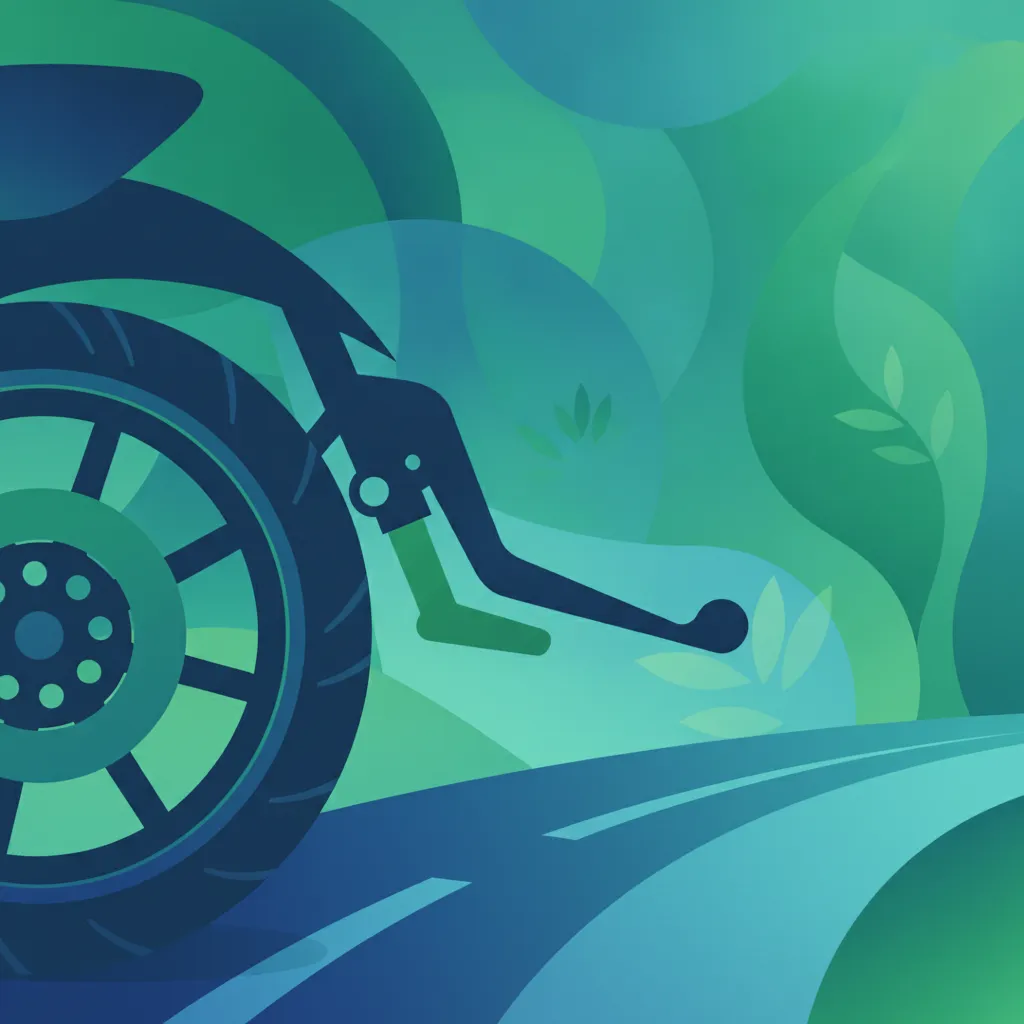
Two-stage braking is a specific application of progressive braking, often taught for emergency situations on motorcycles and scooters to achieve the shortest possible stopping distance. It leverages the concept of weight transfer. When you brake, the vehicle's weight shifts forward, pressing down on the front wheel and increasing its tyre's grip on the road.
Stage 1: Initial Gentle Brake (Front and Rear): Briefly apply a light pressure to both the front and rear brakes. This momentary, gentle application serves to 'load' the front suspension, compressing it and transferring weight to the front wheel. This happens very quickly, almost simultaneously with the next step.
Stage 2: Maximum Braking (Emphasis on Front): Immediately after the initial weight transfer, apply firm and increasing pressure to the front brake, up to its maximum grip limit without locking the wheel. The rear brake can also be applied firmly, but care must be taken to avoid locking the rear wheel, as it has less weight on it.
By allowing the weight to shift first, the front tyre gains maximum grip before the full braking force is applied. Attempting to apply full braking force instantly without this initial weight transfer can cause the front wheel to lock prematurely, leading to a loss of control. This technique is vital for achieving the shortest possible stopping distance in emergencies.
An emergency stop is a critical skill required when a hazard appears suddenly and cannot be avoided by steering. The goal is to achieve maximum deceleration in the shortest possible distance while maintaining control.
If your moped or scooter is equipped with Anti-lock Braking System (ABS), the procedure is straightforward: apply both front and rear brakes firmly and simultaneously, allowing the ABS to manage the brake pressure to prevent wheel lock-up. You should feel a pulsation through the brake levers/pedals; this is normal and indicates the ABS is working. Continue to apply firm pressure until the vehicle stops.
If your vehicle does not have ABS, you must rely on your skill and knowledge of two-stage braking:
Practising emergency braking in a safe, controlled environment (like an empty parking lot) is highly recommended to build muscle memory and confidence.
The Anti-lock Braking System (ABS) is a crucial safety feature that has become increasingly common on mopeds and scooters, especially in Europe where it's mandatory for new models above a certain engine capacity. Its primary purpose is to prevent the wheels from locking up during heavy braking.
Here's a simplified explanation of how ABS functions:
The benefits of ABS are substantial, particularly for less experienced riders or in challenging conditions:
When your moped or scooter has ABS, the correct technique for an emergency stop is to apply both brakes firmly and consistently. Do not "pump" the brakes manually; let the ABS do its job. You will feel a pulsing sensation through the brake levers, which indicates the system is actively preventing lock-up. Maintain firm pressure throughout the stop.
Understanding how various factors interact to affect stopping distances is crucial for risk assessment and responsible riding. As discussed, speed and road conditions are primary, but vehicle state and even driver-specific factors play a significant role.
The relationship between speed and braking distance is not linear; it is exponential. As kinetic energy is proportional to the square of the velocity (E_k = ½mv²), doubling your speed quadruples the kinetic energy that needs to be dissipated, thus quadrupling your braking distance (assuming all other factors remain constant).
If you double your speed from 30 km/h to 60 km/h, your braking distance will be four times longer. If you triple your speed from 30 km/h to 90 km/h, your braking distance will be nine times longer. This dramatic increase is why speed limits are crucial and why you must always adjust your speed downwards for adverse conditions.
This mathematical reality has profound practical implications. Even a small increase in speed can lead to a substantially longer stopping distance, making the difference between avoiding and causing a collision. This principle underpins many speed limits and safe following distance recommendations in the German Road Traffic Act (Straßenverkehrs-Ordnung - StVO).
The coefficient of friction (μ) between your tyres and the road surface directly determines how effectively your brakes can convert kinetic energy into heat and stop the vehicle.
On slippery surfaces, not only is your braking distance extended, but the likelihood of a wheel locking up and causing a skid is also much higher. This requires a gentle, early braking approach and reduced speed.
Beyond speed and surface, the physical state of your vehicle also plays a vital role:
While not directly part of the braking system, the driver's state significantly impacts reaction distance and the effectiveness of braking. A distracted driver will react later, starting the braking sequence further down the road. An unalert driver might also apply brakes improperly, leading to a longer braking distance or loss of control. Remaining focused, rested, and free from distractions is paramount for anticipating hazards and reacting promptly.
In Germany, the Straßenverkehrs-Ordnung (StVO) dictates rules designed to ensure safe traffic flow, many of which directly relate to braking and stopping distances.
The StVO mandates that drivers must maintain a sufficient distance from the vehicle in front to be able to stop safely, even if that vehicle brakes suddenly. While no exact numerical distance is given for all situations, the general principle is critical.
A common rule of thumb, particularly in urban areas and for learners, is the "two-second rule". This means you should keep at least a two-second gap between your vehicle and the one in front. To check this:
On wet or slippery roads, this distance should be significantly increased – aiming for three or four seconds is a safer practice. At higher speeds (e.g., outside built-up areas), a more specific guideline often cited for cars is "half the speedometer reading in metres" (e.g., at 100 km/h, maintain 50 metres). While mopeds/scooters rarely reach these speeds, the principle of increasing distance proportionally with speed remains.
Maintaining an adequate following distance directly accounts for your total stopping distance, giving you the necessary time and space to react and brake without colliding with the vehicle ahead.
According to German regulations, brake lights (Bremsleuchten) are mandatory safety features. They must be in proper working order at all times. Their purpose is to signal your intention to slow down or stop to vehicles behind you. A non-functional brake light significantly increases the risk of a rear-end collision because following drivers have less warning of your deceleration. Regularly checking your brake lights before journeys is a simple yet crucial safety habit.
The StVO explicitly requires drivers to adjust their speed and driving behaviour to suit the prevailing road, weather, visibility, and traffic conditions. This includes:
Failure to adapt your speed and driving style to conditions can lead to legal penalties and is a major cause of accidents.
Understanding common mistakes can help you prevent them and foster safer riding habits:
This lesson explains the two components of total stopping distance: reaction distance, which depends on driver alertness and typically covers about one second of travel, and braking distance, which is influenced by speed, road surface, tyre condition, and vehicle load. Key techniques covered include progressive braking for normal stops and two-stage braking for emergencies, which uses an initial gentle brake to shift weight forward before applying maximum pressure. ABS automatically prevents wheel lockup by modulating brake pressure, allowing riders to maintain steering control during hard braking. German traffic law (StVO) requires drivers to maintain sufficient following distance to stop safely and adapt speed to road conditions, with particular attention to slippery surfaces that drastically increase stopping distances.
A short set of high-value points that capture the most important learning from this lesson.
Total stopping distance equals reaction distance plus braking distance, making both human factors and vehicle physics equally important for safe stopping.
Braking distance increases with the square of speed, meaning doubling your speed quadruples the distance needed to stop.
Road surface condition dramatically affects braking distance: wet roads can double or triple stopping distance compared to dry asphalt.
Two-stage braking leverages weight transfer to maximize front tyre grip before applying full braking force on two-wheeled vehicles.
ABS prevents wheel lockup during emergency braking, maintaining steering control while the system modulates brake pressure automatically.
Explore all units and lessons included in this driving theory course.
The two-second rule is the minimum safe following distance in good conditions; increase it significantly on wet or slippery roads.
Weight transfer during braking shifts load to the front wheel, increasing its grip and allowing stronger front brake application.
Always look toward your escape path during emergency braking, not directly at the obstacle.
With ABS, apply firm steady pressure and never pump the brakes manually.
Factors that increase braking distance include higher speed, poor road grip, worn tyres, heavier vehicle load, and faulty brakes.
Tailgating eliminates reaction distance, leaving insufficient space to stop safely even under ideal conditions.
Applying full brake pressure immediately on slippery surfaces causes wheel lockup and loss of control without ABS.
Manually pumping ABS brakes interferes with the system's ability to modulate pressure correctly.
Over-relying on the rear brake significantly reduces stopping power since the front wheel provides the majority of braking force during deceleration.
Target fixation on an obstacle causes riders to steer toward it instead of looking at their intended escape path.
Lesson content overview
A short set of high-value points that capture the most important learning from this lesson.
Total stopping distance equals reaction distance plus braking distance, making both human factors and vehicle physics equally important for safe stopping.
Braking distance increases with the square of speed, meaning doubling your speed quadruples the distance needed to stop.
Road surface condition dramatically affects braking distance: wet roads can double or triple stopping distance compared to dry asphalt.
Two-stage braking leverages weight transfer to maximize front tyre grip before applying full braking force on two-wheeled vehicles.
ABS prevents wheel lockup during emergency braking, maintaining steering control while the system modulates brake pressure automatically.
Explore all units and lessons included in this driving theory course.
The two-second rule is the minimum safe following distance in good conditions; increase it significantly on wet or slippery roads.
Weight transfer during braking shifts load to the front wheel, increasing its grip and allowing stronger front brake application.
Always look toward your escape path during emergency braking, not directly at the obstacle.
With ABS, apply firm steady pressure and never pump the brakes manually.
Factors that increase braking distance include higher speed, poor road grip, worn tyres, heavier vehicle load, and faulty brakes.
Tailgating eliminates reaction distance, leaving insufficient space to stop safely even under ideal conditions.
Applying full brake pressure immediately on slippery surfaces causes wheel lockup and loss of control without ABS.
Manually pumping ABS brakes interferes with the system's ability to modulate pressure correctly.
Over-relying on the rear brake significantly reduces stopping power since the front wheel provides the majority of braking force during deceleration.
Target fixation on an obstacle causes riders to steer toward it instead of looking at their intended escape path.
Explore search topics learners often look for when studying Braking Techniques and Stopping Distances. These topics reflect common questions about road rules, driving situations, safety guidance, and lesson level theory preparation for learners in Germany.
Browse additional driving theory lessons that cover connected traffic rules, road signs, and common driving situations related to this topic. Improve your understanding of how different rules interact across everyday traffic scenarios.
Explore how speed, road conditions, and vehicle state influence total stopping distance. This lesson details the physics behind reaction distance and braking distance for AM licence riders in Germany.

This lesson explains the physics behind stopping a vehicle, breaking down the total stopping distance ('Anhalteweg') into its two key components: reaction distance and braking distance. It provides formulas for estimating these distances at various speeds and discusses the critical factors that can increase them, such as driver fatigue, poor weather, and worn tires. Understanding this relationship is vital for appreciating the need for safe speeds and distances.

This lesson explains the two components of total stopping distance: reaction distance and braking distance. It teaches learners how factors like speed, road conditions, and rider attentiveness influence how far the motorcycle travels before coming to a complete stop. By understanding these principles, riders can make better decisions about safe speeds and following distances to ensure they can stop in time.

This lesson details the various speed limits applicable in Germany, from urban zones to rural roads. It emphasizes the critical skill of adapting speed to prevailing conditions such as rain, fog, or poor road surfaces. The content explains how external factors significantly impact vehicle handling and stopping distances.

This lesson focuses on the importance of maintaining a safe following distance ('Sicherheitsabstand') to the vehicle ahead. It teaches practical methods for judging this distance, including the universally applicable two-second rule and the German 'halber Tacho' (half the speedometer reading in meters) rule. The lesson stresses the need to increase this distance in poor weather or when visibility is reduced.

This lesson covers the crucial skills of managing speed and maintaining a safe buffer from other vehicles. It teaches methods for calculating an appropriate following distance, such as the time-gap method, which adapts to different speeds and conditions. Learners will understand how to adjust their speed based on traffic flow, road surface, and weather to ensure they always have enough time and space to stop safely.
This lesson provides a method for calculating the braking distance of loaded vehicles, considering factors such as speed, load, and road conditions. It explains the formula for total stopping distance, including reaction time and braking distance components. The content highlights the importance of maintaining adequate safety margins for emergency braking.

This lesson clarifies the legal distinction between 'stopping' ('Halten') and 'parking' ('Parken') in Germany and explains the specific rules for each. You will learn to identify areas where stopping and parking are prohibited through signs and road markings. The lesson also covers the correct use of parking aids like the blue parking disc ('Parkscheibe') and paid parking systems.

This lesson explores the critical role of visibility in safe driving, covering topics such as sight distance, managing blind spots, and the correct use of mirrors. It provides guidance on how to adjust your driving in conditions of reduced visibility, such as at night, in fog, or during heavy rain, including the proper use of headlights. The importance of the over-the-shoulder check ('Schulterblick') is also a key focus.

This lesson focuses on maintaining a safe buffer around the vehicle in traffic. It explains the 'two-second rule' as a simple method for ensuring adequate following distance and discusses how to adjust this for adverse conditions. A key focus is on developing hazard anticipation skills through continuous scanning and risk assessment.

This lesson provides a detailed overview of the legal framework governing the AM licence in Germany. It explains the classification of vehicles like mopeds and scooters based on engine displacement, power output, and weight. Learners will understand the official age requirements, licensing procedures, and fundamental StVO regulations.
Learn essential emergency braking techniques and understand the critical role of Anti-lock Braking Systems (ABS). This lesson covers safe execution of emergency stops and ABS benefits in German traffic law.

This lesson explains the function of a vehicle's braking system and the technology designed to enhance its effectiveness. It describes how the Anti-lock Braking System (ABS) prevents wheels from locking up during hard braking, allowing the driver to maintain steering control. The role of the Electronic Stability Program (ESP) in preventing skids is also covered.

This lesson provides instruction on how to react and perform an emergency stop in a critical situation. It covers the technique of applying maximum braking force progressively and firmly without locking the wheels. For motorcycles equipped with an Anti-lock Braking System (ABS), the lesson explains how the system works and how the rider should respond when it activates to maintain steering control.

This lesson introduces the essential components of a motorcycle's braking system, including disc brakes, drum brakes, and the function of an Anti-lock Braking System (ABS). It teaches learners how to inspect brake pads and rotors for wear and understand the feel of the brake levers. The concept of balanced braking force distribution between the front and rear wheels is explained for maintaining stability.

This lesson delves into the critical control systems of a passenger vehicle: steering, braking, and acceleration. It explains the mechanics of hydraulic and pneumatic brakes and the function of safety aids like ABS and ESP. Learners will understand how to apply smooth acceleration and deceleration techniques to ensure passenger comfort and maintain vehicle stability under various driving conditions.
This lesson introduces the fundamentals of a motorcycle's braking system, emphasizing the dominant role of the front brake due to forward weight transfer during deceleration. It explains how to apply both front and rear brakes in a coordinated manner to achieve maximum, stable stopping power. The content also covers how to modulate brake pressure smoothly and progressively to avoid losing traction and locking a wheel.

This lesson focuses on the use of retarders and engine braking techniques to control vehicle speed without excessive use of the service brake. It explains the different types of retarders, such as hydraulic and exhaust brakes, and their appropriate application. The content also covers gear selection and engine braking strategies for downhill driving.

This lesson provides clear, actionable steps for managing a breakdown or being involved in an accident. It covers how to safely move the vehicle off the road, use warning signals, and secure the area. The procedure for contacting roadside assistance and the authorities is also explained in detail.
This lesson explains the physics behind stopping a vehicle, breaking down the total stopping distance ('Anhalteweg') into its two key components: reaction distance and braking distance. It provides formulas for estimating these distances at various speeds and discusses the critical factors that can increase them, such as driver fatigue, poor weather, and worn tires. Understanding this relationship is vital for appreciating the need for safe speeds and distances.
Find clear answers to common questions learners have about Braking Techniques and Stopping Distances. Learn how the lesson is structured, which driving theory objectives it supports, and how it fits into the overall learning path of units and curriculum progression in Germany. These explanations help you understand key concepts, lesson flow, and exam focused study goals.
Reaction distance is the ground covered from the moment you perceive a hazard to the moment you press the brake. Braking distance is the distance travelled from the moment you hit the brakes until the vehicle comes to a full stop.
No, braking distance increases quadratically with speed. If you double your speed, your braking distance will increase by approximately four times, which is a crucial concept for your exam.
ABS prevents the wheels from locking up during heavy braking, which helps you maintain steering control and prevents the vehicle from skidding on slippery road surfaces.
Road surfaces like gravel, wet leaves, or ice significantly reduce friction. On these surfaces, your braking distance increases drastically, meaning you must increase your following distance to stay safe.
Begin your targeted revision now. Use our practice search to quickly find specific German driving theory questions. Filter by StVO rules, road signs, or hazard perception to create your focused study plan. Master challenging areas and prepare confidently for your theoretical driving test.