This lesson details your professional responsibility as a bus driver to provide accessible transport for all passengers. You will learn the correct technical operation of boarding aids and the legal requirements for securing wheelchairs, which are critical skills for your Danish Category D theory exam.
Lesson content overview
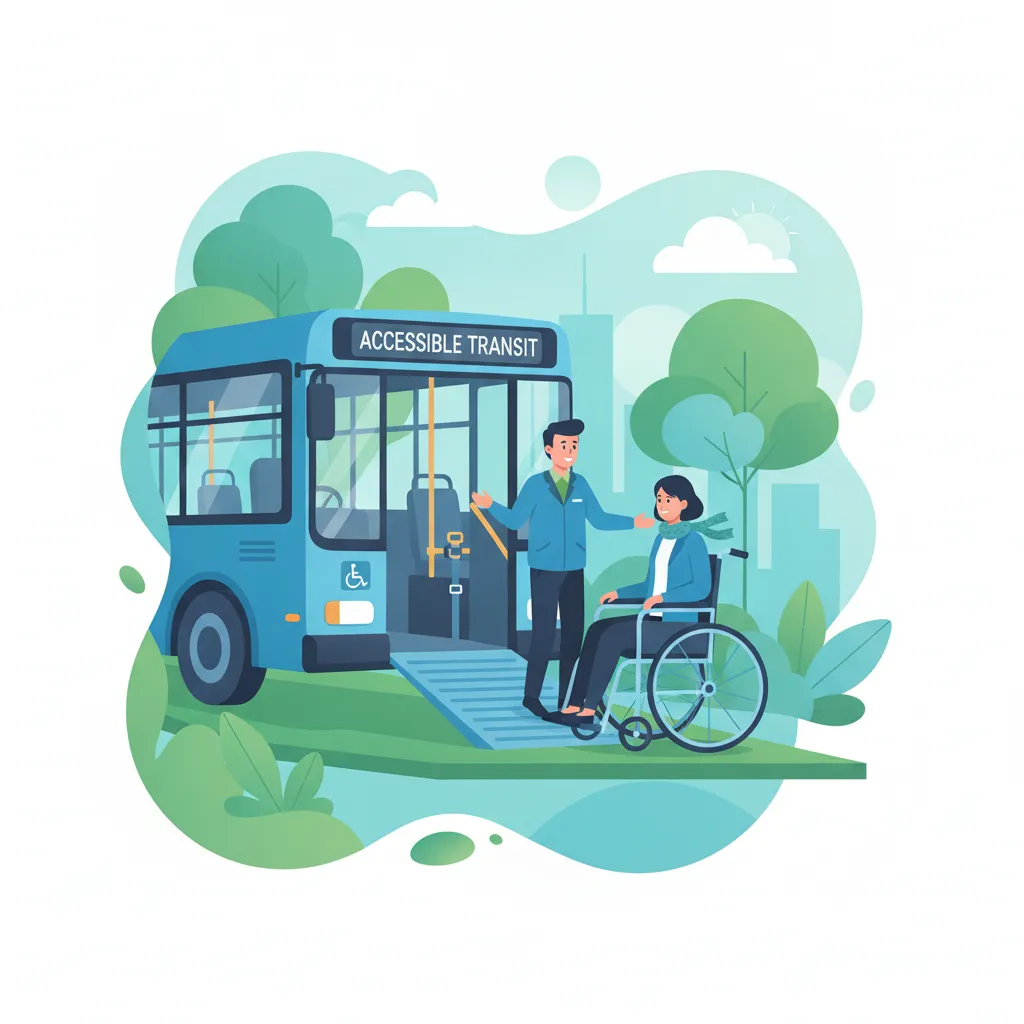
As a professional driver holding a Danish Category D Licence, understanding and implementing accessible transport practices for passengers with reduced mobility (PRM) is not just a courtesy but a fundamental legal and ethical responsibility. This comprehensive lesson details your obligations, the correct operation of specialized equipment, and best practices for respectful communication, all crucial for providing safe, dignified, and compliant public transport services in Denmark.
The principles discussed here are central to your role, directly impacting passenger safety, comfort, and adherence to Danish accessibility laws and standards. A proactive approach to accessibility ensures that all passengers, regardless of their mobility, can travel confidently and safely.
Providing accessible transport for passengers with reduced mobility (PRM) is a core duty for all professional bus drivers in Denmark. This responsibility is underpinned by national and international legal frameworks designed to prevent discrimination and ensure equal access to public services. Adhering to these laws protects both the passenger and the driver.
A Passenger with Reduced Mobility (PRM) is an individual who has a physical, sensory, or cognitive impairment that affects their ability to travel independently or to use transport services without assistance. This broad definition includes individuals using wheelchairs, those with walking difficulties, visual or hearing impairments, or cognitive challenges. Your duty of care extends to taking all reasonable measures to facilitate their safe and dignified journey.
Your obligations as a Category D driver stem from specific legal provisions. In Denmark, accessibility requirements are integrated into transport regulations, ensuring that public transport is inclusive. These national rules are often based on broader EU directives, such as EU Directive 2000/78/EC, which establishes a general framework for equal treatment in employment and occupation, extending its principles to public services. Additionally, specific sections within Danish transport legislation, such as § 46 in the Danish Bus Service Ordinance (Busbekendtgørelsen), mandate that drivers must assist passengers and correctly operate accessibility equipment.
These laws are not merely guidelines; they are mandatory requirements that dictate how vehicles must be designed and how drivers must conduct their duties. This includes requirements for vehicle design, such as having designated spaces for wheelchairs, ramps or lifts, and securement points, as well as driver obligations to assist, operate equipment, and ensure safe travel.
Always allow additional time for passengers with reduced mobility to board and alight. Rushing can compromise safety and dignity.
A common misunderstanding is that passengers are solely responsible for managing their own mobility equipment. In reality, the driver holds a significant responsibility to offer and provide assistance, operate the vehicle’s accessibility features, and ensure the secure transport of all mobility devices.
Modern buses are equipped with various devices to facilitate the boarding and alighting of passengers with reduced mobility. As a driver, you must be proficient in operating these tools safely and effectively.
Understanding the function and correct operation of each piece of equipment is paramount for preventing injuries and ensuring smooth transitions for PRM passengers.
Wheelchair ramps are inclined platforms, often integrated into the vehicle's design, that allow wheelchairs to roll into and out of the bus. They can be manual (requiring physical effort to deploy) or automatic (powered).
External lifts are powered platforms primarily used on high-floor buses to raise or lower a wheelchair into the vehicle. They offer a stable and secure way to manage significant height differences between the bus floor and the ground.
Inside the bus, designated tie-down points are fixed anchorage points on the floor where wheelchairs are secured using specialized straps or restraining systems. These are critical for preventing movement during travel.
Fixed anchorage points within the bus, designed for attaching securement straps to prevent wheelchairs and other mobility devices from moving during transport.
Safe operation requires adherence to manufacturer instructions and a clear, methodical approach.
Position the Vehicle: Always position the bus as close and as level as possible to the curb or boarding area. Ensure there are no obstacles (e.g., street furniture, potholes) where the ramp or lift will deploy. On uneven road surfaces, strive to keep the bus level to avoid hazardous angles.
Activate Hazard Lights: Engage your hazard warning lights to alert other road users that you are stationary and potentially obstructing traffic.
Deploy the Equipment: Carefully deploy the ramp or activate the lift mechanism. For ramps, ensure it is fully extended and stable before anyone attempts to use it. For lifts, ensure the platform is level and fully lowered to the ground.
Inspect for Safety: Visually inspect the ramp or lift. Check for any damage, obstructions, or slippery surfaces (especially in wet or icy conditions). If the surface is wet, try to dry it or take extra precautions.
Supervise Boarding/Alighting: Guide the passenger onto or off the equipment. For lifts, ensure the passenger is correctly positioned and secured on the platform before raising or lowering. Always supervise the movement, ready to offer assistance if needed.
Retract Equipment: Once the passenger is safely on board or has alighted, retract the ramp or lift completely. Ensure it is fully stowed and locked in its travel position before preparing to depart.
Deactivate Hazard Lights: Turn off your hazard warning lights once the equipment is stowed and you are ready to move.
Never allow a passenger to use a ramp or lift that is not fully deployed, stable, or appears damaged. Immediately report any malfunctions.
Once a passenger with a mobility device is on board, the next critical step is to secure their equipment to prevent any movement during transit. An unsecured wheelchair can become a dangerous projectile during sudden braking or a collision, endangering all occupants.
The primary purpose of securing wheelchairs and other mobility devices is to ensure the safety of the PRM passenger and all other individuals in the vehicle. Legal requirements mandate that all mobility devices must be properly secured using designated anchor points and restraints before the vehicle moves. This prevents hazards related to shifting equipment, maintaining stability, and absorbing potential impact forces.
While the general principle is the same, there can be specific considerations for various types of wheelchairs. Always follow a defined procedure and, if available, consult the vehicle's manual and the wheelchair's user guide.
Position the Wheelchair: Guide the passenger to the designated wheelchair space within the bus. Ensure the wheelchair is facing forward or rearward, as indicated by vehicle design, and is positioned against any fixed backrests or support structures.
Engage Wheelchair Brakes: Instruct the passenger to engage the brakes on their wheelchair. If it's a power wheelchair, ensure it is turned off or in a 'neutral' mode to prevent accidental movement.
Inspect the Wheelchair: Briefly inspect the wheelchair for any obvious signs of damage or instability. Pay attention to any removable parts that might become loose during transit.
Attach Securement Straps: Using the vehicle's designated tie-down points, attach the securement straps to the strong, rigid frame components of the wheelchair. Typically, this involves at least four points of securement: two at the front and two at the rear of the wheelchair.
Adjust Tension: Once all straps are attached, tighten them incrementally, ensuring even tension across all points. The goal is to make the wheelchair immobile without distorting its frame or causing discomfort to the passenger.
Verify Securement: Gently attempt to move the secured wheelchair by hand. It should not shift, rock, or slide. Ask the passenger if they feel securely positioned and comfortable.
Seatbelt (if applicable): If the vehicle provides a separate passenger restraint system (seatbelt) for the wheelchair user, ensure it is also correctly fastened across the passenger.
Confirm Readiness: Once fully secured, inform the passenger that they are safe for travel and confirm that the securement process is complete before the vehicle starts moving.
Special Considerations for Power Wheelchairs: Power wheelchairs are often heavier and may have sensitive components like control panels and batteries. Ensure that securement straps do not interfere with these components. If the battery is external or removable, ensure it is properly stowed or secured.
Never assume a wheelchair is secure without physically checking the tension of all straps and verifying its immobility. This is a common mistake that can have serious consequences.
Communication is a cornerstone of providing excellent and accessible service. Interacting clearly, respectfully, and empathetically with passengers who have reduced mobility can significantly enhance their travel experience and overall safety.
Effective communication involves both verbal and non-verbal cues. Your goal is to ensure the passenger feels acknowledged, understood, and safe throughout their journey.
Passengers with reduced mobility may have a range of different impairments, each potentially affecting communication differently.
Your demeanor can significantly reduce passenger anxiety. A calm, patient, and friendly approach builds trust and confidence.
Proactive planning is essential for ensuring a seamless travel experience for passengers with reduced mobility. This involves considering the suitability of stops and the overall route for accessibility.
Many routes will feature designated PRM stops. These are locations specifically chosen and equipped to provide safe and easy access for individuals using wheelchairs or other mobility aids. They often have appropriate curb heights, level surfaces, and sufficient space for deploying ramps or lifts.
A bus stop specifically designed and approved for wheelchair access and other mobility aids, typically featuring suitable infrastructure like curb height and flat boarding areas.
Not all stops are created equal. You must be able to quickly assess the suitability of a general bus stop for a PRM passenger.
Never compromise safety by attempting to board or alight a PRM passenger at an unsuitable stop, even if it causes a slight delay. Patiently explain the situation and proceed to the next safe, accessible stop.
As a professional driver, anticipating accessibility needs during your route planning is a sign of professionalism and commitment to passenger safety.
Understanding common pitfalls is key to providing consistently safe and compliant accessible transport.
Mistake: Deploying a ramp or lift without visually inspecting its stability, full extension, or clear path. Consequence: The ramp could collapse, or the passenger could trip, leading to injury. Correction: Always perform a quick visual check. Ensure the ramp is fully extended and locked, stable on the ground, and free from obstructions or slippery surfaces before allowing use.
Mistake: Assuming built-in straps are sufficient, not checking tension, or using fewer than the required number of securement points. Consequence: The wheelchair could shift or tip during acceleration, braking, or turns, causing injury to the passenger or others. Correction: Use all designated tie-down points (typically four), ensure straps are correctly attached to the rigid frame of the wheelchair, and thoroughly check tension by attempting to move the wheelchair.
Mistake: Stopping at a regular bus stop that lacks sufficient curb height or has an uneven surface, creating a hazardous incline for the ramp. Consequence: Difficult and unsafe boarding/alighting, risking falls or damage to equipment. Correction: Prioritize designated PRM stops. If unavailable, select the safest possible alternative, even if it requires deviating slightly or finding a more level spot.
Mistake: Pressuring a PRM passenger to board or alight quickly due to timetable constraints or impatience. Consequence: Increased risk of accidents, stress for the passenger, and a perceived lack of care. Correction: Allocate ample time for PRM passengers. Safety and dignity always take precedence over strict adherence to a timetable. Communicate patiently.
Mistake: Not offering assistance because a passenger appears capable, or conversely, providing unwanted assistance. Consequence: The passenger may genuinely need help but be reluctant to ask, or may feel disrespected by unsolicited intervention. Correction: Always offer assistance politely. Respect the passenger's autonomy and preferences. Follow their lead if they indicate how they prefer to be assisted.
Mistake: Speaking too quickly, using unclear language, or failing to confirm understanding, especially with passengers who have sensory impairments. Consequence: Confusion, frustration, and potential safety risks if instructions are not understood. Correction: Speak slowly, clearly, and concisely. Use gestures if appropriate. Maintain eye contact. Ask open-ended questions to confirm understanding.
The environment and conditions can significantly impact the safe execution of accessibility procedures. A competent Category D driver must adapt their approach accordingly.
Providing accessible transport for passengers with reduced mobility is a paramount responsibility for Category D drivers in Denmark. This involves a clear understanding of legal obligations, proficient operation of specialized equipment, respectful communication, and proactive planning.
You must:
By integrating these principles and practices into your daily driving, you ensure compliance with regulations, prevent accidents, and uphold the dignity and right to travel for all passengers on your Danish Category D Licence route. Understanding vehicle dimensions, door operation (Lesson 2), smooth driving techniques (Lesson 3.1), and general passenger safety (Lesson 4) are all foundational to executing these responsibilities effectively.
This lesson covers the legal and practical responsibilities of Danish Category D drivers when transporting passengers with reduced mobility. It details the correct operation of wheelchair ramps and external lifts, including safety checks and hazard awareness. The lesson also covers proper wheelchair securement procedures using tie-down points and straps to prevent dangerous movement during transit. Effective communication techniques for passengers with physical, sensory, or cognitive impairments are explained, emphasizing respectful, patient interaction. Drivers must also learn to assess stops for accessibility, considering factors like curb height, surface condition, and weather impacts, with safety always taking priority over schedule adherence.
A short set of high-value points that capture the most important learning from this lesson.
Danish Category D drivers have a legal duty of care under § 46 Busbekendtgørelsen and EU Directive 2000/78/EC to assist passengers with reduced mobility (PRM).
Wheelchair ramps and external lifts must be fully deployed, inspected for stability and obstructions, and supervised before any passenger uses them.
All wheelchairs must be secured using at least four tie-down points attached to the rigid frame, with tension verified by hand before departure.
Effective PRM communication requires clear speech, appropriate eye contact, and checking understanding rather than making assumptions about needs.
Drivers must prioritize designated PRM stops and assess curb height, surface condition, and space availability before attempting accessibility operations.
Explore all units and lessons included in this driving theory course.
Always activate hazard lights before deploying ramps or lifts to warn other road users.
Position the bus as close and level to the curb as possible; steep inclines create safety hazards.
Four-point securement is standard: two front and two rear tie-down points on the wheelchair frame.
Never assume a wheelchair is secure without physically checking strap tension by attempting to move it.
When communicating with PRM passengers, always offer assistance politely and respect their autonomy rather than assuming what they need.
Skipping the visual inspection of ramps or lifts, risking deployment on unstable or obstructed surfaces.
Failing to use all designated securement points or not checking strap tension, allowing the wheelchair to shift during travel.
Stopping at regular bus stops with insufficient curb height or uneven surfaces instead of finding a safe accessible alternative.
Pressuring PRM passengers to board or alight quickly due to timetable pressure, compromising their safety and dignity.
Not adjusting equipment operation for weather conditions, such as wet or icy surfaces making ramps dangerously slippery.
Lesson content overview
A short set of high-value points that capture the most important learning from this lesson.
Danish Category D drivers have a legal duty of care under § 46 Busbekendtgørelsen and EU Directive 2000/78/EC to assist passengers with reduced mobility (PRM).
Wheelchair ramps and external lifts must be fully deployed, inspected for stability and obstructions, and supervised before any passenger uses them.
All wheelchairs must be secured using at least four tie-down points attached to the rigid frame, with tension verified by hand before departure.
Effective PRM communication requires clear speech, appropriate eye contact, and checking understanding rather than making assumptions about needs.
Drivers must prioritize designated PRM stops and assess curb height, surface condition, and space availability before attempting accessibility operations.
Explore all units and lessons included in this driving theory course.
Always activate hazard lights before deploying ramps or lifts to warn other road users.
Position the bus as close and level to the curb as possible; steep inclines create safety hazards.
Four-point securement is standard: two front and two rear tie-down points on the wheelchair frame.
Never assume a wheelchair is secure without physically checking strap tension by attempting to move it.
When communicating with PRM passengers, always offer assistance politely and respect their autonomy rather than assuming what they need.
Skipping the visual inspection of ramps or lifts, risking deployment on unstable or obstructed surfaces.
Failing to use all designated securement points or not checking strap tension, allowing the wheelchair to shift during travel.
Stopping at regular bus stops with insufficient curb height or uneven surfaces instead of finding a safe accessible alternative.
Pressuring PRM passengers to board or alight quickly due to timetable pressure, compromising their safety and dignity.
Not adjusting equipment operation for weather conditions, such as wet or icy surfaces making ramps dangerously slippery.
Explore search topics learners often look for when studying Accessibility for Passengers with Reduced Mobility. These topics reflect common questions about road rules, driving situations, safety guidance, and lesson level theory preparation for learners in Denmark.
Browse additional driving theory lessons that cover connected traffic rules, road signs, and common driving situations related to this topic. Improve your understanding of how different rules interact across everyday traffic scenarios.
Understand the legal framework and driver obligations for transporting passengers with reduced mobility (PRM) in Denmark. Covers Danish and EU laws, ensuring compliance and passenger rights in Category D driving theory.

This lesson provides a detailed breakdown of the Danish licence categories for passenger transport. It explains the differences between D1, D1E, D, and DE licences based on passenger capacity, vehicle size, and permitted combinations. The content clarifies the legal definitions and professional qualifications necessary for obtaining each licence, ensuring drivers operate within the correct regulatory framework.

This lesson details the procedures for safe door operation during passenger boarding. It explains the driver's responsibility to visually clear the doorway and surrounding area before opening or closing doors. The content covers the function of safety features like sensors and interlock systems, ensuring compliance with Danish vehicle regulations to prevent passenger injuries.

This lesson provides a detailed explanation of the Category B license, specifying which vehicles you are permitted to drive. It covers crucial limitations such as maximum authorised mass, passenger capacity, and the regulations for towing a trailer. Furthermore, it clarifies the legal distinctions between holding a license for an automatic versus a manual transmission vehicle, grounding your knowledge in official Danish legislation.

This lesson explains the relationship between a bus's dimensions—length, width, and height—and its maneuverability. It covers key concepts such as turning radius, rear overhang, and swept path, which are critical for navigating turns and tight spaces safely. Learners will also understand how these physical characteristics create significant blind spots that require specific observation techniques to manage.

This lesson focuses on the safe and correct operation of passenger vehicle doors. It covers the different types of door mechanisms and the importance of monitoring the door area to prevent injury during boarding and alighting. The content details Danish regulations regarding door safety systems and the driver's responsibility to ensure doors are fully closed and secured before moving.

This lesson outlines the mandatory daily pre-trip inspection for passenger vehicles as required by Danish law. It provides a systematic checklist for examining brakes, lights, tires, mirrors, and emergency equipment to confirm the vehicle's roadworthiness. Following these procedures helps drivers identify and report potential mechanical faults before they can compromise passenger or public safety.

This lesson provides guidance for navigating special infrastructure like long bridges, tunnels, and ferries. It covers awareness of height and weight restrictions, managing the effects of strong crosswinds on bridges, and adapting to lighting changes in tunnels. The content also details the procedures for boarding ferries and correctly securing the vehicle for transit.

This lesson addresses the specific challenges of school and tourist transport. It outlines heightened safety protocols for stops near schools, including monitoring child behavior and working with school patrols. The content also covers techniques for managing large groups of tourists, dealing with luggage, and providing clear information at popular destinations.
Find clear answers to common questions learners have about Accessibility for Passengers with Reduced Mobility. Learn how the lesson is structured, which driving theory objectives it supports, and how it fits into the overall learning path of units and curriculum progression in Denmark. These explanations help you understand key concepts, lesson flow, and exam focused study goals.
The driver is legally responsible for ensuring the wheelchair is correctly positioned and securely fastened using the vehicle's approved restraint system before the bus departs. Failure to do so poses a severe risk to the passenger's safety and is a common failure point in theory exam scenarios.
Yes, ramps must be deployed on a firm, level surface whenever possible. Drivers must verify that the ramp is fully extended and locked into place, and always provide clear verbal communication to the passenger before and during the movement.
Always approach with patience and respect. Ask how you can best assist rather than assuming, and ensure the passenger is aware of your actions, such as when you are operating the lift or securing restraints, to maintain trust and comfort.
In Danish law, you are expected to accommodate passengers unless the vehicle is physically unable to provide a safe travel environment or is already at capacity. Always follow the specific manufacturer guidelines for your bus model regarding equipment compatibility.
Use our powerful search tool to pinpoint specific Danish driving theory topics, road signs, or traffic situations you need to review. Start exploring relevant practice sets now to reinforce your knowledge and build confidence for your upcoming driving licence exam.