This lesson introduces the fundamental physics and mechanics of braking on a motorcycle, a critical skill for both your theory exam and real-world safety. You will explore how to manage brake distribution, weight transfer, and smooth application to maintain control. This foundation is essential for later units covering emergency maneuvers and riding in adverse weather conditions.

Lesson content overview
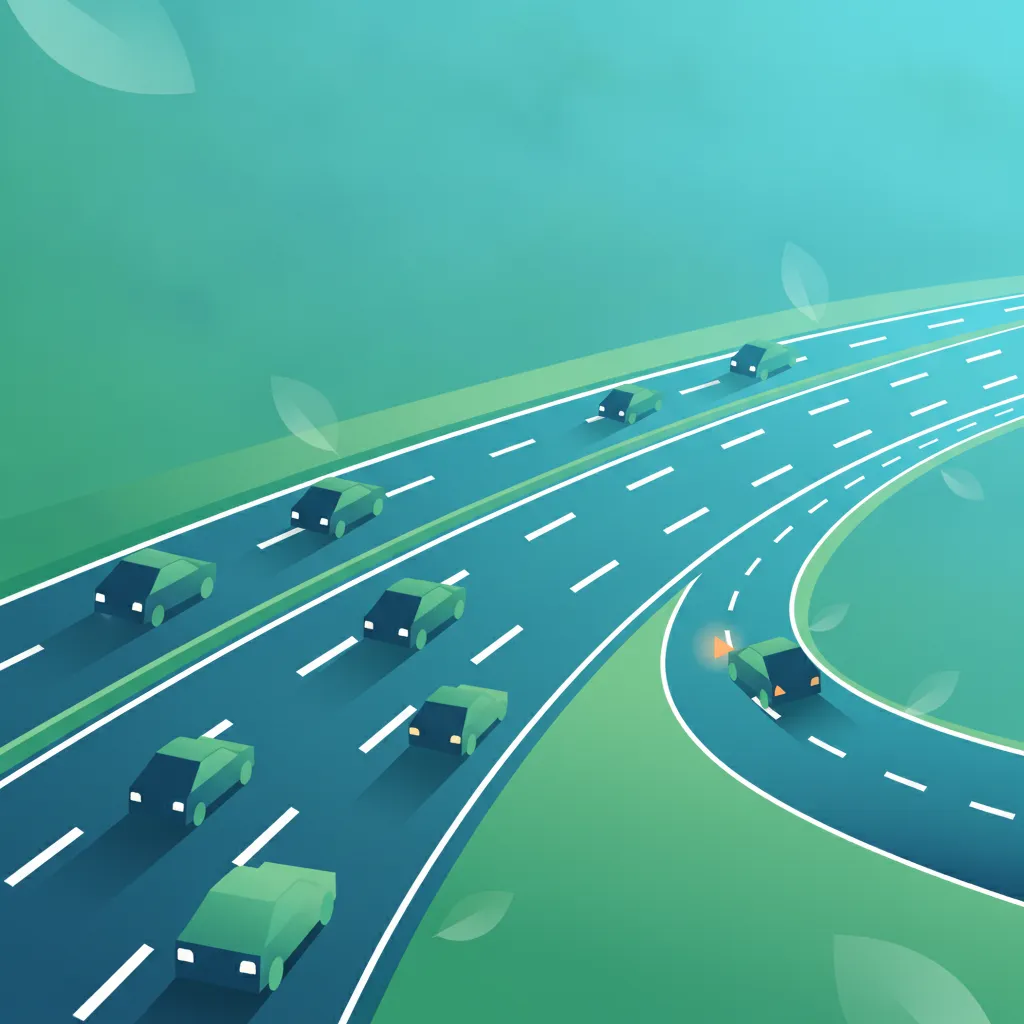
Braking is one of the most critical skills for any motorcyclist, directly impacting safety and control. Understanding the fundamental principles of how a motorcycle stops is paramount for effective riding, allowing you to react confidently in diverse situations and significantly reduce stopping distances. This comprehensive guide delves into the physics, techniques, and safety systems that govern braking on a motorcycle, providing essential knowledge for your Danish Motorcycle Theory training.
Learning to brake correctly not only helps in preventing accidents but also enhances overall riding enjoyment by providing a deeper sense of control. Improper braking is a significant cause of motorcycle accidents, especially in emergencies or challenging conditions. Therefore, mastering these principles is a cornerstone of becoming a safe and skilled rider.
At its core, braking is the process of converting a motorcycle's kinetic energy into heat through friction between the tyres and the road surface. This process relies on a delicate balance of forces, where the rider's input, the motorcycle's design, and the road conditions all play crucial roles. The goal is always to maximize this frictional force without exceeding the tyre's grip limits, which would lead to a skid or loss of control.
Braking force is the resisting force generated when the motorcycle's tyres interact with the road. This force is directly proportional to the "normal force" (the weight pressing down on the tyre) and the "coefficient of friction" (a measure of how 'grippy' the surfaces are). For effective braking, both sufficient tyre grip and optimal road conditions are required.
There are two primary types of friction relevant to braking:
Misunderstandings often arise from assuming the rear brake alone can stop the bike efficiently, or from underestimating how much reduced friction on wet or loose surfaces impacts stopping ability. Riders must ensure their tyres are appropriate for the conditions and maintained at correct pressures to maximize this crucial frictional grip.
One of the most vital concepts in motorcycle braking is weight transfer. As a motorcycle decelerates, inertia causes its centre of gravity to shift significantly forward. This dynamic shift increases the load, or normal force, on the front wheel and simultaneously reduces the load on the rear wheel.
This phenomenon explains why the front brake is so powerful. With more weight pressing down on it, the front tyre gains significantly more frictional grip. Conversely, the rear tyre loses grip, making it much easier to lock up if excessive rear brake pressure is applied. Riders must anticipate and manage this weight transfer, often by shifting their body slightly forward and down to help stabilize the motorcycle and maintain rear wheel traction. Neglecting this rider body position can lead to instability.
Effective braking on a motorcycle is a skill that combines an understanding of physics with precise application. It involves coordinating both brakes and adjusting technique based on the situation.
Due to the principle of weight transfer, the front brake provides the majority of a motorcycle's stopping power, typically 80-90% during hard braking. As the motorcycle slows, the forward shift in weight dramatically increases the front tyre's grip, allowing it to withstand much greater braking forces.
This dominance means that relying solely on the rear brake significantly compromises stopping efficiency and increases stopping distances. While the rear brake does contribute, especially for slower speed control and stabilization, its role in maximizing deceleration is secondary. Proper front brake usage is therefore non-negotiable for effective stopping.
Progressive braking is the technique of applying brake pressure gradually and smoothly, rather than abruptly. This allows the rider to feel the available grip and increase pressure steadily, maximizing deceleration without overwhelming the tyres and causing a lock-up.
Initial squeeze: Begin with a light, gentle squeeze of the front brake lever and a light press on the rear brake pedal. This "loads" the front tyre and initiates weight transfer.
Increase pressure: As the weight shifts forward and you feel the front tyre's grip increase, smoothly and progressively increase pressure on both brakes. The majority of this increase should be on the front brake.
Modulate: Continuously feel for the limits of traction. If you sense a wheel starting to lock, slightly ease off the pressure.
Release smoothly: As you approach a complete stop, progressively reduce brake pressure to avoid a jerky halt.
Abruptly grabbing the front brake can exceed the front tyre's static friction limit, leading to an immediate lock-up and potential loss of control. Similarly, stomping on the rear brake can easily lock the rear wheel, especially when it's unweighted. Progressive application ensures that the brakes are used to their full potential while maintaining stability.
While the front brake is dominant, the optimal approach is to use both brakes in a balanced manner. This maximizes overall stopping power while maintaining directional stability. The typical distribution for normal stopping often involves around 70% front brake and 30% rear brake, although this varies with speed, motorcycle design, and road conditions.
The key is to use both, but to prioritize the progressive application and power of the front brake.
Modern motorcycles are increasingly equipped with advanced safety features, with the Anti-lock Braking System (ABS) being one of the most significant.
Anti-lock Braking System (ABS) is a safety system designed to prevent the wheels from locking up during braking. It does this by automatically monitoring wheel speed and modulating brake pressure when it detects an impending lock-up.
When ABS activates, you might feel a pulsing sensation in the brake lever or pedal, accompanied by a grinding sound. This is normal and indicates the system is working.
Rationale for ABS: In emergency situations, riders may apply brakes too forcefully, causing a wheel to lock. A locked wheel loses directional control, making it impossible to steer around an obstacle. ABS intervenes in these moments, allowing the rider to maintain steering control while braking hard.
While ABS dramatically improves safety, especially on slippery surfaces or during panic stops, it does not negate the need for progressive braking. Riders should still aim for smooth, controlled brake application. ABS acts as a safety net, allowing full brake application without fear of lock-up under many conditions, but its effectiveness can be reduced on extremely loose surfaces like deep gravel or ice.
In Danish Motorcycle Theory, specific regulations and recommended practices govern braking to ensure safety on the roads. Adhering to these rules is crucial for passing your exam and for safe riding.
Riders are generally required to use both the front and rear brakes when slowing or stopping, unless specific vehicle design or emergency conditions dictate otherwise (e.g., if one brake fails). This mandate ensures optimal stopping power and maintains vehicle stability. For typical stops, a balanced application, with emphasis on the front brake, is the correct approach.
In an emergency stop, the front brake is critical. It must be applied firmly and progressively, as it provides the vast majority of the braking force required to stop quickly. Relying solely on the rear brake in an emergency will significantly increase your stopping distance and could lead to a collision. The goal is to maximize the front brake's power while carefully integrating the rear brake to enhance stability without locking the rear wheel.
Motorcyclists must avoid wheel lock-up at all times, as a locked wheel leads to an immediate loss of steering control. This is particularly dangerous for the front wheel. Mastering progressive braking and utilizing ABS (if available) are key strategies to prevent lock-up, ensuring the motorcycle remains steerable and stable.
Braking force must be significantly reduced and applied with greater care in wet, icy, or otherwise slippery conditions. Reduced tyre-road friction means that the grip limit is much lower, and applying normal braking pressure will almost certainly lead to wheel lock-up. Riders must apply brakes earlier, with less pressure, and substantially increase their following distance to compensate for longer stopping distances.
After braking, especially hard braking, it is crucial to ensure the motorcycle is stable and traveling in a straight line before attempting to steer or change direction. Braking, particularly hard braking, unsettles the suspension and changes the bike's geometry. Turning while still braking heavily can overwhelm the available tyre grip, leading to a loss of traction and a fall. Always aim to finish braking before entering a turn.
Understanding common errors is as important as learning correct techniques. Avoiding these pitfalls will significantly improve your safety and control.
Why it's Wrong: Many new riders instinctively use the rear brake more, perhaps due to familiarity with bicycles. However, this severely reduces braking efficiency and can easily cause the rear wheel to lock up, especially on wet or uneven surfaces, leading to instability.
Correct Behavior: Practice a balanced approach, favoring the front brake (around 70% front, 30% rear for normal stops) while applying both progressively.
Why it's Wrong: Grabbing the brake lever or stomping on the pedal can instantly exceed tyre grip, leading to immediate wheel lock-up and loss of steering or balance. This is a common panic reaction.
Correct Behavior: Always apply brakes progressively. Start gently and smoothly increase pressure as you feel the tyres' grip, modulating as needed. ABS helps mitigate this error but does not replace the skill of progressive braking.
Why it's Wrong: Wet roads drastically reduce the coefficient of friction, meaning the tyres have much less grip. Using the same braking force as on a dry road will almost certainly result in wheel lock-up and a skid.
Correct Behavior: Reduce overall braking pressure significantly. Apply brakes much earlier and more gently, allowing for a longer stopping distance. Increase your following distance to provide more reaction time.
Why it's Wrong: While impressive, an uncontrolled "stoppie" indicates excessive front brake application without proper body positioning. Lifting the rear wheel completely can lead to instability and loss of control, making it impossible to steer or adjust.
Correct Behavior: Keep your weight centered or slightly forward during hard braking. This helps to keep the rear wheel grounded, contributing to stability. The goal is maximum deceleration, not a dramatic stunt.
Why it's Wrong: While ABS is excellent on paved roads, its effectiveness can be reduced on very loose surfaces like deep gravel, sand, or ice. Full pressure application in these conditions, even with ABS, can still lead to instability or longer stopping distances than expected.
Correct Behavior: On loose surfaces, apply brakes very gently. Consider reducing speed well before entering such areas. Understand that ABS is a valuable aid but not an infallible solution for all conditions.
Effective braking is highly contextual. Your technique must adapt to various environmental and operational factors.
When braking near pedestrians, cyclists, or other motorcyclists, use smooth, gentle brake applications where possible. Abrupt braking can startle them or cause them to react unpredictably. Maintain extra vigilance and be prepared to stop. If braking hard in traffic, ensure you communicate your intention where possible (e.g., by your brake light).
The relationship between your braking actions and the motorcycle's response is a clear cause-and-effect chain:
Let's consider how these principles apply in real-world Danish riding situations.
Setting: You are traveling at 50 km/h on a dry urban road, approaching an intersection. Suddenly, a car ahead stops abruptly, requiring immediate emergency braking.
Correct Behavior:
Incorrect Behavior: Relying only on the rear brake would lead to a significantly longer stopping distance and likely a rear-end collision. Abruptly grabbing the front brake without modulation could cause a front wheel lock-up and a fall.
Setting: You are riding at 60 km/h on a main road shortly after a rain shower. The road surface is visibly wet and potentially slippery. You need to slow down for an upcoming bend.
Correct Behavior:
Incorrect Behavior: Applying the same braking force as on a dry surface would almost certainly lead to a front or rear wheel lock-up, causing a dangerous skid and loss of control.
Setting: You are traveling at 70 km/h on a rural road and see a gentle bend ahead that has a patch of loose gravel across it.
Correct Behavior:
Incorrect Behavior: Braking while already on the gravel or while cornering would almost guarantee a loss of traction and a skid, as loose surfaces provide very little grip.
Mastering braking is fundamental to safe and confident motorcycle riding. Remember these core principles:
By understanding and consistently applying these principles, you will develop the crucial braking skills necessary for safe and responsible riding on Danish roads.
Motorcycle braking relies on converting kinetic energy into heat through tyre-road friction, with the front brake providing the majority of stopping power due to weight transfer dynamics during deceleration. Progressive braking technique—gradually increasing lever pressure while monitoring tyre grip—prevents wheel lock-up and maximizes deceleration efficiency. Understanding the difference between static friction (optimal grip while rolling) and kinetic friction (reduced grip while sliding) explains why maintaining wheel rotation is critical for control. Both brakes should be used together with the front brake prioritized, and braking force must be substantially reduced on wet or slippery surfaces. ABS acts as a safety net against lock-up during emergency stops, but riders must still apply brakes smoothly and adapt technique to road conditions, always completing braking before entering any curve.
A short set of high-value points that capture the most important learning from this lesson.
The front brake provides approximately 80-90% of stopping power due to weight transfer during deceleration
Progressive braking—gradually increasing pressure while feeling tyre grip—is essential to avoid wheel lock-up
Weight transfer during braking shifts load forward, increasing front tyre grip while reducing rear wheel traction
Balanced brake application (roughly 70% front, 30% rear) provides optimal stopping power and stability
ABS prevents wheel lock-up and maintains steering control but does not replace the need for skilled progressive braking technique
Explore all units and lessons included in this driving theory course.
Static friction (rolling tyre) provides better grip than kinetic friction (sliding tyre)—avoiding lock-up preserves traction
Wet, icy, loose gravel, or snowy surfaces drastically reduce tyre grip and require significantly gentler brake application
Brake before entering turns, not during them—hard braking while leaned over overwhelms tyre grip and causes loss of traction
Tyre condition, pressure, and load affect braking performance and stopping distances
Body position during braking should be slightly forward to help manage weight transfer and maintain rear wheel contact
Overreliance on the rear brake severely reduces braking efficiency and easily causes rear wheel lock-up on wet or uneven surfaces
Abrupt full brake application without modulation can instantly exceed tyre grip limits, causing immediate lock-up and loss of steering control
Failing to reduce braking force for wet or slippery conditions leads to wheel lock-up and skids despite ABS being present
Excessive front brake pressure without proper body positioning can lift the rear wheel, causing instability and inability to steer
Assuming ABS compensates for poor technique on loose surfaces like deep gravel or ice, where its effectiveness is significantly reduced
Lesson content overview
A short set of high-value points that capture the most important learning from this lesson.
The front brake provides approximately 80-90% of stopping power due to weight transfer during deceleration
Progressive braking—gradually increasing pressure while feeling tyre grip—is essential to avoid wheel lock-up
Weight transfer during braking shifts load forward, increasing front tyre grip while reducing rear wheel traction
Balanced brake application (roughly 70% front, 30% rear) provides optimal stopping power and stability
ABS prevents wheel lock-up and maintains steering control but does not replace the need for skilled progressive braking technique
Explore all units and lessons included in this driving theory course.
Static friction (rolling tyre) provides better grip than kinetic friction (sliding tyre)—avoiding lock-up preserves traction
Wet, icy, loose gravel, or snowy surfaces drastically reduce tyre grip and require significantly gentler brake application
Brake before entering turns, not during them—hard braking while leaned over overwhelms tyre grip and causes loss of traction
Tyre condition, pressure, and load affect braking performance and stopping distances
Body position during braking should be slightly forward to help manage weight transfer and maintain rear wheel contact
Overreliance on the rear brake severely reduces braking efficiency and easily causes rear wheel lock-up on wet or uneven surfaces
Abrupt full brake application without modulation can instantly exceed tyre grip limits, causing immediate lock-up and loss of steering control
Failing to reduce braking force for wet or slippery conditions leads to wheel lock-up and skids despite ABS being present
Excessive front brake pressure without proper body positioning can lift the rear wheel, causing instability and inability to steer
Assuming ABS compensates for poor technique on loose surfaces like deep gravel or ice, where its effectiveness is significantly reduced
Explore search topics learners often look for when studying Principles of Braking on a Motorcycle. These topics reflect common questions about road rules, driving situations, safety guidance, and lesson level theory preparation for learners in Denmark.
Browse additional driving theory lessons that cover connected traffic rules, road signs, and common driving situations related to this topic. Improve your understanding of how different rules interact across everyday traffic scenarios.
Explore advanced motorcycle braking, focusing on emergency stops, advanced systems like ABS, and adapting techniques for challenging conditions. Learn to maintain control and understand the physics behind motorcycle deceleration for Danish theory.

This lesson provides instruction on how to execute a quick and controlled emergency stop. It covers the correct body posture to maintain stability and how to apply maximum braking force without losing control. Understanding how to manage weight transfer and the function of an ABS system is crucial for these situations.

This lesson focuses on the challenges of braking in adverse conditions like rain or on icy patches. It teaches riders to increase their following distance and apply brakes smoothly and gently to prevent traction loss. The role of ABS in these scenarios and strategies for maintaining control are also explained.

This lesson outlines a step-by-step procedure for managing a mechanical breakdown on the road. It covers moving the motorcycle to a safe location, using hazard lights, and wearing high-visibility clothing. The goal is to ensure personal safety while minimizing disruption and danger to other traffic.

This lesson explains the components of total stopping distance: reaction distance and braking distance. It provides instruction on how to use both front and rear brakes effectively for a controlled and efficient stop. The content also highlights how factors like speed, road condition, and tyre quality influence how quickly you can stop.

This lesson introduces the essential controls required to operate a motorcycle, such as the throttle, clutch lever, and brake controls. It explains the purpose and correct use of each function for smooth and safe maneuvering. Learners will also understand the importance of proper ergonomics and riding posture for effective control.

This lesson teaches the proper application of auxiliary speed control devices, such as retarders and engine brakes. It focuses on their use for maintaining a safe, controlled speed on long downhill gradients, which helps prevent service brake overheating and fade. The content also covers Danish regulations related to these systems and their benefits for reducing brake wear and improving overall safety.

This lesson equips riders with the knowledge to handle imperfect road surfaces safely. It covers how to adjust speed, steering, and braking inputs when encountering loose gravel, slippery wet leaves, or other hazards. The focus is on smooth control inputs to avoid upsetting the motorcycle's stability.

This lesson breaks down the concept of total stopping distance into its core components: perception, reaction, and braking distances. It explains how variables such as vehicle speed, tyre quality, and road friction significantly impact how quickly you can stop. By understanding these principles, you will be ableto maintain a safe following distance and avoid collisions.

This lesson details the systematic pre-ride inspection process that all motorcyclists must perform. It covers critical safety checks, including verifying correct tyre pressure, assessing brake pad wear, and ensuring all lights are functional. Regular completion of these checks is essential for preventing mechanical failures and ensuring rider safety.
This lesson provides a guide to motorway riding, a high-speed and demanding environment. It details the process for using acceleration lanes to merge smoothly, maintaining proper lane discipline, and preparing for exits well in advance. Key safety principles like the two-second rule are reinforced for this context.
Identify and learn to avoid common braking errors on a motorcycle, such as over-reliance on the rear brake or abrupt application. This lesson provides insights into correcting techniques for safer braking in various Danish traffic scenarios.
This lesson focuses on the challenges of braking in adverse conditions like rain or on icy patches. It teaches riders to increase their following distance and apply brakes smoothly and gently to prevent traction loss. The role of ABS in these scenarios and strategies for maintaining control are also explained.
This lesson equips riders with the knowledge to handle imperfect road surfaces safely. It covers how to adjust speed, steering, and braking inputs when encountering loose gravel, slippery wet leaves, or other hazards. The focus is on smooth control inputs to avoid upsetting the motorcycle's stability.
This lesson outlines a step-by-step procedure for managing a mechanical breakdown on the road. It covers moving the motorcycle to a safe location, using hazard lights, and wearing high-visibility clothing. The goal is to ensure personal safety while minimizing disruption and danger to other traffic.
This lesson provides instruction on how to execute a quick and controlled emergency stop. It covers the correct body posture to maintain stability and how to apply maximum braking force without losing control. Understanding how to manage weight transfer and the function of an ABS system is crucial for these situations.

This lesson explores the critical relationship between tyres, road surface, and grip. It explains how rain, ice, gravel, and even painted road markings can reduce traction and increase risk. Learners will understand the importance of having correct tyre pressure and adequate tread depth to maintain control.

This lesson focuses on techniques for riding when visibility and traction are compromised by weather. It explains how to adjust speed, increase following distance, and use lights to see and be seen in rain or fog. Understanding the risk of hydroplaning and making smooth control inputs are key takeaways.

This lesson delves into the science of traction, explaining the relationship between the tyre and the road surface. It covers how factors like water, oil, gravel, and painted lines can significantly reduce grip. Learners will develop the ability to 'read' the road surface and anticipate potential traction loss.

This lesson prepares riders for the specific hazards of rural roads, which often have less visibility and more unpredictable surfaces. It covers strategies for approaching blind curves, safely passing agricultural machinery, and being vigilant for animals on the road. Adjusting speed to match visibility is a core principle.
This lesson details the systematic pre-ride inspection process that all motorcyclists must perform. It covers critical safety checks, including verifying correct tyre pressure, assessing brake pad wear, and ensuring all lights are functional. Regular completion of these checks is essential for preventing mechanical failures and ensuring rider safety.
This lesson introduces the essential controls required to operate a motorcycle, such as the throttle, clutch lever, and brake controls. It explains the purpose and correct use of each function for smooth and safe maneuvering. Learners will also understand the importance of proper ergonomics and riding posture for effective control.
Find clear answers to common questions learners have about Principles of Braking on a Motorcycle. Learn how the lesson is structured, which driving theory objectives it supports, and how it fits into the overall learning path of units and curriculum progression in Denmark. These explanations help you understand key concepts, lesson flow, and exam focused study goals.
When you brake, the motorcycle's weight shifts forward, pressing the front tyre harder into the road surface and increasing its grip. The front brake provides the majority of your stopping power, while the rear brake serves as a stabilizer and support.
You must use progressive pressure, meaning you squeeze the lever firmly but gradually rather than grabbing it instantly. This allows the tyre to reach the limit of traction without exceeding it, which is the key to maintaining control in an emergency.
Yes, keeping your body upright and your weight balanced helps maintain the motorcycle's chassis stability. If you are tense or leaning incorrectly, you may shift the weight unintentionally, which can compromise the bike's balance and your ability to steer if needed.
Yes, these are fundamental physics applicable to A1, A2, and A class motorcycles. While the weight and power of the bikes differ, the core principles of front-brake dominance and progressive input remain the same for safe riding.
Use our powerful search tool to pinpoint specific Danish driving theory topics, road signs, or traffic situations you need to review. Start exploring relevant practice sets now to reinforce your knowledge and build confidence for your upcoming driving licence exam.