This lesson details the legal requirements and practical use of vehicle lighting systems in Denmark. Understanding when to use specific lights is essential for visibility, communication with other road users, and passing your Category B theory exam.

Lesson content overview
Effective use of a vehicle's lighting system is fundamental to road safety within the Danish Driving License Theory Course: Category B Preparation. Proper lighting ensures that you, as a driver, have adequate visibility of the road ahead and your surroundings, while also making your vehicle visible to other road users. Furthermore, signal lights are crucial for communicating your intentions, thereby preventing misunderstandings and potential collisions.
This comprehensive guide will explore the various lighting systems in a vehicle, their specific functions, and the legal requirements for their use under different driving conditions in Denmark. Mastering these concepts is vital for developing into a responsible and confident driver.
Vehicle lighting plays a dual role in road safety: visibility and communication. By illuminating the road, headlights allow drivers to detect obstacles, road conditions, and other road users in low-light conditions. Equally important, lights make your vehicle easily detectable by others, reducing the risk of collisions, especially during twilight, darkness, or adverse weather.
Beyond mere visibility, specific lights serve as vital communication tools. Turn signals indicate your intention to change direction or lanes, while brake lights alert drivers behind you to your deceleration. Understanding and correctly applying these functions is a core principle of defensive driving and a legal obligation for all drivers in Denmark.
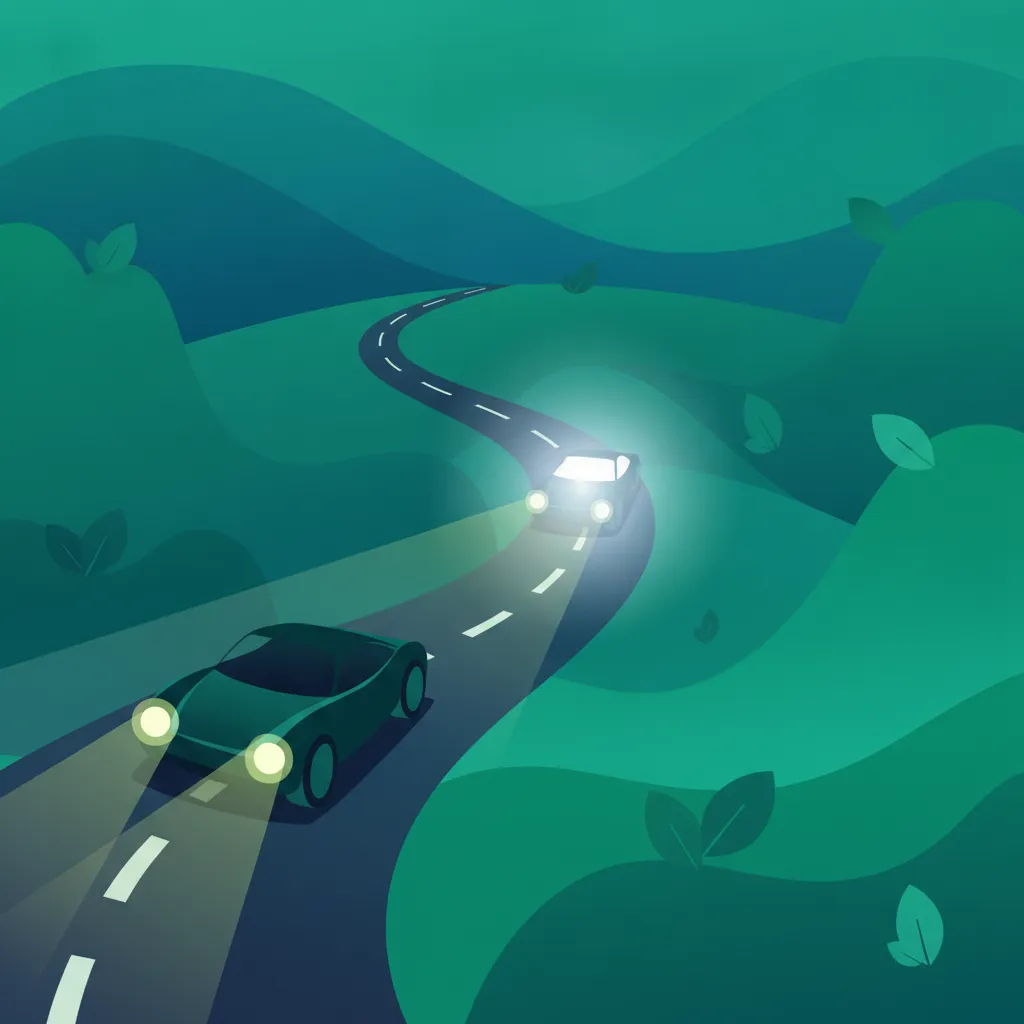
The low beam, also known as the dipped headlight, is your vehicle's standard forward-lighting setting. It emits a moderate-intensity beam that illuminates the road directly in front of and to the sides of your vehicle without projecting too high. This design is crucial because it prevents glare that could momentarily blind oncoming drivers or those you are following.
Low beam headlights are essential for normal night driving. They provide sufficient illumination for typical road conditions after sunset and before sunrise. Their controlled spread of light makes them suitable for use in built-up areas with street lighting, as well as on unlit rural roads when other traffic is present.
Using low beams also becomes mandatory whenever visibility is reduced, even during daylight hours. This includes conditions such as heavy rain, snow, fog, or at dusk and dawn when natural light is insufficient. The goal is always to ensure you can see clearly and, more importantly, that your vehicle is clearly seen by others.
In Denmark, it is a legal requirement to use low beam headlights from sunset to sunrise. Additionally, they must be activated at any time of day when visibility is poor due to weather conditions or insufficient daylight. This regulation ensures a consistent standard of safety across all vehicles on the road.
Even if your vehicle has automatic lighting, always check to ensure the correct lights are activated. Automatic systems may not always react instantly or appropriately to rapidly changing light or weather conditions.
High beams, also referred to as main headlights, provide a significantly longer and wider beam of light compared to low beams. This high-intensity illumination extends far down the road, offering maximum visibility, which is particularly beneficial on unlit roads where seeing potential hazards further in advance is critical.
High beams should be used to improve your forward vision when driving on unlit roads, such as rural roads or motorways, where there is no oncoming traffic and no vehicle directly ahead of you. The increased illumination allows you to spot animals, pedestrians, or road debris much earlier, giving you more time to react.
The extended reach of high beams significantly reduces reaction time, which is crucial when traveling at higher speeds on open roads. However, their powerful light must be managed carefully to avoid inconveniencing or endangering other drivers.
While high beams offer superior visibility for the driver, their intensity can temporarily blind other road users. Therefore, it is legally and ethically imperative to dim your high beams to low beams whenever you encounter oncoming traffic or when you are following another vehicle within a certain distance.
According to Danish regulations, you must switch to low beam when an oncoming vehicle is within approximately 150 meters. Similarly, if you are following another vehicle, you must dim your lights to avoid dazzling the driver in front, usually when you are within a safe following distance. Failing to dim high beams is a common violation that significantly increases the risk of accidents by impairing the vision of other drivers.
Fog lights are specialized lights designed to improve visibility in challenging atmospheric conditions like fog, heavy rain, or snow. Unlike headlights, fog lights are mounted low on the vehicle and emit a wide, flat beam that is aimed downwards. This low angle helps the light penetrate beneath the fog or precipitation, illuminating the road surface directly rather than reflecting off the mist and causing glare.
Front fog lights are typically white or yellow and are situated below the main headlights. Their purpose is to cast light close to the road, allowing you to see the lane markings and the immediate road ahead when visibility is severely reduced. They are not a substitute for low beams but rather a supplementary lighting system.
Some vehicles are also equipped with rear fog lights. These are typically a single, bright red light (or sometimes two) located at the rear of the vehicle, much brighter than standard taillights. Their sole purpose is to make your vehicle more visible to drivers approaching from behind in conditions of extremely poor visibility.
In Denmark, fog lights should only be used in genuine conditions of fog, heavy rain, or snow where visibility is significantly impaired. Once the visibility improves, they must be switched off. Using fog lights in clear weather is prohibited because their intense light can cause unnecessary glare for other road users, potentially distracting or dazzling them.
Never use fog lights as a substitute for low beam headlights at night in clear weather. They do not provide adequate forward illumination and can blind other drivers.
Daytime Running Lights (DRLs) are lights that automatically illuminate whenever the vehicle's engine is running and it is in motion during daylight hours. Unlike headlights, DRLs are not intended to help the driver see the road; their primary function is to make the vehicle more visible to other road users, such as pedestrians, cyclists, and other drivers.
Studies have shown that vehicles equipped with DRLs are involved in fewer daytime collisions. By increasing the conspicuity of a vehicle, DRLs reduce the risk of head-on and multi-vehicle accidents, especially at dawn, dusk, or on overcast days when a vehicle might otherwise blend into the background.
In Denmark, it is a legal requirement for vehicles to have their lights on even during the day. Modern vehicles often come with automatic DRLs, but older vehicles or those without DRLs must use low beam headlights during the day.
It is crucial to understand that DRLs are not a substitute for low beams in conditions requiring full illumination. DRLs typically only illuminate the front of the vehicle and are not bright enough, nor do they project far enough, to adequately light the road ahead in darkness or adverse weather. Moreover, DRLs usually do not activate the rear lights of the vehicle, meaning your car might not be visible from behind if you rely solely on DRLs in poor visibility.
Lights on the front of a vehicle that automatically turn on during daylight hours to increase the vehicle's visibility to other road users, but do not illuminate the road ahead.
Beyond seeing and being seen, a critical aspect of safe driving is communicating your intentions to other road users. This is primarily achieved through the correct and timely use of turn signals and brake lights.
Turn signals, also known as indicators, are flashing amber lights located at the front, sides, and rear of the vehicle. They communicate your intention to turn, change lanes, or merge. Proper use of turn signals is paramount for traffic flow and accident prevention.
You must activate your turn signal well in advance of your maneuver to give other drivers ample time to react. In urban areas, this typically means at least 3 seconds before the turn or lane change. On rural roads or motorways, where speeds are higher, it is recommended to signal for at least 5 seconds. Failing to signal, or signaling too late, can lead to dangerous situations and is a common cause of collisions.
Brake lights are red lights located at the rear of your vehicle that illuminate when you apply the brakes. Their purpose is to immediately alert drivers behind you that you are decelerating or stopping. This warning allows following drivers to adjust their speed and maintain a safe distance, preventing rear-end collisions.
It is essential to ensure that your brake lights are always in good working order. A faulty brake light can severely compromise safety, as drivers behind you may not realize you are slowing down until it is too late. Regularly check your brake lights as part of your vehicle maintenance routine.
Several other lighting systems serve crucial roles in specific driving situations, particularly during reversing maneuvers or when your vehicle poses a temporary hazard.
Reverse lights are white lights located at the rear of your vehicle that automatically illuminate when you select reverse gear. These lights serve two main functions: they provide some illumination for you to see what is behind your vehicle in low light, and they act as a clear signal to pedestrians and other drivers that your vehicle is moving backward. This warning is vital in parking lots or driveways where pedestrians might not expect a vehicle to reverse.
Hazard warning lights (or hazard lights) cause all turn signals on your vehicle to flash simultaneously. They are used to indicate that your vehicle is temporarily stopped in a location that may pose a hazard to other road users, or that your vehicle itself is experiencing a problem that makes it a hazard.
Common situations for using hazard lights include:
It is critical to remember that hazard lights are not to be used while driving to signal a turn or to communicate other intentions; this can confuse other drivers and is illegal. Their purpose is solely to warn of a dangerous situation or a stationary obstruction.
Adhering to Danish traffic regulations regarding vehicle lighting is a legal obligation and a fundamental aspect of safe driving. Here is a summary of the key rules:
Understanding the rules is one thing; consistently applying them correctly is another. Here are some common mistakes and best practices to ensure optimal use of your vehicle's lighting systems:
Turn on your low beams and walk around the vehicle to check all front lights, rear lights, and license plate lights.
Activate your turn signals (left and right) and check that both front and rear indicators are flashing correctly.
Have someone stand behind your vehicle (or use a reflective surface) while you press the brake pedal to confirm your brake lights illuminate.
Engage reverse gear and check that the white reverse lights are working.
Activate your hazard warning lights and confirm all four indicators flash simultaneously.
Mastering the use of your vehicle's lighting systems is more than just passing a theory test; it's about being a responsible, visible, and communicative driver. In the Danish Driving License Theory Course: Category B Preparation, understanding these systems ensures you can adapt to varying conditions, protect yourself, and safeguard other road users. By diligently applying the principles of visibility, communication, and legal compliance, you contribute significantly to overall road safety.
This lesson covers the complete range of vehicle lighting systems required for Danish Category B theory, emphasizing both legal obligations and practical safety applications. It distinguishes between low beams (standard, non-dazzling illumination), high beams (maximum long-range visibility for unlit roads only), and fog lights (specialized low-mounted beams for poor weather). Danish regulations specify mandatory low beam use from sunset to sunrise, high beam dimming at approximately 150 meters from other traffic, and turn signal activation at least 3 seconds (urban) or 5 seconds (rural/motorway) before maneuvers. Key safety principles include understanding that DRLs improve daytime conspicuity without illuminating the road, and that hazard lights signal stationary danger only.
A short set of high-value points that capture the most important learning from this lesson.
Low beam headlights are mandatory from sunset to sunrise and any time visibility is reduced, even during daylight in rain, fog, or snow.
High beams must be dimmed to low beam when an oncoming vehicle is within approximately 150 meters or when following another vehicle.
Fog lights are supplementary lights that cut beneath fog and precipitation; they are only legal in genuinely poor visibility and must be switched off once conditions improve.
Daytime Running Lights (DRL) make your vehicle visible to others during the day but do NOT illuminate the road or activate rear lights, so low beams are still required in darkness or adverse weather.
Turn signals must be activated well in advance—at least 3 seconds in urban areas and 5 seconds on rural roads or motorways—to communicate your intentions safely.
Explore all units and lessons included in this driving theory course.
Use low beams as your standard setting; high beams are only for unlit roads with no traffic ahead or oncoming.
150 meters is the threshold for dimming high beams when approaching or following another vehicle in Denmark.
Fog lights (front and rear) are prohibited in clear weather because their intense, low-mounted beam can blind other drivers.
DRLs do not replace headlights in darkness or poor visibility; always switch to low beam to activate rear lights and illuminate the road.
Hazard warning lights are only for stationary hazards or breakdowns—never use them while driving to signal turns or other intentions.
Forgetting to dim high beams promptly, causing dangerous glare that impairs other drivers' vision.
Using fog lights unnecessarily in clear weather, which dazzles other road users and is prohibited by law.
Activating turn signals too late (last-second signaling defeats the purpose of warning other road users).
Relying solely on automatic lighting systems without manually checking that correct lights are active, especially in tunnels or sudden weather changes.
Confusing DRLs with full headlights—DRLs only illuminate the front and may leave your vehicle invisible from behind in poor conditions.
Lesson content overview
A short set of high-value points that capture the most important learning from this lesson.
Low beam headlights are mandatory from sunset to sunrise and any time visibility is reduced, even during daylight in rain, fog, or snow.
High beams must be dimmed to low beam when an oncoming vehicle is within approximately 150 meters or when following another vehicle.
Fog lights are supplementary lights that cut beneath fog and precipitation; they are only legal in genuinely poor visibility and must be switched off once conditions improve.
Daytime Running Lights (DRL) make your vehicle visible to others during the day but do NOT illuminate the road or activate rear lights, so low beams are still required in darkness or adverse weather.
Turn signals must be activated well in advance—at least 3 seconds in urban areas and 5 seconds on rural roads or motorways—to communicate your intentions safely.
Explore all units and lessons included in this driving theory course.
Use low beams as your standard setting; high beams are only for unlit roads with no traffic ahead or oncoming.
150 meters is the threshold for dimming high beams when approaching or following another vehicle in Denmark.
Fog lights (front and rear) are prohibited in clear weather because their intense, low-mounted beam can blind other drivers.
DRLs do not replace headlights in darkness or poor visibility; always switch to low beam to activate rear lights and illuminate the road.
Hazard warning lights are only for stationary hazards or breakdowns—never use them while driving to signal turns or other intentions.
Forgetting to dim high beams promptly, causing dangerous glare that impairs other drivers' vision.
Using fog lights unnecessarily in clear weather, which dazzles other road users and is prohibited by law.
Activating turn signals too late (last-second signaling defeats the purpose of warning other road users).
Relying solely on automatic lighting systems without manually checking that correct lights are active, especially in tunnels or sudden weather changes.
Confusing DRLs with full headlights—DRLs only illuminate the front and may leave your vehicle invisible from behind in poor conditions.
Explore search topics learners often look for when studying Lighting Systems and Visibility. These topics reflect common questions about road rules, driving situations, safety guidance, and lesson level theory preparation for learners in Denmark.
Browse additional driving theory lessons that cover connected traffic rules, road signs, and common driving situations related to this topic. Improve your understanding of how different rules interact across everyday traffic scenarios.
Learn the essential Danish regulations for using vehicle lights, including low beams, high beams, and fog lights. Understand how proper lighting ensures visibility and communication on Danish roads.

Properly functioning lighting and signaling systems are fundamental for safe communication on the road. This lesson details the purpose and correct use of all exterior lights, including headlights, brake lights, turn signals, and hazard lights, according to Danish law. It emphasizes the driver's responsibility to ensure these systems are clean and operational to maintain visibility and clearly signal maneuvers to other road users.

This lesson explains the critical importance of being visible to other road users. It details the proper use of headlights and daytime running lights as required by Danish law. The content also covers the effectiveness of wearing reflective clothing and ensuring the vehicle's reflectors are clean and functional.

This lesson focuses on the specific challenges of riding in darkness. It explains the legal requirements and proper use of high and low beam headlights to see and be seen. The importance of wearing reflective clothing and ensuring all vehicle lights and reflectors are functioning is strongly emphasized.

This lesson details the meaning and application of various road surface markings, including lane dividers, solid and broken lines, and directional arrows. You will also learn to interpret the full sequence of traffic light signals, including the specific rules for the amber (yellow) light phase. A proper understanding of these systems is vital for maintaining correct lane discipline and adhering to traffic controls.

This lesson explains how to adjust driving techniques for adverse conditions. It covers the effects of rain, snow, ice, and fog on tire grip and visibility, emphasizing the need to increase following distances and reduce speed. The content also details the correct use of lights for night driving and in poor weather to ensure the bus is visible to others.

This lesson equips you with the knowledge to drive safely in challenging weather conditions. It explains the risk of aquaplaning in heavy rain, how to counteract strong crosswinds, and the correct use of lights in darkness and fog. The core principle is adapting your speed and increasing your following distance to compensate for reduced visibility and traction.
This lesson provides strategies for safe riding after dark, when visibility is significantly reduced. It explains how to use high and low beams effectively, avoid being dazzled by other vehicles' lights, and look for road markings to guide your path. The importance of wearing reflective clothing to be seen is strongly emphasized.

This lesson details the function and meaning of traffic light signals in Denmark. It covers the standard red, amber, and green sequences, as well as special signals like flashing amber lights and green arrows for turning. The content also explains signals specific to cyclists and pedestrians that moped riders must observe at intersections.
Understand the critical role of turn signals, brake lights, and hazard warning lights in communicating your intentions to other road users. Essential knowledge for safe driving in Denmark.
Properly functioning lighting and signaling systems are fundamental for safe communication on the road. This lesson details the purpose and correct use of all exterior lights, including headlights, brake lights, turn signals, and hazard lights, according to Danish law. It emphasizes the driver's responsibility to ensure these systems are clean and operational to maintain visibility and clearly signal maneuvers to other road users.

This lesson covers the proper methods for signalling intentions to other road users. It details the legal requirements for using turn indicators before turning or changing lanes. The content also explains how to use legally recognized hand signals as a backup or for added clarity.
This lesson details the function and meaning of traffic light signals in Denmark. It covers the standard red, amber, and green sequences, as well as special signals like flashing amber lights and green arrows for turning. The content also explains signals specific to cyclists and pedestrians that moped riders must observe at intersections.

This lesson teaches you to identify warning signs that alert drivers to upcoming hazards and changing road conditions. It covers common signs such as sharp curves, school zones, animal crossings, and temporary conditions like roadworks or slippery surfaces. Understanding these signs is crucial for anticipating risks and adjusting your driving to ensure safety on all types of Danish roads.
This lesson details the meaning and application of various road surface markings, including lane dividers, solid and broken lines, and directional arrows. You will also learn to interpret the full sequence of traffic light signals, including the specific rules for the amber (yellow) light phase. A proper understanding of these systems is vital for maintaining correct lane discipline and adhering to traffic controls.

This lesson covers the correct techniques for various turning manoeuvres, including how to signal, position your vehicle, and judge gaps in traffic. It also details the legal and safety protocols for overtaking, emphasizing the importance of assessing speed, distance, and oncoming traffic. A thorough understanding of these procedures is crucial for navigating intersections and two-lane roads safely.

This lesson provides a clear action plan for handling emergencies on the road. It explains how to secure an accident scene using a warning triangle, when and how to call the emergency number 112, and the fundamentals of providing basic first aid. You will also learn the safe procedure for dealing with a vehicle breakdown to protect yourself and other road users.

This lesson explores non-verbal communication techniques for safer road sharing. It discusses the importance of making eye contact with other drivers and pedestrians to confirm they have seen you. The content also explains the appropriate and legal use of the horn to alert others of your presence.
This lesson equips you with the knowledge to drive safely in challenging weather conditions. It explains the risk of aquaplaning in heavy rain, how to counteract strong crosswinds, and the correct use of lights in darkness and fog. The core principle is adapting your speed and increasing your following distance to compensate for reduced visibility and traction.
Find clear answers to common questions learners have about Lighting Systems and Visibility. Learn how the lesson is structured, which driving theory objectives it supports, and how it fits into the overall learning path of units and curriculum progression in Denmark. These explanations help you understand key concepts, lesson flow, and exam focused study goals.
In Denmark, all motor vehicles must have their low beam headlights turned on at all times, including during daylight hours, to ensure maximum visibility to other road users.
You should only use front fog lights when visibility is significantly reduced due to heavy rain, snow, or fog. They are not intended for use in clear weather as they can dazzle oncoming traffic.
If the blue high beam indicator is lit, you are using high beams. You must switch to low beams immediately when approaching oncoming traffic or when following another vehicle closely to avoid blinding the other driver.
Yes, even if a tunnel is illuminated, you must ensure your low beams are switched on to guarantee your vehicle is visible to all other drivers within the tunnel environment.
Use our powerful search tool to pinpoint specific Danish driving theory topics, road signs, or traffic situations you need to review. Start exploring relevant practice sets now to reinforce your knowledge and build confidence for your upcoming driving licence exam.