
The G-1d sign is a crucial distance marker, specifically for the left side of the road. It's used on one-way streets or dual carriageways to count down to a railway crossing, with stripes sloping down towards the roadway. This sign works in tandem with the G-1a marker on the right and helps drivers in the left lanes prepare for the tracks ahead. Always observe these markers to ensure a safe approach.
Master the G-1d marker post, a crucial warning for left-side railway crossings on Polish roads. Understanding its meaning is vital for safe navigation and passing your theory test revision.
The G-1d marker post is the left-side equivalent of the G-1a. It is used on roads where a secondary set of markers is required for visibility, such as one-way streets, dual carriageways, or where the right-side view is obstructed. The stripes on this sign slope down toward the right (toward the roadway). It marks the beginning of the countdown to the railway crossing for drivers in the left-hand lanes.
The first distance marker placed on the left side of the road, used on one-way streets or dual carriageways.
Get clear, practical answers to the most common questions about the G-1d - Three-Stripe Marker Post (Left Side) road sign. Learn how the sign works, what rules it represents, and how it affects real driving situations. This FAQ strengthens your understanding and supports accurate decision making for the Polish driving theory exam in Poland.
The G-1d sign is a three-stripe marker post indicating the distance to a railway crossing. It's placed on the left side of the road, typically on one-way streets or dual carriageways. The number of visible stripes counts down as you get closer to the crossing, alerting you to prepare to stop or yield.
The G-1d sign features three stripes that slope downwards towards the roadway. Each stripe represents a segment of the remaining distance to the railway crossing. As you approach the crossing, you'll see fewer stripes visible, acting as a visual countdown to help you gauge your speed and prepare for the crossing.
The G-1d sign is used on the left side of the road, complementing the G-1a sign on the right. You'll typically see both signs on dual carriageways or one-way streets where drivers in left-hand lanes need a specific warning and countdown. This ensures clear visibility and preparation for the railway crossing from all relevant lanes.
When you see the G-1d sign, be aware that a railway crossing is approaching. You should start looking for other signs, such as the stop line (P-12), and be prepared to reduce your speed. Listen and look carefully for any approaching trains and be ready to stop before the crossing if necessary.
While the G-1d sign itself doesn't prohibit actions directly, the context of a railway crossing often implies restrictions. You should not overtake other vehicles near the crossing due to potentially limited visibility and road width. Furthermore, never park near these marker posts, as it can obstruct the view for other drivers.
A common trap is underestimating the importance of the G-1d sign because it's on the left, or confusing its countdown function with a speed limit. Remember it's a warning and preparation sign for railway crossings. Always be vigilant for trains and be prepared to stop safely, just as you would for the G-1a sign on the right.
A clear reference image of the G-1d - Three-Stripe Marker Post (Left Side) road sign used in Poland.

The G-1d - Three-Stripe Marker Post (Left Side) road sign may also be known by these alternative names or terms.
The G-1d - Three-Stripe Marker Post (Left Side) road sign is part of the Additional Railway Crossing Signs (G) category, which groups together signs with similar rules and functions.
Reviewing similar road signs like the G-1d marker post alongside related examples aids in clearer recognition and retention for your theory test revision. Understanding the subtle differences in traffic sign comparison helps prevent confusion and improves your overall sign recognition skills.

Prepare for tram signals ahead with the AT-1 warning sign.

Understand the AT-2 Tram-Activated Signal: Know when trams are coming!
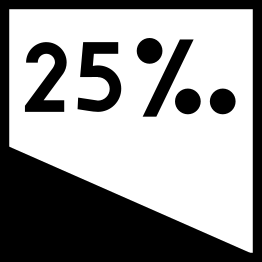
Understand the AT-3 Dangerous Tram Descent warning sign for trams.
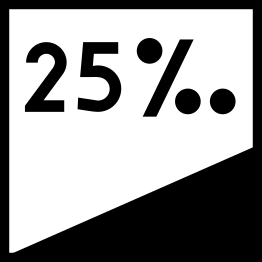
Warning: Steep Tram Ascent Ahead (AT-4)

Understand the AT-5 sign: Tram Collision Movement Warning for Turning Trams
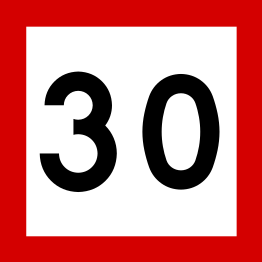
What the BT-1 Tram Speed Limit sign means and how to obey it.

BT-2: Tram Speed Limit Restriction Ends Here

BT-3 Tram Switch Lock: Don't Enter Until Clear!
After reviewing the full list of Polish road signs, explore specific sign categories for in-depth understanding. Challenge your knowledge with practice questions focused on sign recognition and interpretation to solidify your preparation for the driving theory exam.
Browse All Polish Road Signs