This lesson guides you through the critical steps for handling sudden mechanical issues, such as tyre blowouts or engine failure, while operating a heavy goods vehicle. Mastering these procedures is vital for ensuring your safety and that of other road users on Swiss roads. It provides the essential knowledge required for your C and C1 licence theory exam and professional driver responsibilities.

Lesson content overview
Driving a heavy goods vehicle (HGV) like those in Category C or C1 requires constant vigilance and preparedness, especially when faced with unexpected emergencies. A sudden tyre blowout or a critical mechanical failure can be a frightening and dangerous experience. Due to their significant mass, kinetic energy, and extended stopping distances compared to passenger cars, an improper response in an HGV can have severe consequences for the driver, other road users, and the cargo. This lesson provides a clear, step-by-step action plan to effectively manage such incidents on Swiss roads.
This module is designed for candidates pursuing their Official Swiss Driving Theory Course for Category C & C1 Goods Vehicles. It builds upon foundational knowledge of vehicle controls, braking systems, and road safety to equip you with the essential procedures for maintaining vehicle control, safely bringing your heavy vehicle to a stop, and securing the incident scene to prevent secondary accidents.
The very first priority when a tyre fails or a mechanical issue arises is to maintain control of the vehicle. Panic can lead to incorrect decisions that worsen the situation. Your immediate actions directly impact the stability of your heavy goods vehicle and the safety of everyone around you.
Upon sensing a tyre failure or mechanical issue, your grip on the steering wheel must be firm, but your steering inputs should remain smooth and controlled. A sudden loss of tyre pressure, especially on a front axle, can cause the vehicle to pull sharply to one side. Resist the urge to fight the steering wheel with violent inputs. Instead, apply steady, gentle counter-steering to keep the vehicle traveling in as straight a line as possible.
When it comes to deceleration, the key is gradual reduction of speed. Avoid any sudden or harsh braking. For heavy goods vehicles, abrupt braking after a tyre blowout can lead to wheel lock-up, skidding, or even a loss of control, potentially causing the vehicle to spin out or the load to shift dangerously.
Utilise engine braking by gradually easing off the accelerator and, if appropriate, gently downshifting without over-revving the engine. This helps to slow the vehicle while maintaining stability and preventing excessive strain on the service brakes.
Heavy vehicles carry immense kinetic energy. When a tyre fails, the vehicle's dynamics change significantly. Applying full brakes instantly can cause:
Instead, combine gentle engine braking with light, progressive pressure on the foot brake. Focus on guiding the vehicle to a safe stopping point, rather than stopping quickly in your current lane.
A tyre blowout, or Reifenpanne, is a sudden, explosive loss of air pressure. This can be caused by various factors, including impact damage, overloading, underinflation, or a defect in the tyre itself. The experience is often accompanied by a loud bang and immediate changes in vehicle handling.
The location of the blowout significantly affects how the heavy vehicle responds:
The weight and distribution of your cargo play a critical role in how your vehicle handles a tyre failure. An improperly secured or unevenly distributed load can exacerbate instability. During a tyre blowout, especially with heavy loads, the weight transfer can be extreme, making it harder to maintain control. Awareness of your vehicle's load dynamics, as covered in previous modules on mass and load distribution, is vital for predicting and mitigating these effects. Always strive for balanced load distribution to enhance stability during emergencies.
Beyond tyre failures, a range of mechanical breakdowns can incapacitate a heavy goods vehicle. These require swift, appropriate responses to ensure safety.
An engine stall (Motorstillstand) means the engine has stopped running, leading to a loss of power steering and power braking. While the steering and brakes will still function, they will require significantly more effort.
Gearbox issues, such as the transmission slipping into neutral or refusing to engage a gear, mean a loss of drive.
A brake system malfunction (Bremsstörung) is one of the most critical failures. This could manifest as a soft brake pedal, reduced braking efficiency, or a complete loss of brake pressure.
A steering system failure (Lenkungsausfall), such as a loss of power steering or complete steering loss, is extremely dangerous.
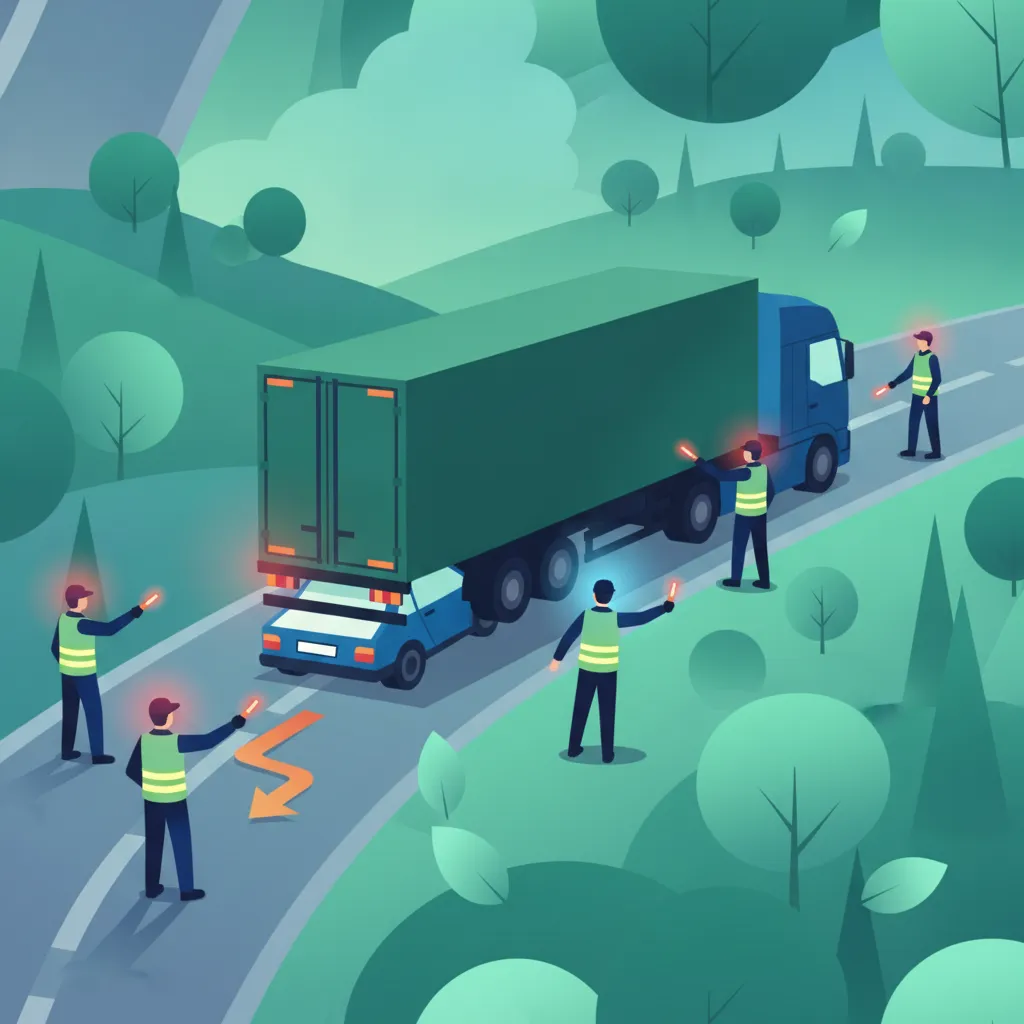
Once you have managed to bring your heavy goods vehicle to a safe stop, the next critical phase is to secure the scene. This prevents further accidents and protects yourself and other road users.
As soon as your vehicle is stationary and safely positioned (ideally on the hard shoulder or a safe lay-by), immediately activate your hazard warning lights (Pannenhilfeblinkleuchten in German-speaking Switzerland, also simply Warnblinker). These lights cause all turn indicators to flash simultaneously, alerting other drivers to your stationary, hazardous presence.
Do not activate hazard warning lights while still moving at speed unless a severe hazard dictates it. Their primary purpose is to indicate a stationary or extremely slow-moving emergency, and using them otherwise can confuse other drivers about your intentions.
The warning triangle (Pannendreieck) is a crucial safety device for alerting oncoming traffic. Its correct placement is mandated by Swiss law to provide sufficient warning.
Ensure your hazard lights are activated and put on a high-visibility vest if you have one, especially if visibility is poor.
Carefully exit your vehicle, paying close attention to passing traffic. Whenever possible, exit on the side away from the traffic flow.
Walk upstream (against the direction of traffic) to place the triangle. This ensures approaching drivers see it before they reach your vehicle.
Place the warning triangle on the road surface at the required distance. This distance depends on the type of road:
On motorways (Autobahnen): 150 to 300 metres upstream of the vehicle. Given the high speeds, a greater warning distance is essential.
On other roads (Andere Strassen): A minimum of 100 metres upstream of the vehicle.
Make sure the triangle is stable and clearly visible to oncoming traffic.
After securing your vehicle and placing the warning triangle, your personal safety is paramount.
Swiss traffic law mandates specific actions in the event of a breakdown to ensure road safety. Non-compliance can lead to fines and, more importantly, put lives at risk.
The core principles outlined previously are embedded in Swiss road traffic regulations:
Failing to follow these mandatory procedures can have serious legal and safety implications:
Violations of these safety regulations can result in significant fines and, in cases leading to accidents, severe legal consequences under Swiss law.
The specific actions you take during a tyre failure or mechanical breakdown must be adjusted based on the prevailing road type, weather, and visibility.
On Swiss motorways (Autobahnen) and other high-speed roads, the risks associated with a stationary heavy vehicle are amplified.
In urban areas (Städte) with lower speeds and more complex traffic, or on rural roads (Landstrassen) with limited shoulders:
Fog (Nebel), heavy rain (starker Regen), snow (Schnee), or darkness (Dunkelheit) significantly reduce visibility and increase risk.
Breakdowns in tunnels (Tunnel) or on bridges (Brücken) present unique challenges due to limited space, enclosed environments, and often restricted escape routes.
Responding to a tyre failure or mechanical breakdown in a heavy goods vehicle demands a disciplined, calm, and informed approach. Mastery of these procedures is not just a regulatory requirement for obtaining your Swiss Category C or C1 driving license; it is a fundamental aspect of professional heavy vehicle operation and road safety.
Control First: Maintain a firm grip on the steering wheel and make smooth, controlled steering corrections.
Gradual Deceleration: Avoid abrupt braking. Use engine braking and gentle, progressive foot brake pressure to slow down.
Signal Intent: Always use your turn indicators when moving your vehicle to a safer location, such as the hard shoulder.
Safe Relocation: Move your vehicle off the main carriageway to the hard shoulder, a lay-by, or the safest available spot.
Scene Securing: Once stationary, immediately activate your hazard warning lights (Warnblinker).
Warning Triangle Placement: Place your warning triangle (Pannendreieck) upstream at the legally required distance (100 m on other roads, 150-300 m on motorways).
Personal Safety: Remain inside your vehicle if safe, or move to a secure location away from the traffic flow. Never stand on the roadway.
Adapt to Conditions: Adjust your actions based on road type, weather, visibility, and vehicle load.
By internalising these procedures, Category C and C1 drivers will be prepared to handle emergencies safely, protecting themselves, other road users, and their valuable cargo, all while complying with Swiss traffic regulations.
This lesson teaches Category C and C1 drivers how to respond safely to tyre failures and mechanical breakdowns in heavy goods vehicles, emphasising calm, controlled procedures that protect both the driver and other road users. The critical steps are: maintain firm steering control with smooth inputs, use gradual engine braking instead of harsh foot braking, and once stationary, immediately activate hazard lights and place the warning triangle at the legally required distance upstream. Swiss law mandates specific triangle distances (100m on ordinary roads, 150-300m on motorways), and the content covers how front and rear tyre blowouts create opposite handling challenges requiring different steering corrections. Heavy loads significantly affect vehicle dynamics during emergencies, and the lesson also addresses how to adapt procedures for adverse weather, tunnels, bridges, and urban environments.
A short set of high-value points that capture the most important learning from this lesson.
Maintain firm steering grip and use smooth, controlled inputs when a tyre fails to prevent loss of directional control
Gradual deceleration using engine braking is essential; harsh braking can cause wheel lock-up, load shift, and brake fade in heavy vehicles
Front tyre blowouts cause the vehicle to pull toward the failed tyre (understeer), while rear blowouts cause oversteer requiring opposite steering corrections
Always signal before moving to the hard shoulder and activate hazard warning lights immediately once stationary
Personal safety requires remaining in the vehicle if safely off the carriageway, otherwise moving to a secure location well away from traffic flow
Explore all units and lessons included in this driving theory course.
Warning triangle (Pannendreieck) placement: minimum 100 metres on ordinary roads, 150 to 300 metres on Swiss motorways (Autobahnen), always upstream from the vehicle
Hazard warning lights (Warnblinker) are for stationary vehicles only; do not use them while still moving at speed
Front tyre blowouts pull toward the failed tyre; rear blowouts cause the rear to swing out
Engine braking is preferred over continuous foot braking to prevent brake fade, especially on descents
In tunnels, activate hazard lights immediately, guide vehicle to emergency stopping bay, and turn off engine to prevent exhaust buildup
Applying sudden full brakes during a tyre blowout, which risks skidding, load shift, and loss of control
Moving to the hard shoulder without using turn indicators, confusing other road users about your intentions
Placing the warning triangle too close to the vehicle or behind it instead of upstream, giving approaching drivers insufficient reaction time
Using hazard warning lights while still moving at motorway speeds, which misleads other drivers about your status
Exiting the vehicle onto the roadway or standing near traffic rather than exiting on the side away from the traffic flow
Lesson content overview
A short set of high-value points that capture the most important learning from this lesson.
Maintain firm steering grip and use smooth, controlled inputs when a tyre fails to prevent loss of directional control
Gradual deceleration using engine braking is essential; harsh braking can cause wheel lock-up, load shift, and brake fade in heavy vehicles
Front tyre blowouts cause the vehicle to pull toward the failed tyre (understeer), while rear blowouts cause oversteer requiring opposite steering corrections
Always signal before moving to the hard shoulder and activate hazard warning lights immediately once stationary
Personal safety requires remaining in the vehicle if safely off the carriageway, otherwise moving to a secure location well away from traffic flow
Explore all units and lessons included in this driving theory course.
Warning triangle (Pannendreieck) placement: minimum 100 metres on ordinary roads, 150 to 300 metres on Swiss motorways (Autobahnen), always upstream from the vehicle
Hazard warning lights (Warnblinker) are for stationary vehicles only; do not use them while still moving at speed
Front tyre blowouts pull toward the failed tyre; rear blowouts cause the rear to swing out
Engine braking is preferred over continuous foot braking to prevent brake fade, especially on descents
In tunnels, activate hazard lights immediately, guide vehicle to emergency stopping bay, and turn off engine to prevent exhaust buildup
Applying sudden full brakes during a tyre blowout, which risks skidding, load shift, and loss of control
Moving to the hard shoulder without using turn indicators, confusing other road users about your intentions
Placing the warning triangle too close to the vehicle or behind it instead of upstream, giving approaching drivers insufficient reaction time
Using hazard warning lights while still moving at motorway speeds, which misleads other drivers about your status
Exiting the vehicle onto the roadway or standing near traffic rather than exiting on the side away from the traffic flow
Explore search topics learners often look for when studying Responding to a Tyre Failure or Mechanical Breakdown. These topics reflect common questions about road rules, driving situations, safety guidance, and lesson level theory preparation for learners in Switzerland.
Browse additional driving theory lessons that cover connected traffic rules, road signs, and common driving situations related to this topic. Improve your understanding of how different rules interact across everyday traffic scenarios.
Learn critical steps for controlling a heavy vehicle during a tyre failure or mechanical breakdown. Understand how to safely stop, secure the scene with warning triangles, and protect yourself according to Swiss theory requirements.

After stopping for an emergency, making the scene safe is the top priority. This lesson details the procedure: activate hazard warning lights, put on high-visibility clothing before exiting the cab, and place the warning triangle at the correct distance behind the vehicle (at least 100m on motorways). This warns approaching traffic and creates a safer environment for the driver and emergency responders.

A breakdown can be a dangerous situation, especially on a busy road or motorway. This lesson provides a clear, sequential guide to follow. It includes pulling over to a safe location, activating hazard lights, placing the warning triangle, ensuring passenger safety, and contacting the appropriate services for assistance.

Losing part of a load on the road creates an immediate and serious hazard for other drivers. This lesson outlines the driver's responsibilities: stop in a safe place, assess the situation from a safe distance, and immediately alert the police. The driver's primary role is to warn other road users and not to attempt to retrieve the load from a live carriageway.

This lesson provides clear, actionable steps for managing a motorcycle breakdown safely. It covers moving the vehicle to a safe location, making yourself visible to other traffic with hazard lights and reflective gear, and contacting breakdown services. Following a proper protocol minimizes risk in a vulnerable situation.

This lesson provides a practical guide for handling a vehicle breakdown. It covers the immediate steps to take, such as moving the vehicle off the road if possible and making it visible to other traffic using hazard lights. The content also explains how to contact breakdown services and what information to provide to them.
This lesson provides a structured guide for managing the scene of a road traffic accident. It covers the internationally recognized priorities: assess for danger, make the scene safe, send for help by calling emergency services (112), and provide first aid to the injured if trained to do so. It also details the legal requirement to stop and exchange information after being involved in a collision.

Tunnels are enclosed environments where incidents can quickly escalate. This lesson outlines the specific rules for tunnel driving: remove sunglasses, turn on dipped headlights, maintain a safe following distance, and tune the radio to the indicated frequency. It also covers the critical emergency procedures to follow in the event of a fire or breakdown inside a tunnel.
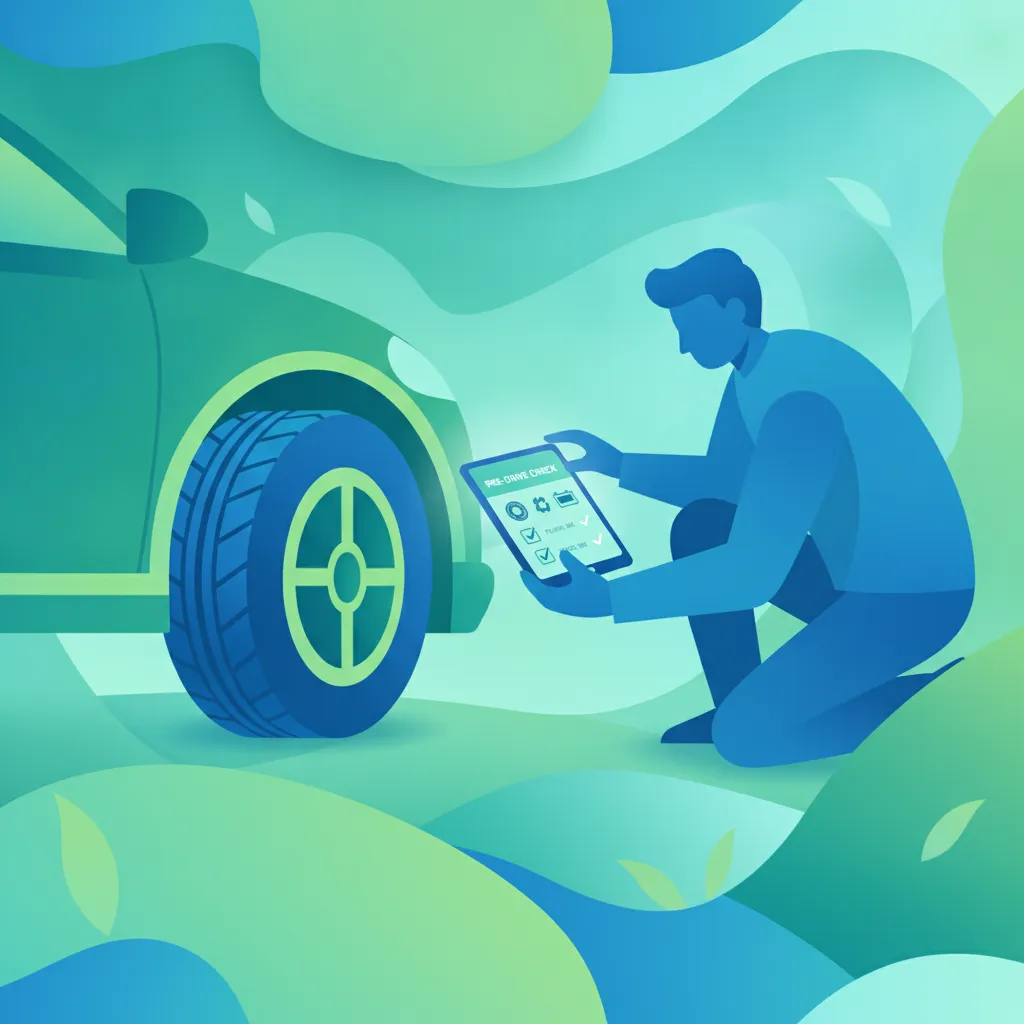
The driver is legally responsible for the roadworthiness of their vehicle at the start of and during every journey. This lesson outlines the formal process for reporting any identified defects to the transport manager or maintenance staff. It stresses the critical rule that a vehicle with a known safety-critical defect must not be driven until it has been professionally repaired and declared safe.

Driving in the Alps requires a high level of skill and vehicle sympathy. This lesson covers techniques for climbing steep gradients by selecting the correct gear to maintain momentum without straining the engine. It reiterates the critical importance of using low gears and auxiliary brakes for descending, to ensure the service brakes remain cool and effective for the entire descent.

Turning a long vehicle requires careful planning and execution. This lesson covers the correct procedure: approach, observation, signalling, and positioning the vehicle correctly to allow for the trailer's off-tracking without mounting the kerb. It also highlights the need for constant mirror checks throughout the turn to monitor for cyclists or other vulnerable road users who may enter the danger zone.
Explore how road type, weather, and environmental factors affect emergency responses for heavy vehicle breakdowns. This includes specific guidance for motorways, urban areas, tunnels, and adverse weather in Switzerland.
A breakdown can be a dangerous situation, especially on a busy road or motorway. This lesson provides a clear, sequential guide to follow. It includes pulling over to a safe location, activating hazard lights, placing the warning triangle, ensuring passenger safety, and contacting the appropriate services for assistance.
After stopping for an emergency, making the scene safe is the top priority. This lesson details the procedure: activate hazard warning lights, put on high-visibility clothing before exiting the cab, and place the warning triangle at the correct distance behind the vehicle (at least 100m on motorways). This warns approaching traffic and creates a safer environment for the driver and emergency responders.
Losing part of a load on the road creates an immediate and serious hazard for other drivers. This lesson outlines the driver's responsibilities: stop in a safe place, assess the situation from a safe distance, and immediately alert the police. The driver's primary role is to warn other road users and not to attempt to retrieve the load from a live carriageway.
This lesson provides a structured guide for managing the scene of a road traffic accident. It covers the internationally recognized priorities: assess for danger, make the scene safe, send for help by calling emergency services (112), and provide first aid to the injured if trained to do so. It also details the legal requirement to stop and exchange information after being involved in a collision.
This lesson provides a practical guide for handling a vehicle breakdown. It covers the immediate steps to take, such as moving the vehicle off the road if possible and making it visible to other traffic using hazard lights. The content also explains how to contact breakdown services and what information to provide to them.
Tunnels are enclosed environments where incidents can quickly escalate. This lesson outlines the specific rules for tunnel driving: remove sunglasses, turn on dipped headlights, maintain a safe following distance, and tune the radio to the indicated frequency. It also covers the critical emergency procedures to follow in the event of a fire or breakdown inside a tunnel.
This lesson provides clear, actionable steps for managing a motorcycle breakdown safely. It covers moving the vehicle to a safe location, making yourself visible to other traffic with hazard lights and reflective gear, and contacting breakdown services. Following a proper protocol minimizes risk in a vulnerable situation.

Wet or icy roads drastically reduce tyre grip and can double or triple braking distances. This lesson stresses the importance of significantly reducing overall speed and increasing following distances in such conditions. It advises on using brakes with extreme care to avoid skidding and explains how the vehicle's retarder should be used with caution as it can cause the drive wheels to lock up on slippery surfaces.

This lesson outlines the steps a driver should take when a passenger becomes ill or requires medical attention. It covers safely stopping the vehicle, making an emergency call to the correct number (144/112), and providing basic assistance until professional help arrives. The focus is on a calm, systematic response to a stressful situation.

Tunnels are enclosed environments with unique risks. This lesson covers the mandatory pre-entry checks, such as removing sunglasses and turning on dipped headlights. It explains the importance of maintaining a greater following distance and outlines the critical emergency procedures in case of a breakdown or fire inside a tunnel.
Find clear answers to common questions learners have about Responding to a Tyre Failure or Mechanical Breakdown. Learn how the lesson is structured, which driving theory objectives it supports, and how it fits into the overall learning path of units and curriculum progression in Switzerland. These explanations help you understand key concepts, lesson flow, and exam focused study goals.
The priority is to remain calm and avoid harsh braking. Keep a firm grip on the steering wheel to maintain directional control and allow the vehicle to slow down gradually before steering toward the hard shoulder.
In Switzerland, you must place the warning triangle at a sufficient distance behind your vehicle to warn oncoming traffic, typically at least 50 meters on normal roads and 100 meters on motorways, ensuring it is clearly visible to approaching drivers.
Generally, no. For heavy vehicles on motorways, it is extremely dangerous. It is safer to move the vehicle to a secure location, activate hazard lights, exit the vehicle on the side away from traffic, and call for professional roadside assistance.
Yes, hazard lights should be activated immediately upon sensing a mechanical failure or when stopping in an emergency. They alert other drivers to the potential hazard of a stationary or slow-moving heavy vehicle.
Pinpoint specific Swiss traffic rules, road signs, or driving situations you need to master. Use the practice search to start a focused revision session now and build confidence for your official driving theory exam.