
Welcome to the essential lesson on Braking Techniques and Stopping Distances for your Spanish Category AM licence. Understanding how to brake effectively and safely is crucial for controlling your moped in busy urban traffic and is a key topic for your DGT theory exam. This lesson builds on basic moped controls and prepares you for advanced hazard perception and emergency situation management.
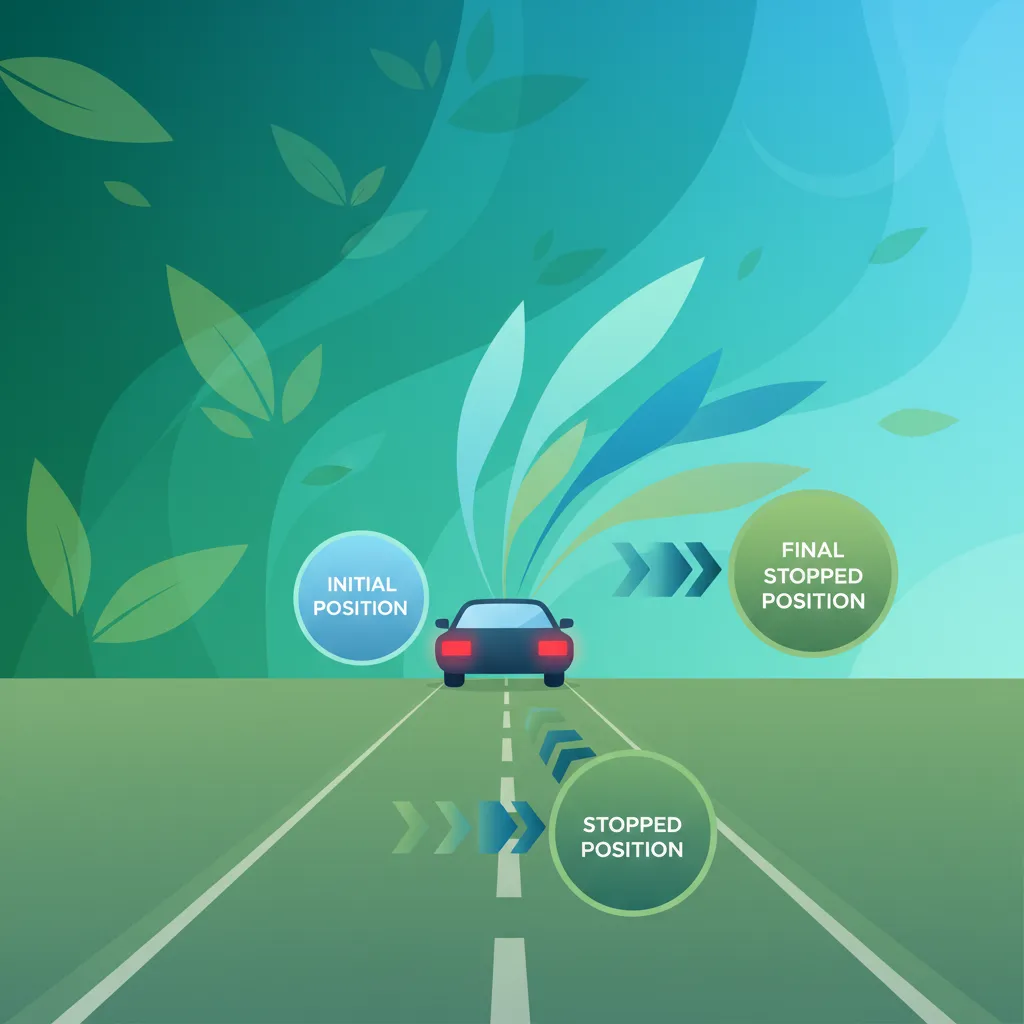
Lesson content overview
Effective braking is a cornerstone of safe moped riding. For learners preparing for the Spanish Driving License Theory – AM Category exam, understanding how to properly use your moped's brakes and appreciating the physics behind stopping distances is critical. This comprehensive guide delves into the essential techniques, legal requirements, and environmental factors that influence how quickly and safely you can bring your moped to a halt. Mastering these skills will not only enhance your safety but also ensure compliance with Spanish traffic regulations.
Braking is the process of converting a vehicle's kinetic energy (energy of motion) into heat energy through friction, allowing for controlled deceleration and eventually a complete stop. For mopeds, this friction is primarily generated between the brake pads and discs (or drums) and, critically, between the tires and the road surface. Efficient braking maximizes this friction without compromising stability or losing traction.
The underlying logic for effective braking is multifaceted. From a safety perspective, proper deceleration reduces the severity of potential crashes and prevents loss of control. Physiologically, braking distance is directly influenced by kinetic energy, the coefficient of friction between the tires and the road, and the vehicle's mass. Legally, Spanish traffic regulations mandate the use of functional brakes and require riders to maintain safe following distances to protect all road users. This lesson connects directly to managing speed, anticipating hazards, and responding effectively in emergency situations, all vital components of your Spanish AM Category curriculum.
Balanced braking is the cornerstone of effective deceleration on a moped. It involves the simultaneous and proportionate application of both the front and rear brakes. This technique distributes the braking force across both wheels, maximizing tire grip and stopping power while maintaining vehicle stability and preventing wheel lock-up.
For most mopeds, the front brake provides significantly more stopping power—typically around 70% of the total braking force—due to the phenomenon of load transfer. When a moped decelerates, its weight shifts forward, increasing the load and thus the available traction on the front wheel, while simultaneously reducing the load on the rear wheel. Riders should therefore apply the front brake firmly yet progressively, while gently pulling the rear brake lever.
Progressive Braking: Gradually increase pressure on both brake levers rather than applying them abruptly. This allows the tires to adapt to the braking force and prevents sudden loss of traction.
Modulated braking is a refined form of progressive braking, where the rider continuously adjusts brake pressure to just below the point of wheel lock-up, ensuring maximum deceleration without skidding. Relying solely on the rear brake is a common misunderstanding that leads to significantly longer stopping distances and a higher risk of skidding, especially on slippery surfaces. Conversely, over-using the front brake can cause the front wheel to lock, leading to a loss of control and a fall. The Spanish Dirección General de Tráfico (DGT) consistently recommends using both brakes for optimal safety and control.
Emergency braking is a critical skill for all moped riders, defining the ability to stop as quickly as possible when a collision is imminent, while still maintaining control. This maneuver requires a rapid, maximum-force application of both brakes.
The technique involves applying firm, progressive pressure to both brake levers simultaneously. The front brake should receive the majority of the pressure, in line with balanced braking principles, but applied very rapidly to achieve maximum deceleration. The rider should aim to keep the moped steering straight during the initial braking phase to maintain stability. If the wheels begin to lock (a skid), brake pressure should be momentarily eased and then reapplied, a technique known as threshold braking. Mopeds equipped with an Anti-lock Braking System (ABS) will automatically modulate brake pressure to prevent wheel lock-up, allowing the rider to maintain maximum brake force and potentially steer around an obstacle simultaneously.
Avoid Steering While Emergency Braking: Applying brakes hard, especially the front brake, while turning sharply significantly increases the risk of a skid and loss of control. Always try to straighten the moped before initiating emergency braking.
Spanish traffic law mandates that all vehicles have functional brakes and expects drivers to be capable of stopping within safe distances. Practicing emergency braking in a safe, controlled environment is crucial for developing the muscle memory and confidence needed to react effectively in a real-world emergency.
Total stopping distance is the entire distance your moped travels from the moment you perceive a hazard until your vehicle comes to a complete stop. This crucial safety metric is composed of two primary elements: perception-reaction distance and braking distance.
This is the distance your moped travels during your perception-reaction time (PRT). PRT is the period it takes for a rider to:
For mopeds, Spanish guidelines typically assume an average PRT of approximately 1.5 seconds under normal conditions. This time is influenced by factors such as rider alertness, fatigue, distractions, and visibility. Even a brief delay can significantly increase the total distance traveled before braking begins.
This is the distance your moped travels from the moment the brakes are applied until it comes to a complete stop. Braking distance is primarily determined by:
The total stopping distance is simply the sum of these two components: Total Stopping Distance = Perception-Reaction Distance + Braking Distance
If a moped is traveling at 40 km/h (approximately 11.1 meters per second) on a dry road:
Understanding these components highlights why maintaining a safe following distance, often expressed as a time gap (e.g., 2 seconds), is mandatory under Spanish traffic law. This time gap provides the necessary space to accommodate both your reaction time and the distance required to stop your moped safely.
One of the most critical factors influencing stopping distance is speed. The relationship is not linear, but quadratic, meaning that doubling your speed quadruples your braking distance. This is due to the physics of kinetic energy, which increases with the square of the velocity (Kinetic Energy ∝ v²).
If you double your speed, your moped has four times the kinetic energy, requiring four times the braking effort (and thus distance) to dissipate that energy.
For AM Category mopeds, legal speed limits are strictly enforced, particularly the 30 km/h limit in urban areas in Spain. These limits are not arbitrary; they are set to significantly reduce the potential stopping distance, thereby improving safety for both the moped rider and other road users, especially vulnerable pedestrians and cyclists. Ignoring this quadratic principle is a common and dangerous misunderstanding, often leading to overestimation of stopping capabilities.
The condition of the road surface and prevailing weather dramatically influence the coefficient of friction (μ) between your moped's tires and the road, directly impacting braking efficiency and stopping distance. The friction coefficient is a ratio that determines the maximum achievable braking deceleration.
The friction coefficient quantifies the grip between two surfaces. A higher μ means more grip and shorter stopping distances, while a lower μ means less grip and longer stopping distances.
Hidden Hazards: Even on a seemingly dry day, beware of oil spills, wet leaves, tram tracks, painted road markings, or drain covers, which can drastically reduce friction and cause sudden loss of grip, especially when braking or turning.
The DGT explicitly requires riders to reduce speed and increase following distance in adverse weather conditions. Assuming that brakes will perform the same regardless of conditions is a dangerous misconception that can lead to accidents. Always adjust your riding style to match the environmental conditions.
Load transfer is a fundamental principle of vehicle dynamics that plays a crucial role in moped braking. During deceleration, the inertia of the moped and rider causes a significant shift of weight from the rear wheel to the front wheel. This phenomenon increases the load (and therefore the available traction) on the front wheel, while simultaneously reducing the load on the rear wheel.
Proper rider position works in conjunction with balanced braking to ensure the moped remains stable and under control, particularly during emergency stops.
Adhering to Spanish traffic regulations regarding braking and following distances is not only a legal requirement but also a vital component of safe riding for AM Category moped drivers. These rules are outlined in the Reglamento General de Circulación (RGC) and DGT guidelines.
| Rule | Applicability | Legal Status | Rationale |
|---|---|---|---|
| Functional Brakes | All mopeds must have independently functional front and rear brakes. | Mandatory | Ensures adequate and redundant stopping power. |
| Brake Light Functionality | The rear brake light must illuminate when either brake is applied. | Mandatory | Alerts following traffic of your deceleration, preventing rear-end collisions. |
| Use Both Brakes Simultaneously | Recommended for routine and emergency stops. | Advisory (DGT Guideline) | Maximizes stopping power, maintains stability, and prevents wheel lock. |
| Maintain a Safe Following Distance | All driving conditions, especially in traffic. | Mandatory | Provides adequate perception-reaction time and stopping distance. The DGT recommends a minimum 2-second gap. |
| Reduce Speed in Adverse Weather | Rain, fog, snow, ice, strong winds. | Mandatory | Compensates for reduced friction and visibility, significantly lowering stopping distance. |
| Brake Before Turning | When taking a curve or turn. | Recommended | Prevents loss of traction while the moped is leaned over. Complete braking before initiating the turn. |
| Regular Brake Maintenance | Periodic vehicle inspections and rider checks. | Mandatory | Ensures brakes are always in optimal working condition. |
Following Distance Calculation: A 2-second following distance means you should choose a fixed point (like a road sign or bridge) and, when the vehicle ahead passes it, you should count "one thousand one, one thousand two." If you reach the point before saying "two," you are too close.
Failure to comply with these regulations can lead to fines, points on your license, and, more importantly, increase the risk of serious accidents. Regular checks of your brake system, including pad wear and fluid levels, are essential for maintaining safety.
Even experienced riders can make braking errors, but for new AM Category moped drivers, certain mistakes are particularly common and dangerous. Understanding these pitfalls is the first step to avoiding them and improving your overall safety.
Braking isn't a one-size-fits-all action; it must be adapted to the specific circumstances of the road, weather, and traffic. Here are examples of how contextual variations influence your braking approach:
These scenarios emphasize that safe braking is a dynamic skill, requiring constant assessment of your environment and immediate adaptation of your technique.
Understanding the physics and psychology behind braking reinforces its critical role in rider safety.
By appreciating these insights, riders can make informed decisions, maintain greater awareness, and ultimately contribute to safer roads for everyone.
This lesson covers the essential braking techniques and physics of stopping distances required for the Spanish AM moped licence. Learners must master balanced braking, using both brakes simultaneously with approximately 70% front and 30% rear force distribution to maximize traction during deceleration. Total stopping distance comprises perception-reaction distance (based on a 1.5-second reaction time) plus braking distance, with speed having a quadratic effect—doubling speed quadruples braking distance. Road conditions dramatically affect the friction coefficient, so riders must reduce speed and increase following distance on wet, gravel, or icy surfaces. Spanish DGT regulations mandate functional brakes, working brake lights, and a minimum 2-second following gap, with specific techniques required for emergency stops, downhill braking, and adverse weather conditions.
A short set of high-value points that capture the most important learning from this lesson.
Balanced braking using both front (approximately 70%) and rear (approximately 30%) brakes simultaneously provides maximum stopping power while maintaining stability
Total stopping distance equals perception-reaction distance plus braking distance; at 40 km/h on dry asphalt this can reach approximately 26.7 meters
Doubling your speed quadruples your braking distance due to the quadratic relationship between speed and kinetic energy
Road surface conditions dramatically alter the friction coefficient: dry asphalt (μ ≈ 0.7–0.9) provides much better grip than wet asphalt (μ ≈ 0.4–0.5) or ice (μ below 0.2)
Spanish regulations require functional brakes, working brake lights, and a minimum 2-second following distance maintained at all times
Explore all units and lessons included in this driving theory course.
Use both brakes progressively together; never grab the front brake abruptly or apply only the rear brake
Average perception-reaction time for moped riders is approximately 1.5 seconds before braking even begins
During braking, weight transfers forward to the front wheel, which is why the front brake provides most stopping power
Your brake light must illuminate whenever you apply either brake to warn following traffic
Reduce speed and increase following distance in adverse conditions such as rain, fog, gravel, or ice
Relying solely on the rear brake, which significantly lengthens stopping distance and increases skid risk especially on wet surfaces
Applying the front brake abruptly while turning, which can cause front wheel lock-up, loss of control, and a fall
Maintaining an insufficient following distance, failing to account for the 1.5-second perception-reaction time before brakes engage
Carrying a passenger or heavy load without adjusting technique, not anticipating the increased mass and longer stopping distance required
Applying brakes while the throttle is still open, which creates conflicting forces that destabilize the moped
Lesson content overview
A short set of high-value points that capture the most important learning from this lesson.
Balanced braking using both front (approximately 70%) and rear (approximately 30%) brakes simultaneously provides maximum stopping power while maintaining stability
Total stopping distance equals perception-reaction distance plus braking distance; at 40 km/h on dry asphalt this can reach approximately 26.7 meters
Doubling your speed quadruples your braking distance due to the quadratic relationship between speed and kinetic energy
Road surface conditions dramatically alter the friction coefficient: dry asphalt (μ ≈ 0.7–0.9) provides much better grip than wet asphalt (μ ≈ 0.4–0.5) or ice (μ below 0.2)
Spanish regulations require functional brakes, working brake lights, and a minimum 2-second following distance maintained at all times
Explore all units and lessons included in this driving theory course.
Use both brakes progressively together; never grab the front brake abruptly or apply only the rear brake
Average perception-reaction time for moped riders is approximately 1.5 seconds before braking even begins
During braking, weight transfers forward to the front wheel, which is why the front brake provides most stopping power
Your brake light must illuminate whenever you apply either brake to warn following traffic
Reduce speed and increase following distance in adverse conditions such as rain, fog, gravel, or ice
Relying solely on the rear brake, which significantly lengthens stopping distance and increases skid risk especially on wet surfaces
Applying the front brake abruptly while turning, which can cause front wheel lock-up, loss of control, and a fall
Maintaining an insufficient following distance, failing to account for the 1.5-second perception-reaction time before brakes engage
Carrying a passenger or heavy load without adjusting technique, not anticipating the increased mass and longer stopping distance required
Applying brakes while the throttle is still open, which creates conflicting forces that destabilize the moped
Explore search topics learners often look for when studying Braking Techniques and Stopping Distances. These topics reflect common questions about road rules, driving situations, safety guidance, and lesson level theory preparation for learners in Spain.
Browse additional driving theory lessons that cover connected traffic rules, road signs, and common driving situations related to this topic. Improve your understanding of how different rules interact across everyday traffic scenarios.
Explore complex braking scenarios for mopeds, including advice on adverse weather, slippery surfaces, and emergency stops. Understand how to adapt your braking for maximum safety and control beyond standard conditions. Learn theory relevant to Spanish AM licence.
This lesson teaches riders how to react effectively in a sudden, critical situation. It explains the technique for applying maximum braking force without locking the wheels, ensuring the shortest possible stopping distance while maintaining stability. The content also covers how to perform a swift and controlled swerve to avoid an obstacle when stopping is not possible, emphasizing the importance of looking where you want to go.

This lesson details the protocol for performing an emergency stop, emphasizing full-force application of both front and rear brakes while maintaining optimal rider posture. It covers the importance of visual fixation and the role of ABS in stabilizing the bike under panic conditions. Learners also study the calculation of stopping distances based on speed and road conditions.

This lesson provides a detailed guide to safely starting a moped, from the ignition sequence to the coordinated use of the throttle and brakes. It explains the importance of a pre-ride checklist to verify lights and controls are functional. The content also covers techniques for achieving smooth acceleration from a standstill and performing controlled stops, which is crucial for managing stop-and-go urban traffic conditions.

This lesson focuses on mastering acceleration and deceleration to integrate smoothly with traffic. It teaches how to apply the throttle gradually for steady speed control and how to use front and rear brakes in a balanced manner to slow down without destabilizing the moped. Learners will understand how to adjust their speed in response to changing traffic conditions, ensuring safe following distances and predictable movements for other road users.
This lesson outlines procedures for handling emergency situations and accidents. It covers emergency braking techniques, hazard avoidance strategies, and the DGT emergency protocol for accident reporting. Emphasis is placed on rider protective actions, post-crash first aid, roadside safety, and legal obligations after an incident.
This lesson focuses on adapting braking techniques for wet and slippery roads. Topics include hydroplaning risk, reduced tire friction, and how ABS assists in preventing wheel lock-up. Learners are taught to employ progressive braking, reduce speed, and assess tire tread depth to maintain adequate grip.
This lesson focuses on the coordination of acceleration and deceleration to maintain vehicle stability. It explains how to modulate the accelerator pedal for smooth acceleration and how to apply the brake pedal for controlled deceleration. The content covers the role of the ABS system, the calculation of stopping distances, and the importance of maintaining stability during speed changes.

This lesson presents advanced cornering scenarios common on Spanish roads, such as mountain hairpins and high-speed autovía exits. It outlines specific techniques for descent control, ascent maneuvers, and safely merging into traffic after cornering. Interaction with cyclists and emergency cornering strategies are also covered in accordance with DGT regulations.
This lesson focuses on the specific techniques required for riding in rainy and slippery conditions. It explains how water on the road surface reduces tire grip and significantly increases braking distances. Learners will be taught to reduce speed, use controls smoothly and progressively, and be particularly cautious of painted lines and manhole covers, which become extremely slippery when wet.
This lesson teaches the crucial skill of adapting speed to match prevailing environmental conditions. It explains that the posted speed limit is a maximum for ideal conditions and that riders must slow down significantly in rain, fog, or darkness. The content emphasizes maintaining a larger safety margin to account for reduced visibility and longer stopping distances, ensuring the rider can always stop within the distance they can see clearly.
Understand all key factors that influence your moped's total stopping distance. Learn about perception-reaction time, speed, road conditions, and vehicle maintenance as they relate to safe deceleration for your Spanish AM licence theory.
This lesson teaches riders the critical importance of maintaining a safe following distance to allow for adequate reaction and braking time. It explains practical methods for judging this distance, such as the 'two-second rule,' and how this gap must be increased in adverse weather or poor visibility. Understanding this principle is fundamental to preventing rear-end collisions, one of the most common types of traffic accidents.
This lesson provides a detailed examination of the components that determine a vehicle’s stopping distance: perception time, reaction time, and braking distance. It outlines how to calculate safe stopping distances under various speeds and road conditions like wet or dry surfaces. Learners will be equipped to compute appropriate safety margins and understand the physics of emergency braking.
This lesson teaches riders how to react effectively in a sudden, critical situation. It explains the technique for applying maximum braking force without locking the wheels, ensuring the shortest possible stopping distance while maintaining stability. The content also covers how to perform a swift and controlled swerve to avoid an obstacle when stopping is not possible, emphasizing the importance of looking where you want to go.
This lesson focuses on mastering acceleration and deceleration to integrate smoothly with traffic. It teaches how to apply the throttle gradually for steady speed control and how to use front and rear brakes in a balanced manner to slow down without destabilizing the moped. Learners will understand how to adjust their speed in response to changing traffic conditions, ensuring safe following distances and predictable movements for other road users.
This lesson provides a detailed guide to safely starting a moped, from the ignition sequence to the coordinated use of the throttle and brakes. It explains the importance of a pre-ride checklist to verify lights and controls are functional. The content also covers techniques for achieving smooth acceleration from a standstill and performing controlled stops, which is crucial for managing stop-and-go urban traffic conditions.
Find clear answers to common questions learners have about Braking Techniques and Stopping Distances. Learn how the lesson is structured, which driving theory objectives it supports, and how it fits into the overall learning path of units and curriculum progression in Spain. These explanations help you understand key concepts, lesson flow, and exam focused study goals.
For maximum stopping power and stability, you should aim to use both the front and rear brakes simultaneously. The front brake provides most of the stopping force, but using it alone can lead to a skid. The rear brake helps stabilize the moped. Always apply them smoothly and progressively.
A wet road significantly reduces tyre grip, meaning your brakes won't be as effective. This will increase your total stopping distance considerably, often by as much as double. You must compensate by increasing your following distance and braking earlier and more gently.
Total stopping distance is made up of two parts: reaction distance and braking distance. Reaction distance is the distance your moped travels from the moment you perceive a hazard until you physically apply the brakes. Braking distance is the distance travelled while the brakes are applied until the moped comes to a complete stop. Both are critical to understand for the theory exam.
Yes, skidding can occur if you brake too hard or too suddenly, especially on slippery surfaces. Locking the wheels, particularly the front wheel, can cause you to lose steering control and fall. Smooth, progressive braking and understanding your limits help prevent this.
Practice emergency braking in a safe, open area away from traffic, such as a large empty car park. Start at low speeds, then gradually increase. Aim to apply both brakes firmly and quickly, but not so abruptly that you lock the wheels. Focus on keeping the moped upright and controlling the deceleration.
Use our powerful search functionality to pinpoint specific Spanish DGT driving theory practice sets. Filter by road sign categories, traffic law topics, or question difficulty to build custom study sessions and reinforce your knowledge precisely where it matters for your official exam.