
This lesson dives into the critical skill of emergency braking, a vital component for motorcycle safety and a common topic in the Spanish DGT theory exam for A, A1, and A2 licences. Mastering this technique is essential for reacting effectively in sudden, high-risk situations. We'll cover the precise actions needed to execute a safe and controlled emergency stop, ensuring you're prepared for both the exam and real-world riding challenges.

Lesson content overview
Emergency braking is one of the most critical skills a motorcyclist must master. It allows you to rapidly decelerate and stop your motorcycle in unexpected situations, effectively preventing collisions and safeguarding lives. For candidates preparing for the Spanish Motorcycle Theory Exam (A, A1, A2 Licence Prep Course), a thorough understanding of emergency braking procedures is not just theoretical knowledge; it is a fundamental requirement for safe riding and passing the exam. This lesson delves into the principles, techniques, and regulations surrounding emergency stops, equipping you with the expertise to react confidently and competently when every metre counts.
At its heart, emergency braking is a controlled, maximal-force deceleration manoeuvre designed to bring your motorcycle to a stop as quickly and safely as possible. It involves the simultaneous and forceful application of both front and rear brakes while maintaining an optimal body position to keep the motorcycle stable and prevent skidding. The objective is to maximise the friction between your tires and the road surface, thereby achieving the shortest possible stopping distance.
The full-force, simultaneous application of both front and rear brakes to achieve the quickest possible stop in a critical situation. Often referred to as a "panic stop."
When you brake, you are converting the motorcycle's kinetic energy into heat through friction. The maximum deceleration achievable is directly related to the coefficient of friction between your tires and the road, as well as the force applied to the brakes. A higher coefficient of friction, such as on dry asphalt, allows for quicker stops than on a wet or gravel surface. Understanding these physics helps riders appreciate why certain techniques and road conditions significantly impact stopping capabilities.
During any braking manoeuvre, the motorcycle's weight shifts forward due to inertia. In an emergency stop, this weight transfer is profound, placing a much greater load on the front wheel and significantly increasing its grip. Conversely, the rear wheel becomes lighter, reducing its traction. Proper rider posture is essential to manage this weight transfer effectively, ensuring the front tire can handle the increased load without locking up, while preventing the rear wheel from lifting excessively or skidding due to insufficient load. This phenomenon is why the front brake typically provides the majority of stopping power.
Performing an emergency stop effectively requires precise coordination of several actions. It is a skill that must be practiced repeatedly to become an instinctive reaction.
Initial Reaction: Identify the hazard immediately and prepare to brake. Your reaction time is crucial.
Visual Fixation: Fix your gaze on a stable point far ahead in your intended path, not at the obstacle or your front wheel. This helps maintain directional control.
Full-Force Brake Application: Simultaneously and forcefully apply both the front and rear brakes. Do not hesitate; this must be a decisive action.
Rider Posture: Lean slightly forward, push your hips towards the fuel tank, grip the tank firmly with your knees, and keep your elbows raised and bent. This posture transfers weight to the front wheel and stabilizes your body.
Clutch Management (Optional but Recommended): In most emergency braking scenarios, pull the clutch lever in simultaneously with the brakes, especially if you are braking to a complete stop. This prevents the engine from stalling and allows for quick evasion if the stop cannot be completed.
Maintain Pressure: Keep full pressure on both brakes until the motorcycle has stopped or the hazard is cleared, allowing ABS (if present) to manage wheel lock-up.
Release and Re-evaluate: Once stopped, or the immediate danger has passed, release the brakes, assess your surroundings, and proceed cautiously.
The cornerstone of an emergency stop is the immediate and complete application of both braking systems. Many riders initially hesitate or use only the rear brake, a common misunderstanding that dramatically increases stopping distances. The goal is to apply maximum pressure to both the front and rear brake levers instantly, achieving the greatest deceleration possible within the limits of tire-road friction.
Effective emergency braking demands that both the front and rear brakes are engaged at the same time. The front brake, due to weight transfer, provides approximately 70% of the total stopping power on dry surfaces. The rear brake contributes the remaining 30% and helps stabilize the motorcycle, preventing the rear wheel from lifting or skidding sideways.
Human instinct often causes a rider to hesitate or apply brakes progressively in an emergency. However, every millisecond of delay adds metres to your stopping distance. Training and practice are essential to condition a rider to react decisively and apply maximum braking force immediately when faced with an unexpected hazard. This rapid response is critical for collision avoidance.
The proportion of braking effort distributed between the front and rear brakes is crucial for stability and effectiveness. This distribution varies depending on surface conditions and the presence of ABS.
The proportion of braking effort allocated between the front and rear wheels to achieve optimal deceleration and stability.
Under dry conditions, the front brake should bear the majority of the braking force, typically around 70%. This leverages the increased grip available at the front wheel due to weight transfer during deceleration. The rear brake, contributing about 30%, provides additional stopping power and helps maintain the motorcycle's straight-line stability.
When practicing, aim for a firm, decisive squeeze on the front brake lever and a strong, steady press on the rear brake pedal. The sensation of the front suspension diving and the rear tire being lightly loaded indicates proper distribution.
On wet or slippery surfaces, the coefficient of friction is significantly reduced. This necessitates an adjustment in brake force distribution to prevent wheel lock-up. A typical adjustment might be reducing front brake pressure to approximately 60% and increasing rear pressure to 40%. The application of brakes should also be smoother and more progressive to avoid sudden loss of traction.
Your body position plays a vital role in transferring weight, enhancing control, and reducing stopping distance during an emergency stop. Incorrect posture can severely compromise your braking ability.
As you brake hard, the inertia will want to push you forward. To counteract this and efficiently transfer your body weight to the front wheel, grip the fuel tank firmly with your knees. Simultaneously, lean your torso slightly forward, effectively moving your centre of gravity forward. This action increases the load on the front tire, improving its grip and allowing for harder braking.
Keep your elbows raised and bent, allowing your arms to act as shock absorbers. Stiff, locked elbows will hinder weight transfer and make it harder to modulate brake pressure, potentially causing you to push yourself off the bike or lose balance. A relaxed yet firm grip on the handlebars is key to maintaining control.
Where you look profoundly influences where your motorcycle goes. During an emergency stop, maintaining a steady gaze on a fixed point ahead is paramount for keeping the motorcycle in a straight line.
The technique of maintaining visual focus on a fixed point ahead on the road (typically a distant object) while performing an emergency stop to maintain directional control.
When you brake suddenly, your natural tendency might be to look down at the hazard or your front wheel. However, this can cause an unconscious steering input, leading the motorcycle to veer off course (yaw). By fixing your gaze on a distant, stable point in your intended path, you effectively "tell" your brain to keep the motorcycle moving straight towards that point, overriding any unintended steering inputs.
The "look-down" trap is a common mistake where riders inadvertently steer towards what they are looking at. In an emergency, looking down at your brakes or the ground immediately in front of you can cause you to unintentionally turn the handlebars, leading to a loss of stability or veering into the hazard. Always keep your head and eyes up, focused on your escape path or a distant reference point.
Modern motorcycles are increasingly equipped with Anti-Lock Braking Systems (ABS), a crucial safety feature that significantly enhances braking performance, especially in emergency situations.
An electronic safety system that monitors wheel speed and modulates brake pressure to prevent the wheels from locking up during hard braking, maintaining steering control.
ABS works by constantly monitoring the rotational speed of your wheels. If a wheel begins to lock up during heavy braking – an indication of impending skid – the ABS rapidly releases and reapplies brake pressure multiple times per second. This "pulsing" action prevents the wheel from completely locking, allowing the tire to maintain traction and enabling the rider to retain steering control while braking maximally.
Spanish law mandates that motorcycles above 125 cc (as of a specific regulation, usually around 2016) must be equipped with ABS. This regulation underscores the DGT's commitment to enhancing rider safety through technological advancements. For A, A1, and A2 licence candidates, understanding how ABS functions and its legal requirement is essential.
While ABS is an invaluable safety feature, it is important to remember that it is an aid, not a substitute for proper emergency braking technique. Riders must still apply full, firm pressure to both brakes. ABS will then manage the brake pressure to prevent lock-up, but it cannot compensate for improper posture, poor visual fixation, or inappropriate brake force distribution for the conditions. Riders should still practice full-force braking to build muscle memory and confidence, even on ABS-equipped bikes.
Compliance with regulations and adherence to best practices are fundamental for safe motorcycling and passing the Spanish theory exam.
According to Spanish DGT regulations (e.g., Article 13), both the front and rear brakes on a motorcycle must be fully functional and operable at all times. The front brake, being the primary stopping mechanism, is particularly emphasized. Riding with a faulty or disabled brake can lead to penalties and poses a significant safety risk.
As mentioned, ABS is mandatory for motorcycles over 125 cc manufactured and registered after a specific date (around 2016) in Spain. This requirement is a proactive measure to enhance safety, reducing the likelihood of skidding and loss of control during emergency braking. Riders should ensure their motorcycles comply and that their ABS system is always in working order.
While not directly part of the braking procedure, related DGT regulations play a crucial role in overall safety.
Even experienced riders can make mistakes under pressure. Being aware of common pitfalls can help you avoid them.
This is one of the most prevalent and dangerous errors. Relying solely on the rear brake dramatically lengthens stopping distance and can easily cause the rear wheel to lock up, leading to a skid or even a high-side crash. Always use both brakes.
Staying upright or leaning backward reduces the load on the front wheel, making the front brake less effective and increasing the risk of the rear wheel lifting or skidding. Always adopt the correct emergency braking posture: lean forward, grip the tank, and keep elbows bent.
Using a standard dry-road braking technique on a wet, gravel, or otherwise slippery surface will likely result in wheel lock-up and loss of control. Always adjust your brake force distribution and application smoothness according to the prevailing road conditions.
As discussed, looking down can cause unintended steering inputs and lead to a loss of directional control. Keep your gaze fixed on a distant point in your intended path.
Some riders disable ABS for specific riding styles (e.g., off-road). However, on public roads, especially in emergencies, disabling ABS significantly increases the risk of wheel lock-up and loss of control, particularly on low-traction surfaces. Always ensure your ABS is active unless specifically trained for its deactivation in controlled environments.
Effective emergency braking is not a one-size-fits-all procedure. It requires adaptation based on various environmental and vehicle-specific factors.
| Condition | Variation in Technique | Reasoning |
|---|---|---|
| Wet or Slippery Surface | Reduce initial front brake pressure to approximately 60% and increase rear pressure to 40%. Apply brakes more smoothly and progressively to avoid sudden loss of traction. Fully engage ABS if available, as it is highly effective in these conditions. | Lower coefficient of friction on wet surfaces makes the front wheel more prone to locking up. A smoother, more balanced application helps prevent skids. ABS is designed to maintain traction under these challenging conditions. |
| Uneven or Gravel Surface | Apply brakes progressively. Prioritize the rear brake slightly more than on dry asphalt to maintain front wheel stability, but still use both. Focus on gentle, controlled pressure rather than maximum force, anticipating reduced grip. | Loose surfaces can cause the front wheel to lose grip very quickly and unpredictably, leading to a front-end washout. The rear brake helps settle the bike and provide controlled deceleration while reducing the risk of front wheel lock. |
| Night Riding | Ensure your high-beam or dipped-beam headlights illuminate the stopping area as much as possible. Fixate on an illuminated reference point in your path. Be aware that reaction times may be slightly longer due to reduced visibility. | Reduced visibility at night limits your ability to perceive hazards early and accurately. Strong visual fixation on an illuminated point helps maintain directional stability when other visual cues are diminished. |
| Urban Traffic (low speed) | At lower speeds, reaction distances are shorter, but the need for rapid coordination between front and rear brakes remains. Reduce the overall magnitude of braking force compared to high speed to avoid low-speed wheel lock-up, especially without ABS. Maintain heightened awareness of vulnerable road users. | While kinetic energy is lower at low speeds, abrupt braking can still cause wheel lock-up. Rapid, coordinated, yet measured braking is key to avoiding incidents with other traffic or pedestrians. |
| Motorway (high speed) | Initiate full-force emergency braking much earlier than you might instinctively believe. Maintain perfect rider posture to maximize weight transfer to the front wheel. Be prepared for a significantly longer stopping distance due to the exponential increase in kinetic energy. | Higher speeds increase kinetic energy exponentially, requiring substantially more distance to decelerate. Early and decisive braking, combined with optimal technique, is paramount to stopping safely within the available space. |
| Heavy Load (passenger, luggage) | Anticipate a longer overall braking distance, potentially increasing it by 10% or more. Adjust your brake force distribution slightly rearward if the weight distribution shifts significantly towards the rear. Communicate clearly with a passenger to ensure they brace themselves. | Additional mass increases the motorcycle's inertia, demanding more time and distance to decelerate. The added weight, especially a passenger, can alter the motorcycle's centre of gravity, requiring a slight adjustment in braking balance to maintain stability. |
| Malfunctioning ABS | If the ABS fault light is on, do not rely on the system. Instead, use progressive braking, modulating front and rear pressure manually with extra care, particularly on low-traction surfaces. Plan for increased stopping distances. | A malfunctioning ABS means the system cannot prevent wheel lock-up. Riders must revert to manual modulation skills, which require greater finesse and attention to prevent skidding. |
| Vulnerable Users Present | Increase following distance significantly. Anticipate the potential need for emergency braking due to unpredictable movements. Apply brakes gently yet promptly, focusing on maintaining control to avoid swerving into the path of vulnerable road users. | Pedestrians, cyclists, and other vulnerable road users may not always follow traffic rules or be easily visible. Providing a larger safety margin and being prepared for a gentle, controlled stop is crucial to prevent serious accidents. |
Mastering emergency braking procedures is not just a skill; it's a fundamental aspect of responsible motorcycling and a key component of passing your Spanish Motorcycle Theory Exam for A, A1, and A2 licences. By understanding the physics of deceleration, practicing full-force dual-brake application, adopting correct rider posture, maintaining visual fixation, and recognizing the role of ABS, you equip yourself with the ability to react effectively in critical situations. Remember to adjust your technique for varying road and environmental conditions, always prioritizing safety and control. Through consistent practice and adherence to DGT regulations, you can build the confidence to perform a quick, controlled stop when it matters most, reducing the risk of collisions and ensuring a safer riding experience.
This lesson covers the critical skill of emergency braking for Spanish A, A1, and A2 motorcycle licence candidates, teaching the correct procedure for a maximum-force controlled stop using both brakes simultaneously. Key concepts include optimal brake force distribution (70/30 front/rear on dry roads), proper rider posture for weight transfer, maintaining visual fixation on a distant point, and understanding ABS functionality within DGT regulations. The lesson also explains how stopping distance is calculated from reaction time and braking distance, emphasizing that doubling speed quadruples braking distance. Learners study how to adapt technique for varying conditions (wet surfaces, heavy load, high speed) and review common mistakes such as rear-brake-only stops and improper body position.
A short set of high-value points that capture the most important learning from this lesson.
Emergency braking requires simultaneous, full-force application of both front and rear brakes, with the front brake providing approximately 70% of stopping power on dry surfaces.
Correct rider posture—leaning forward, gripping the tank with knees, and keeping elbows bent—optimizes weight transfer to the front wheel for maximum deceleration.
Visual fixation on a distant stable point ahead maintains directional control; looking down at brakes or obstacles causes unintended steering inputs.
ABS prevents wheel lock-up by modulating brake pressure, but it cannot compensate for improper technique, posture, or inappropriate brake force distribution for conditions.
Stopping distance increases exponentially with speed because braking distance is proportional to the square of velocity, making early hazard recognition critical.
Explore all units and lessons included in this driving theory course.
On wet or slippery surfaces, reduce front brake pressure to approximately 60% and increase rear pressure to 40%, applying brakes more smoothly to avoid traction loss.
The total stopping distance equals reaction distance (speed × ~1.5 seconds reaction time) plus braking distance (v² ÷ 2a), with both components growing significantly at higher speeds.
Rear-brake-only stops dramatically increase stopping distance and risk rear wheel lock-up; always use both brakes simultaneously.
Human instinct causes hesitation in emergencies, but every millisecond of delay adds metres to stopping distance—training is needed to override this reflex.
ABS is mandatory for motorcycles over 125cc in Spain (post-2016 registration) and is an aid, not a replacement for proper emergency braking technique.
Relying on the rear brake only dramatically lengthens stopping distance and can cause rear wheel lock-up, leading to a skid or high-side crash.
Staying upright or leaning backward during braking reduces front wheel load, decreasing front brake effectiveness and increasing risk of rear wheel lift.
Using dry-road braking technique on wet, gravel, or slippery surfaces causes wheel lock-up and loss of control due to reduced coefficient of friction.
Looking down at the hazard or front wheel during emergency braking triggers unconscious steering inputs, causing the motorcycle to veer towards what the rider is looking at.
Disabling ABS on public roads significantly increases wheel lock-up risk, as the system cannot manage brake pressure automatically during panic stops.
Lesson content overview
A short set of high-value points that capture the most important learning from this lesson.
Emergency braking requires simultaneous, full-force application of both front and rear brakes, with the front brake providing approximately 70% of stopping power on dry surfaces.
Correct rider posture—leaning forward, gripping the tank with knees, and keeping elbows bent—optimizes weight transfer to the front wheel for maximum deceleration.
Visual fixation on a distant stable point ahead maintains directional control; looking down at brakes or obstacles causes unintended steering inputs.
ABS prevents wheel lock-up by modulating brake pressure, but it cannot compensate for improper technique, posture, or inappropriate brake force distribution for conditions.
Stopping distance increases exponentially with speed because braking distance is proportional to the square of velocity, making early hazard recognition critical.
Explore all units and lessons included in this driving theory course.
On wet or slippery surfaces, reduce front brake pressure to approximately 60% and increase rear pressure to 40%, applying brakes more smoothly to avoid traction loss.
The total stopping distance equals reaction distance (speed × ~1.5 seconds reaction time) plus braking distance (v² ÷ 2a), with both components growing significantly at higher speeds.
Rear-brake-only stops dramatically increase stopping distance and risk rear wheel lock-up; always use both brakes simultaneously.
Human instinct causes hesitation in emergencies, but every millisecond of delay adds metres to stopping distance—training is needed to override this reflex.
ABS is mandatory for motorcycles over 125cc in Spain (post-2016 registration) and is an aid, not a replacement for proper emergency braking technique.
Relying on the rear brake only dramatically lengthens stopping distance and can cause rear wheel lock-up, leading to a skid or high-side crash.
Staying upright or leaning backward during braking reduces front wheel load, decreasing front brake effectiveness and increasing risk of rear wheel lift.
Using dry-road braking technique on wet, gravel, or slippery surfaces causes wheel lock-up and loss of control due to reduced coefficient of friction.
Looking down at the hazard or front wheel during emergency braking triggers unconscious steering inputs, causing the motorcycle to veer towards what the rider is looking at.
Disabling ABS on public roads significantly increases wheel lock-up risk, as the system cannot manage brake pressure automatically during panic stops.
Explore search topics learners often look for when studying Emergency Braking Procedures. These topics reflect common questions about road rules, driving situations, safety guidance, and lesson level theory preparation for learners in Spain.
Browse additional driving theory lessons that cover connected traffic rules, road signs, and common driving situations related to this topic. Improve your understanding of how different rules interact across everyday traffic scenarios.
Understand the physics behind motorcycle braking, including weight transfer, tire grip, and optimal brake force distribution. Learn how rider posture and visual fixation enhance control during deceleration for Spanish theory exams.

This lesson focuses on adapting braking techniques for wet and slippery roads. Topics include hydroplaning risk, reduced tire friction, and how ABS assists in preventing wheel lock-up. Learners are taught to employ progressive braking, reduce speed, and assess tire tread depth to maintain adequate grip.
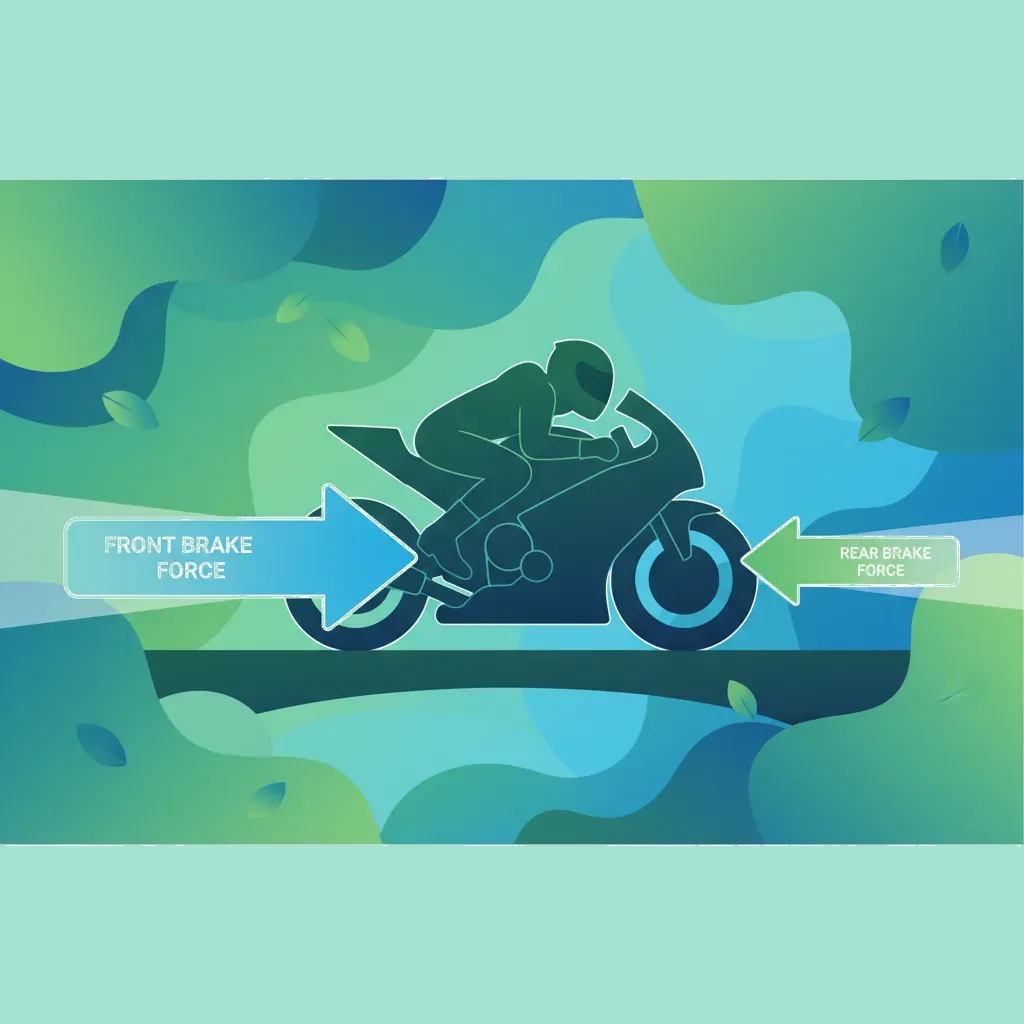
This lesson explores the physics behind brake torque distribution, explaining why the front brake provides greater stopping power due to weight shift during deceleration. It discusses the optimal brake bias for various speeds and surface conditions. Understanding these principles enables riders to modulate braking forces effectively.

This lesson covers the principles of anti-lock braking systems (ABS), describing how wheel slip detection prevents wheel lock-up. It explains combined braking operation, where front and rear brakes are applied in a calibrated ratio to maintain stability. Learners also explore how ABS enhances safety on low-traction surfaces and review DGT braking regulations.
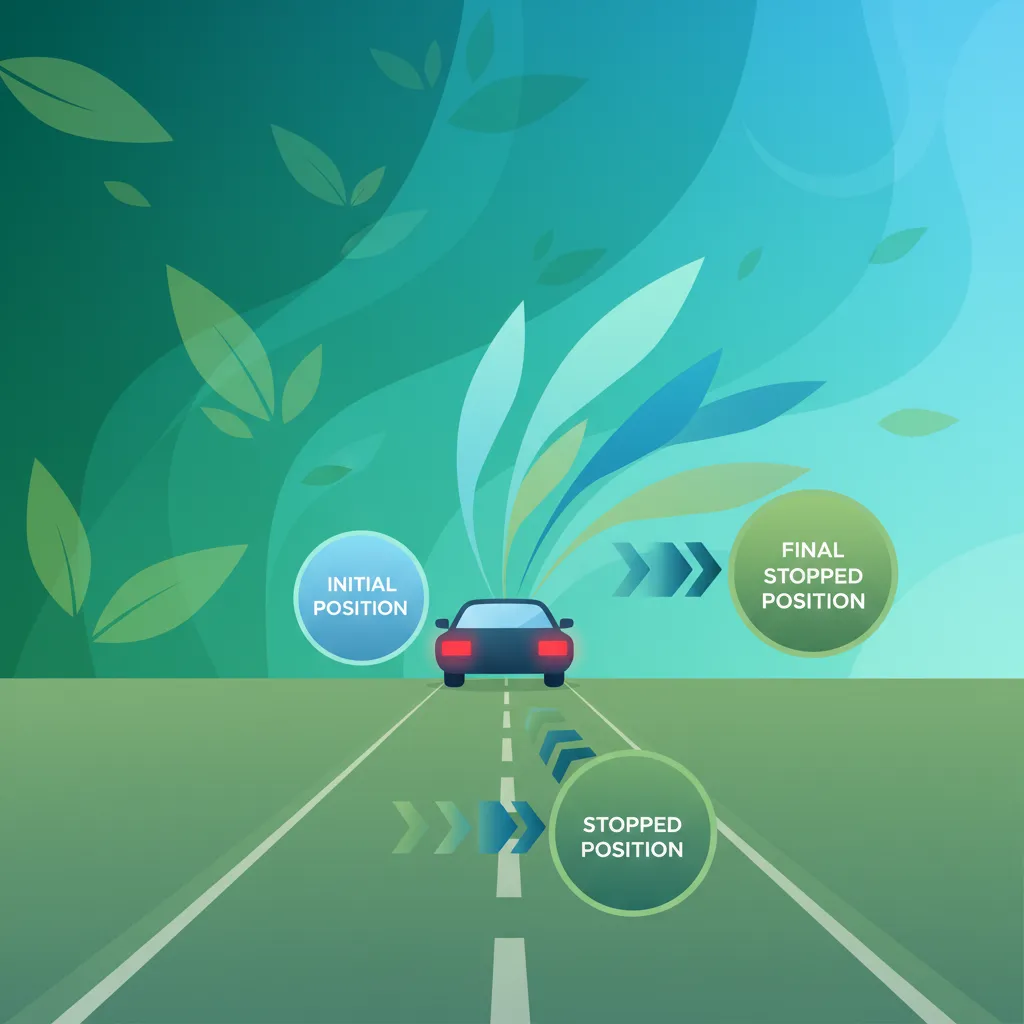
This lesson focuses on the correct application of a moped's brakes for effective and stable deceleration. It explains the concept of balanced braking, using both front and rear brakes simultaneously for maximum stopping power without losing traction. Learners will understand how factors like speed, road surface, and weather dramatically affect total stopping distance, and will learn techniques for emergency braking.
This lesson focuses on the coordination of acceleration and deceleration to maintain vehicle stability. It explains how to modulate the accelerator pedal for smooth acceleration and how to apply the brake pedal for controlled deceleration. The content covers the role of the ABS system, the calculation of stopping distances, and the importance of maintaining stability during speed changes.

This lesson details the technique of safely reducing speed while entering a corner, known as trail braking. It explains how the motorcycle’s lean angle affects front-wheel load and rear-wheel traction. The content aligns with DGT cornering safety standards to ensure riders execute controlled deceleration without compromising grip.

This lesson outlines procedures for handling emergency situations and accidents. It covers emergency braking techniques, hazard avoidance strategies, and the DGT emergency protocol for accident reporting. Emphasis is placed on rider protective actions, post-crash first aid, roadside safety, and legal obligations after an incident.

This lesson teaches riders how to react effectively in a sudden, critical situation. It explains the technique for applying maximum braking force without locking the wheels, ensuring the shortest possible stopping distance while maintaining stability. The content also covers how to perform a swift and controlled swerve to avoid an obstacle when stopping is not possible, emphasizing the importance of looking where you want to go.
This lesson explores static balance techniques essential when the motorcycle is stationary or moving at extremely low speeds. The content covers optimal foot placement, body posture, and centre of gravity control to maintain stability. Emphasis is placed on weight distribution between the bike and rider and practical balance drills.

This lesson focuses on mastering acceleration and deceleration to integrate smoothly with traffic. It teaches how to apply the throttle gradually for steady speed control and how to use front and rear brakes in a balanced manner to slow down without destabilizing the moped. Learners will understand how to adjust their speed in response to changing traffic conditions, ensuring safe following distances and predictable movements for other road users.
Learn how to adjust emergency braking techniques for various road surfaces like wet or gravel, and in different conditions such as night riding or urban traffic. Essential theory for safe riding in Spain.
This lesson focuses on adapting braking techniques for wet and slippery roads. Topics include hydroplaning risk, reduced tire friction, and how ABS assists in preventing wheel lock-up. Learners are taught to employ progressive braking, reduce speed, and assess tire tread depth to maintain adequate grip.

This lesson examines the impact of rain, wind, and heat on motorcycle dynamics and rider comfort. It discusses wet road grip, hydroplaning risk, and appropriate speed adaptation to maintain traction. Wind gust compensation techniques are presented, along with methods for managing heat-related tyre pressure changes and rider cooling.
This lesson details the technique of safely reducing speed while entering a corner, known as trail braking. It explains how the motorcycle’s lean angle affects front-wheel load and rear-wheel traction. The content aligns with DGT cornering safety standards to ensure riders execute controlled deceleration without compromising grip.

This lesson focuses on the specific techniques required for riding in rainy and slippery conditions. It explains how water on the road surface reduces tire grip and significantly increases braking distances. Learners will be taught to reduce speed, use controls smoothly and progressively, and be particularly cautious of painted lines and manhole covers, which become extremely slippery when wet.
This lesson covers the principles of anti-lock braking systems (ABS), describing how wheel slip detection prevents wheel lock-up. It explains combined braking operation, where front and rear brakes are applied in a calibrated ratio to maintain stability. Learners also explore how ABS enhances safety on low-traction surfaces and review DGT braking regulations.
This lesson explores the physics behind brake torque distribution, explaining why the front brake provides greater stopping power due to weight shift during deceleration. It discusses the optimal brake bias for various speeds and surface conditions. Understanding these principles enables riders to modulate braking forces effectively.

This lesson teaches the crucial skill of adapting speed to match prevailing environmental conditions. It explains that the posted speed limit is a maximum for ideal conditions and that riders must slow down significantly in rain, fog, or darkness. The content emphasizes maintaining a larger safety margin to account for reduced visibility and longer stopping distances, ensuring the rider can always stop within the distance they can see clearly.

This lesson introduces anticipation techniques that improve a rider’s ability to predict potential hazards before they manifest. It covers scanning ahead, evaluating traffic patterns, and applying DGT risk assessment criteria. Emphasis is placed on developing a defensive riding mindset and maintaining safety margins to reduce accident likelihood.
Find clear answers to common questions learners have about Emergency Braking Procedures. Learn how the lesson is structured, which driving theory objectives it supports, and how it fits into the overall learning path of units and curriculum progression in Spain. These explanations help you understand key concepts, lesson flow, and exam focused study goals.
For the Spanish DGT theory exam and safe riding, the general principle is to apply both brakes firmly and progressively. While theory often emphasizes full force on both, in practice, the front brake usually provides about 70-80% of the stopping power. It's crucial to apply them simultaneously and hard, while maintaining control. ABS significantly aids in preventing lock-up, especially on the front wheel.
ABS (Anti-lock Braking System) is designed to prevent your wheels from locking up during hard braking, which is crucial for maintaining stability and steering control. For the Spanish theory exam, understanding that ABS helps you stop more safely and controllably, especially in emergencies or on slippery surfaces, is key. It allows for maximum braking force without skidding.
Absolutely. Maintaining a firm grip on the handlebars and keeping your body weight slightly back helps transfer weight distribution effectively during hard braking. This counteracts the forward pitch of the motorcycle, improving stability and tire contact with the road. Proper posture is a frequently tested element in the DGT exam.
Road conditions significantly increase stopping distances. On wet, oily, or gravelly surfaces, tyre grip is reduced, meaning you'll need much more distance to stop safely compared to dry, clean asphalt. The Spanish theory exam often includes questions testing your awareness of these environmental factors and how they affect braking.
Normal braking is about smooth, controlled deceleration, often using less force and maintaining fluidity. Emergency braking involves applying maximum braking force as quickly as possible to stop in the shortest distance. It requires a more aggressive, immediate application of both brakes, often accompanied by specific body positioning and a focus on maintaining stability, especially if ABS is present.
Use our powerful search functionality to pinpoint specific Spanish DGT driving theory practice sets. Filter by road sign categories, traffic law topics, or question difficulty to build custom study sessions and reinforce your knowledge precisely where it matters for your official exam.