
This lesson from the "Hazard Perception & Defensive Riding" unit is crucial for anticipating risks on the road. You'll learn to identify and compensate for blind spots around larger vehicles and your own motorcycle. Mastering these techniques is vital for passing your Spanish DGT A, A1, A2 theory exam and ensuring your safety in real-world traffic scenarios. It builds upon understanding general road positioning and interaction.
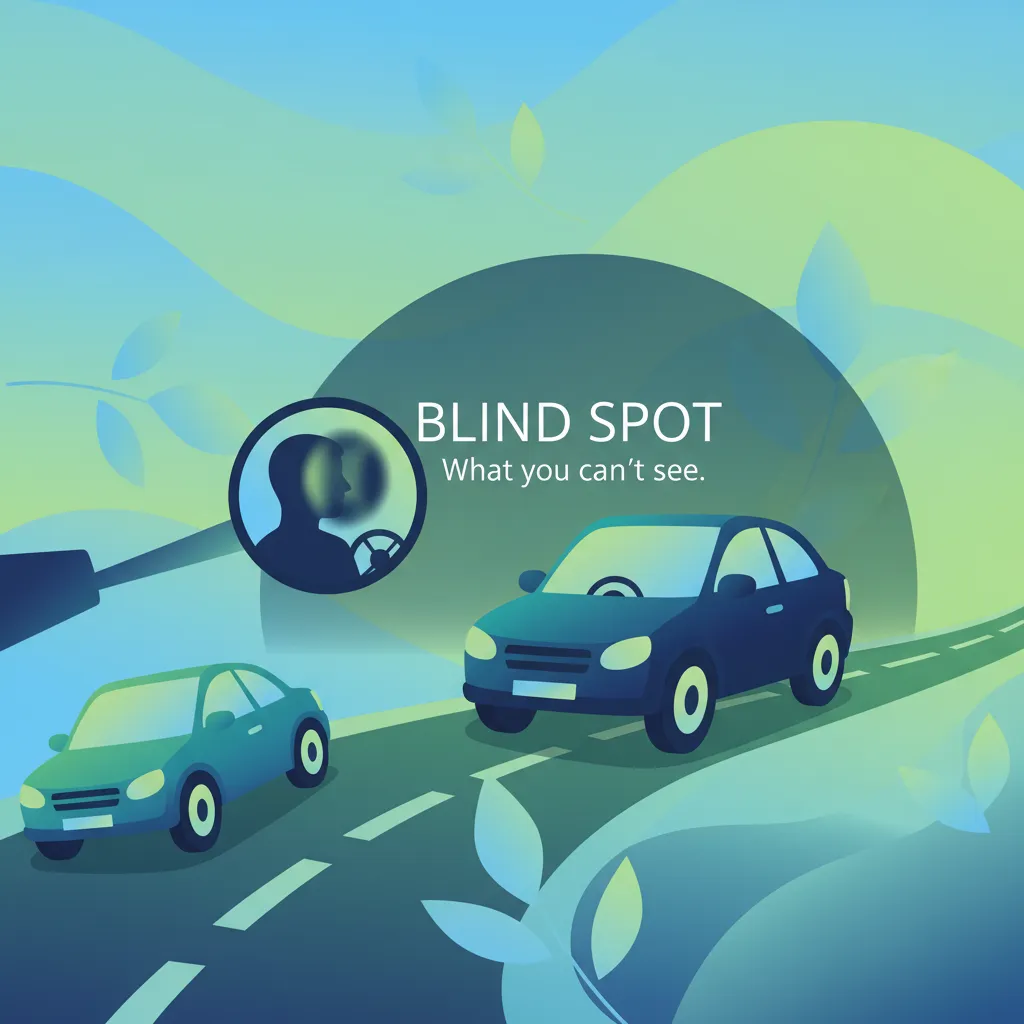
Lesson content overview
Riding a motorcycle offers unparalleled freedom and agility, but it also comes with unique challenges, particularly concerning visibility. Understanding and managing blind spots is paramount for safety, preventing collisions, and successfully passing your Spanish A, A1, and A2 motorcycle theory exams. This lesson provides a comprehensive guide to identifying and mitigating these hidden dangers on the road.
Blind spots are areas around any vehicle that cannot be seen by the driver or rider through mirrors or direct line of sight. For motorcyclists, these zones pose a significant risk because our smaller profile can easily disappear from other drivers' view, and our own limited field of vision can hide approaching hazards. Collisions involving blind spots are a leading cause of motorcycle accidents, making mastery of this topic essential for every rider.
This lesson will equip you with the knowledge and techniques to identify these critical zones, utilize your mirrors effectively, perform crucial head-checks, and adopt strategic road positioning. By developing a systematic approach to scanning your surroundings, you will enhance your situational awareness, significantly reduce your crash risk, and demonstrate a core competency required for the Spanish Motorcycle Theory Exam.
To effectively manage blind spots, it's crucial to understand what they are and how they operate in different situations. Blind spots are not just abstract concepts; they are specific physical areas where vehicles and obstacles can be completely hidden from your view.
An area around a vehicle that is not observable through mirrors or the rider’s direct line of sight. For motorcyclists, this includes zones created by other vehicles and by the motorcycle’s own structure or the rider's posture.
These unseen areas can be caused by the design of other vehicles (like the pillars or bodywork of cars and trucks) or by the limitations of a motorcycle rider's own ergonomic setup and field of vision. A rider must actively compensate for these inherent visual limitations through specific techniques.
Static blind spots are fixed zones related to a vehicle's dimensions and structure. They remain constant regardless of whether the vehicle is moving or stationary. For example, the area directly alongside a large truck or behind its cab is a static blind spot for the truck driver. A motorcyclist riding in such a zone will be invisible.
It's vital for riders to anticipate where these static zones exist on other vehicles and avoid lingering in them. If you cannot see a vehicle's mirrors, assume its driver cannot see you.
Unlike static zones, dynamic blind spots are areas that change with vehicle speed, acceleration, deceleration, and lateral movement. For instance, when a bus begins to turn, the blind spot along its side will shift and expand, creating a different hazard than when it is traveling in a straight line.
Dynamic blind spots require continuous monitoring and adjustment of your riding position. They demand a proactive approach, predicting how other vehicles' movements will affect their blind zones and consequently, your visibility to them.
The size and location of blind spots vary significantly between different types of vehicles. As a motorcyclist, you are vulnerable to the blind spots of all surrounding traffic, and you must also be aware of your own.
Most passenger cars and small vans have blind spots extending approximately 1.5 metres to each side, sometimes more depending on the vehicle's design and mirror adjustment. These zones are typically found slightly behind and to the side of the vehicle, where they are not fully covered by the side-view mirrors. Even a momentary lapse can cause a motorcyclist to disappear from a car driver's vision.
Medium to large trucks and buses possess significantly larger blind spots compared to cars. These are often referred to as "No-Zones" due to their immense danger.
Articulated vehicles, such as tractor-trailers, have the most extensive blind spots. In addition to the large side and rear no-zones, they have a critical blind spot created by the trailer's "shoulder." This is the area just behind the tractor cab, along the front section of the trailer. This lateral area can extend 2-3 metres and is completely invisible to the driver. When passing or being passed by such a vehicle, avoid riding in this zone for any length of time.
While we focus on other vehicles' blind spots, motorcycles also have their own. Your body, especially when looking down at instruments or in certain postures, can momentarily block your peripheral view. The narrow profile of a motorcycle, combined with the often limited field of view from standard mirrors, means that you must actively turn your head to gain full lateral awareness.
Your mirrors are your primary tool for extending your field of vision. Proper adjustment and consistent use are non-negotiable for safe riding.
The rear-view mirror is typically mounted on the handlebars and provides a direct view of the traffic immediately behind you. It should be adjusted so that you can clearly see the road directly behind your motorcycle, ideally showing the rear bumper of a following vehicle at approximately a 1-metre distance. This helps you judge closing speeds and distances accurately.
Side-view mirrors are usually attached to the fork or side of the handlebars. They extend your lateral and rear view, covering the lanes adjacent to you. Each side mirror should be adjusted to show a small sliver of your own shoulder or arm on the inner edge, with the majority of the mirror showing the lane next to you and the vehicles approaching from behind in that lane. This minimal overlap helps to reduce the blind area between your direct rear vision and your peripheral vision.
Helmet-mounted mirrors are a valuable accessory, especially in dense urban traffic. They offer a quick, subtle way to check your immediate sides without significant head movement, enhancing your lateral awareness.
These small reflective surfaces can be attached to your helmet visor or shell. When properly aligned, they allow you to quickly glance at a small area of the side lane with minimal eye movement, providing an instant safety check. They are particularly useful when preparing for a quick lane change or navigating congested areas where larger head turns might be impractical or destabilizing.
Proper mirror adjustment is a one-time setup that pays dividends in safety every time you ride.
Mount your motorcycle and sit in your normal riding position.
Adjust your Rear-View Mirror (RVM) so you can clearly see the road directly behind you, ensuring the rear bumper of a trailing vehicle is visible at about 1 metre.
Adjust each Side-View Mirror (SVM) so that you see mostly the adjacent lane and vehicles behind, with only a small portion showing your arm or shoulder. The goal is to minimize the overlap with your RVM and maximize coverage of the lateral blind spots.
If using a Helmet-Mounted Mirror, align it to reflect a small area of the side lane when you look straight ahead, allowing for quick, subtle checks.
Confirm your adjustments by observing traffic in all mirrors. Ensure a continuous visual field from your RVM to your SVMs, with minimal gaps.
Incorrect mirror adjustment creates unnecessary blind zones. Take the time to set them up correctly before every ride.
Even with perfectly adjusted mirrors, there will always be areas that remain hidden. This is where the head-check becomes a life-saving maneuver.
A brief, deliberate turn of the head (approximately 30-45 degrees) to visually confirm that the space in the blind spot is clear before initiating any lateral movement, such as a lane change or overtake.
The head-check provides direct visual verification of an area that mirrors simply cannot cover. It is a mandatory action before almost any lateral maneuver on the road.
Performing a head-check should be integrated smoothly into your riding routine for any lateral movement.
Assess the situation: Determine if a lane change or overtaking maneuver is necessary and safe.
Signal your intent: Activate your turn signal well in advance to inform other road users.
Check your mirrors: Scan your rear-view and side-view mirrors to assess traffic flow and identify potential hazards.
Reduce throttle slightly (if needed): A slight throttle reduction can help stabilize the motorcycle and prepare for the maneuver.
Perform the head-check: Briefly turn your head (30-45 degrees) over your shoulder in the direction you intend to move. This rapid glance should confirm that the blind spot is completely clear.
Execute the maneuver: Once you confirm the path is clear, smoothly and confidently initiate the lane change or overtake.
Cancel signal: Once the maneuver is complete, cancel your turn signal.
Mirrors, by their very nature, distort distance and only reflect light from a specific angle. A vehicle entering your blind spot after your mirror check, or one that was perfectly aligned to be invisible at the moment you checked, can lead to a collision if you rely solely on mirrors. The head-check eliminates this uncertainty by providing a direct, unfiltered view of the critical blind spot area. It's the final, crucial verification.
Beyond mirrors and head-checks, a continuous and systematic approach to scanning your environment is key to comprehensive blind spot management and overall safety.
A lateral scanning cycle is a repeated, systematic pattern of observation that ensures you maintain continuous awareness of your surroundings. It's a fundamental part of defensive riding.
A consistent and systematic pattern of observation where the rider repeatedly checks mirrors, scans forward, uses peripheral vision, and performs head-checks to maintain continuous situational awareness of evolving traffic dynamics.
This cycle should be fluid and integrated into your riding. While riding steadily, perform quick checks of your side mirrors every 5-8 seconds. Before any lateral movement, always include a full head-check.
Visual scanning involves rapidly and repeatedly moving your eyes to different areas of interest – far ahead, near, left, right, mirrors, dashboard. For blind spot management, this means not just glancing at mirrors, but actively seeking out potential hazards, especially in areas where blind spots might exist. Train your eyes to detect subtle movements or lights that indicate a vehicle approaching from the side or rear.
Your peripheral vision is the outer part of your visual field. While it's not sharp enough for precise detail, it's excellent for detecting motion and changes in light or shape. Consciously expand your awareness to include movement at the edges of your vision. This can give you an early warning of a vehicle or object starting to enter your blind spot, even before you directly focus on it.
Sight-line management means actively choosing where to look to maximize your information gathering while riding. Avoid looking down at your dashboard or instruments for prolonged periods, as this narrows your field of vision and takes your attention away from the road ahead and your crucial mirrors. Keep your eyes up and moving, constantly assessing the entire traffic picture.
Your position on the road can significantly influence your visibility to other drivers and your ability to see hazards. Strategic positioning is a proactive way to minimize your exposure to blind spots.
When riding alongside larger vehicles, especially cars, vans, or trucks, adopt a "two-finger offset" position. This means riding slightly offset from the centreline of the lane, typically towards the side opposite the larger vehicle. This creates a slightly larger safety margin and positions you better to see the driver's side mirror. It also gives you more space to react if the other vehicle makes a sudden move.
Adjusting your speed is a powerful tool.
Consider your lane choice and specific position within the lane carefully.
The Dirección General de Tráfico (DGT) has specific guidelines and regulations designed to enhance road safety, many of which directly relate to blind spot awareness and prevention for motorcyclists holding A, A1, and A2 licences.
Mandatory (DGT Manual, Article 320): Riders must ensure the lane they intend to occupy is completely clear and safe before commencing any overtaking manoeuvre on public roads. This explicitly covers checking for vehicles in blind spots.
Rationale: This rule directly addresses the danger of collisions caused by unseen vehicles in blind zones. It places the onus on the overtaking rider to perform all necessary checks.
Mandatory (Circular 191/2009): The continuous and correct use of mirrors is compulsory while riding, especially in traffic.
Rationale: Mirrors are fundamental for extending a rider's field of view, compensating for the motorcycle's narrow body and the rider's position. Incorrect or neglected mirror use significantly increases accident risk.
Mandatory (DGT Circular 4/2018): A head-check is mandatory before any lateral movement, including lane changes, overtaking, or merging.
Rationale: This rule acknowledges the inherent limitations of mirrors and emphasizes that a direct visual check is the only way to conclusively verify a clear blind spot, preventing dangerous side-collisions.
Recommended (Best practice): Maintain at least 1 metre distance from the side of larger vehicles (cars, vans, trucks, buses) when riding alongside them.
Rationale: While not always strictly codified as a legal minimum, this is a crucial best practice. It provides a buffer zone, giving the rider more time to react to sudden movements by the larger vehicle and positions the rider outside the immediate, critical blind spot.
Recommended: Using helmet-mounted mirrors is advised when riding in heavy traffic or urban environments where space for side-mirror checks might be limited.
Rationale: This recommendation highlights the benefit of these accessories in enhancing immediate side views without requiring larger, potentially destabilizing head movements, thereby improving rapid situational awareness.
It is always advisable to consult the latest official DGT Manual and relevant circulars for the most up-to-date and precise wording of all regulations, as traffic laws can be updated. Understanding the legal intent behind these rules is as important as memorizing them.
Many collisions stem from fundamental misunderstandings or shortcuts taken with blind spot management.
Blind spot management is not a one-size-fits-all approach. The environment and conditions dictate how you should adapt your scanning and positioning.
Cyclists and pedestrians also occupy the same blind zones as motorcycles. When you are looking for blind spots of cars and trucks, remember to also scan for these vulnerable road users, especially when maneuvering near intersections, cycle lanes, or pedestrian crossings. They are often even harder to spot than other vehicles.
Let's look at some practical scenarios to solidify your understanding.
Setting: Two-lane city street, light rain, moderate traffic. You are approaching a parked car and plan to overtake it. Correct Behavior: You activate your left turn signal early. You check your rear-view mirror for following traffic, then your left side-view mirror. You perform a brief, decisive head-check over your left shoulder to ensure no bicycle, scooter, or car is entering your blind spot from behind or is hidden by the parked car's own blind spot. You adjust your speed, maintain a safe offset from the parked car, and smoothly overtake. Incorrect Behavior: You rely only on your mirrors. As you begin to move left, a small delivery van, hidden in your blind spot and the parked car's blind spot due to the rain-reduced visibility, suddenly appears, forcing an emergency braking or a collision.
Setting: Dual carriageway (autovía), night, headlights on high beam, low to moderate traffic. You intend to change lanes to the left to overtake a slower vehicle. Correct Behavior: You signal your intent to change lanes to the left. You check your left side-view mirror, looking for headlights approaching from behind. Crucially, you perform a thorough, albeit quick, head-check over your left shoulder to confirm no vehicle is rapidly entering your blind spot. Seeing a clear path, you smoothly transition into the left lane. Incorrect Behavior: You only glance at your side-view mirror, failing to account for the reduced visibility at night. A fast-approaching car with dim headlights is in your blind spot, and you begin your lane change, leading to a dangerous near-miss or side-swipe collision.
Setting: Two-lane rural road converging onto a narrow bridge, with a large truck following closely behind you. Correct Behavior: You actively monitor your rear-view mirror to keep track of the truck's position and speed. As you approach the narrow bridge, you anticipate the truck's large turning radius and blind spots. You decide it's safer to slow down and allow the truck to pass first, ensuring you are never in its critical side blind spots during the tight maneuver over the bridge. Incorrect Behavior: You assume the truck driver will see you and maintain your speed. As the truck begins to approach the bridge, it edges towards you, with your motorcycle in its blind spot, leading to a dangerous squeeze against the bridge barrier or a collision.
Effective blind spot management is a cornerstone of defensive motorcycle riding and a critical skill for all riders seeking A, A1, and A2 licences in Spain.
Blind spot awareness is not just about avoiding immediate collisions; it's about developing a proactive mindset. This involves continuously scanning your environment, anticipating potential hazards, and making informed decisions about your road position and maneuvers.
Through consistent scanning and mirror usage, you build a mental "situational map" of the traffic around you. This reduces cognitive load during critical decision-making moments, allowing you to react faster and more safely to evolving traffic conditions.
Mastery of these blind spot concepts, techniques, and DGT regulations is a mandatory competency for your Spanish Motorcycle Theory Exam. Demonstrating this knowledge not only ensures you pass but also equips you with essential skills for a lifetime of safe riding.
By internalizing these principles – understanding blind spots, using your mirrors correctly, performing mandatory head-checks, employing lateral awareness techniques, and adopting strategic road positioning – you will significantly enhance your safety and confidence on the road.
This lesson covers the critical skill of identifying and managing blind spots for motorcycle riders in Spain, distinguishing between static blind spots (fixed vehicle dimensions) and dynamic blind spots (changing with traffic flow). It explains specific blind spot zones for different vehicle types—cars extending ~1.5m to each side, trucks and buses with large 'No-Zones' including side, rear, and front areas, and articulated vehicles with additional trailer shoulder blind spots. The lesson provides step-by-step procedures for proper mirror adjustment (rear-view and side-view mirrors showing specific coverage areas) and mandatory head-check technique (30-45 degree brief head turn before any lateral maneuver). It emphasizes that mirrors alone are insufficient, that DGT regulations require both mirror use and head-checks, and that riders must adopt strategic positioning and continuous scanning habits to avoid blind spot collisions.
A short set of high-value points that capture the most important learning from this lesson.
Blind spots are areas around vehicles that cannot be seen through mirrors or direct vision, including zones created by other vehicles and your own motorcycle's structure
Vehicles have static blind spots (fixed by vehicle dimensions) and dynamic blind spots that change with speed, acceleration, and direction
If you cannot see a vehicle's mirrors, assume its driver cannot see you—never linger in another vehicle's blind spot
Proper mirror adjustment is essential: rear-view mirror should show road behind with trailing vehicle bumper at ~1 metre, side mirrors should show adjacent lanes with minimal self-overlap
The head-check is a mandatory life-saving verification that must occur before any lateral movement—not optional and not replaceable by mirrors alone
Explore all units and lessons included in this driving theory course.
Cars have blind spots extending approximately 1.5 metres to each side; trucks and buses have much larger 'No-Zones' along their entire sides, front, and rear
A head-check involves a brief 30-45 degree head turn to directly verify the blind spot area, and it must be performed before signaling or initiating movement
Maintain at least 1 metre distance from the side of larger vehicles when riding alongside them
In rain or fog, blind spots are effectively larger due to reduced visibility—increase scanning frequency and extend head-check duration
Use the full width of your lane strategically; never ride between two larger vehicles ('sandwiching') as this places you in multiple blind spots simultaneously
Relying solely on mirrors before lane changes—mirrors reduce but never eliminate blind spots, so a head-check is always required
Performing the head-check after already beginning to signal or initiate movement—this is too late to react if a hazard is present
Adjusting mirrors incorrectly (too wide or too narrow), which creates larger unobserved zones instead of eliminating them
Assuming all vehicles have similar blind spot sizes—trucks and buses have significantly larger no-zones than cars
Neglecting increased scanning frequency in poor visibility conditions such as rain, fog, or bright sunlight
Lesson content overview
A short set of high-value points that capture the most important learning from this lesson.
Blind spots are areas around vehicles that cannot be seen through mirrors or direct vision, including zones created by other vehicles and your own motorcycle's structure
Vehicles have static blind spots (fixed by vehicle dimensions) and dynamic blind spots that change with speed, acceleration, and direction
If you cannot see a vehicle's mirrors, assume its driver cannot see you—never linger in another vehicle's blind spot
Proper mirror adjustment is essential: rear-view mirror should show road behind with trailing vehicle bumper at ~1 metre, side mirrors should show adjacent lanes with minimal self-overlap
The head-check is a mandatory life-saving verification that must occur before any lateral movement—not optional and not replaceable by mirrors alone
Explore all units and lessons included in this driving theory course.
Cars have blind spots extending approximately 1.5 metres to each side; trucks and buses have much larger 'No-Zones' along their entire sides, front, and rear
A head-check involves a brief 30-45 degree head turn to directly verify the blind spot area, and it must be performed before signaling or initiating movement
Maintain at least 1 metre distance from the side of larger vehicles when riding alongside them
In rain or fog, blind spots are effectively larger due to reduced visibility—increase scanning frequency and extend head-check duration
Use the full width of your lane strategically; never ride between two larger vehicles ('sandwiching') as this places you in multiple blind spots simultaneously
Relying solely on mirrors before lane changes—mirrors reduce but never eliminate blind spots, so a head-check is always required
Performing the head-check after already beginning to signal or initiate movement—this is too late to react if a hazard is present
Adjusting mirrors incorrectly (too wide or too narrow), which creates larger unobserved zones instead of eliminating them
Assuming all vehicles have similar blind spot sizes—trucks and buses have significantly larger no-zones than cars
Neglecting increased scanning frequency in poor visibility conditions such as rain, fog, or bright sunlight
Explore search topics learners often look for when studying Identifying Blind Spots. These topics reflect common questions about road rules, driving situations, safety guidance, and lesson level theory preparation for learners in Spain.
Browse additional driving theory lessons that cover connected traffic rules, road signs, and common driving situations related to this topic. Improve your understanding of how different rules interact across everyday traffic scenarios.
Learn advanced techniques for road positioning, speed modulation, and scanning to avoid blind spots and enhance rider visibility. Essential for safe navigation in Spain.
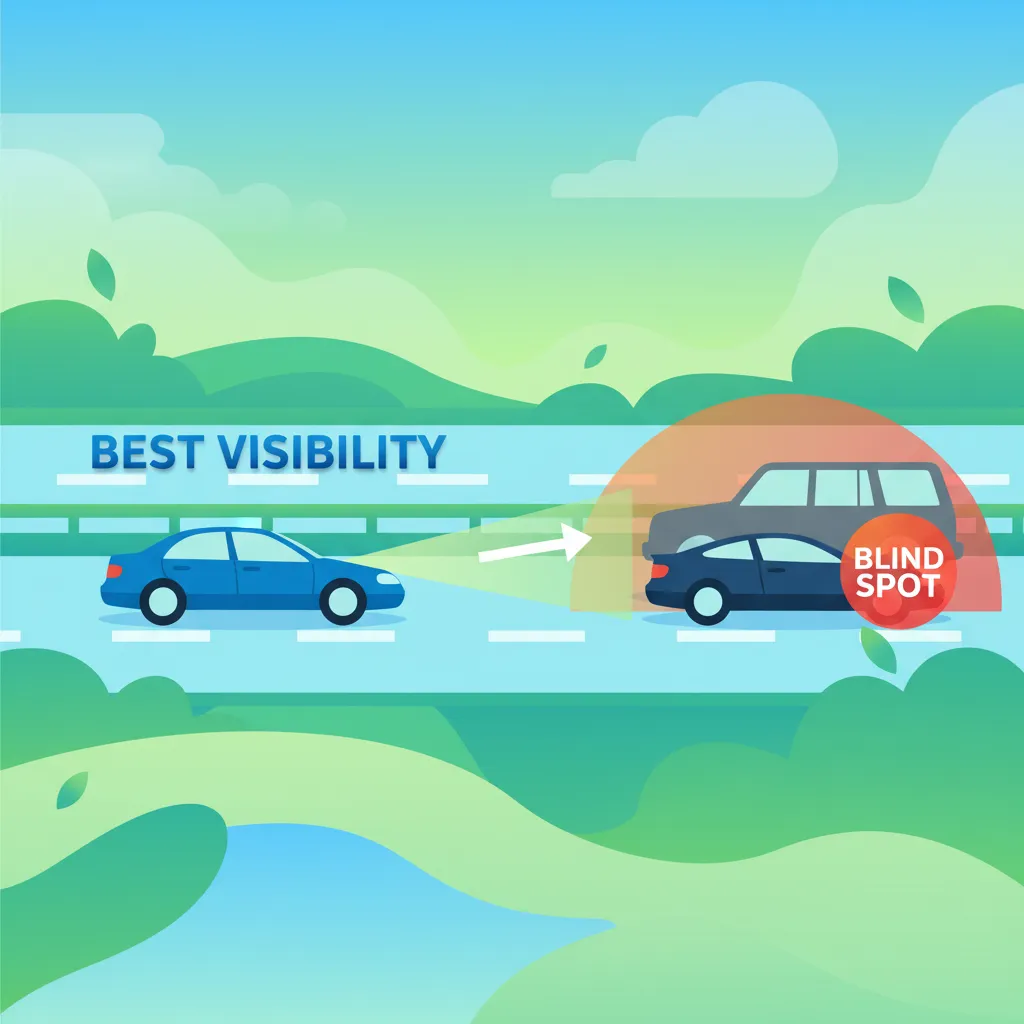
This lesson explores proper lane positioning, emphasizing strategic selection of traffic lanes for optimal visibility. It explains the importance of rider line of sight and peripheral vision in maintaining situational awareness. The content also covers legal aspects of lane splitting and correct usage of road shoulders, abiding by DGT regulations.

This lesson focuses on strategies for maximizing rider visibility in daylight and nighttime conditions, covering high-visibility apparel, reflective vests, and LED accessories. It delves into rider posture and lane positioning that improve sightlines and reduce collision risk. The content aligns with DGT regulations for illumination levels on motorcycles.

This lesson focuses on defensive maneuvers in mixed traffic environments where various vehicles share the road. It outlines lane discipline, appropriate overtaking safety measures, and strategies for maintaining a safety corridor. The content incorporates DGT defensive guidelines, teaching riders to manage space and anticipate unpredictable driver behavior.

This lesson focuses on interaction dynamics with larger vehicles like cars, trucks, and buses, detailing their specific blind spot zones. Strategies for safely sharing lanes, overtaking etiquette, and proper approach when a bus stops are covered. The lesson also includes guidance on merging onto acceleration lanes following DGT policies.

This lesson introduces anticipation techniques that improve a rider’s ability to predict potential hazards before they manifest. It covers scanning ahead, evaluating traffic patterns, and applying DGT risk assessment criteria. Emphasis is placed on developing a defensive riding mindset and maintaining safety margins to reduce accident likelihood.

This lesson examines the principles of maintaining a safe following distance, including the 'two-second rule' and its adjustments for speed and weather. It focuses on effective blind-spot management, teaching drivers how to use mirrors and head checks. The content integrates DGT guidelines on creating a safety buffer around the vehicle to allow time to react to unexpected events.

This lesson presents advanced cornering scenarios common on Spanish roads, such as mountain hairpins and high-speed autovía exits. It outlines specific techniques for descent control, ascent maneuvers, and safely merging into traffic after cornering. Interaction with cyclists and emergency cornering strategies are also covered in accordance with DGT regulations.

This lesson focuses on the optimal position for a moped within a traffic lane to maximize visibility and safety. It discusses the importance of maintaining a safety buffer from other vehicles and hazards, particularly the risk posed by the doors of parked cars. The content explains how to use lane positioning strategically to discourage unsafe overtaking and to be clearly seen by drivers in front and behind, especially when approaching intersections.

This lesson focuses on safe nighttime riding, covering headlight alignment, rear-light visibility, and the use of reflective gear to enhance conspicuity. It explains DGT night riding requirements, including mandatory lighting standards. Topics also include managing glare from oncoming vehicles and mitigating rider fatigue during low-light conditions.
Master the correct adjustment and use of motorcycle mirrors and perform effective head-checks. Essential skills for confirming blind spots are clear before maneuvers, as required by DGT.

This lesson outlines the proper use and legal requirements of vehicle lighting and mirror systems. It covers headlamps, fog lights, turn signals, and brake lights, clarifying when each must be used according to DGT regulations. The lesson also explains the correct adjustment of rearview and side mirrors and strategies for effective blind-spot monitoring.
Find clear answers to common questions learners have about Identifying Blind Spots. Learn how the lesson is structured, which driving theory objectives it supports, and how it fits into the overall learning path of units and curriculum progression in Spain. These explanations help you understand key concepts, lesson flow, and exam focused study goals.
On a motorcycle, your own helmet and shoulders can create blind spots, especially when checking mirrors. Additionally, every vehicle, particularly larger ones like trucks and vans, has significant blind spots on their sides and directly behind them, where a motorcyclist can easily be hidden from the driver's view on Spanish roads.
You should continuously scan your mirrors as part of your overall situational awareness, especially before any maneuver. However, a crucial 'head check' (quickly turning your head to directly look into the blind spot area) is mandatory before every lane change, turn, or merge to confirm the area is truly clear, as per DGT recommendations.
Yes, the DGT exam frequently includes questions on hazard perception, which often involves scenarios related to blind spots. These questions assess your understanding of how to identify and react to hidden vehicles or how to position your A, A1, A2 motorcycle to avoid being in another driver's blind spot.
A mirror check involves glancing at your rearview mirrors for traffic behind and to your sides. A head check, however, is a quick, decisive turn of your head (over your shoulder) to directly scan the area not visible in your mirrors. Both are essential for complete blind spot coverage and safe riding in Spain.
To enhance your visibility, maintain a safe following distance, ride in a lane position that gives you the best view and makes you visible in other drivers' mirrors, and use your high-beam during the day if conditions allow. Avoid lingering in known blind spot zones of larger vehicles on Spanish roads.
Use our powerful search functionality to pinpoint specific Spanish DGT driving theory practice sets. Filter by road sign categories, traffic law topics, or question difficulty to build custom study sessions and reinforce your knowledge precisely where it matters for your official exam.