This lesson explains how to calculate the total stopping distance by combining perception-reaction distance with braking distance. You will also learn to adapt your following gap based on speed, weather, and road conditions to meet Swiss Category B requirements.

Lesson content overview
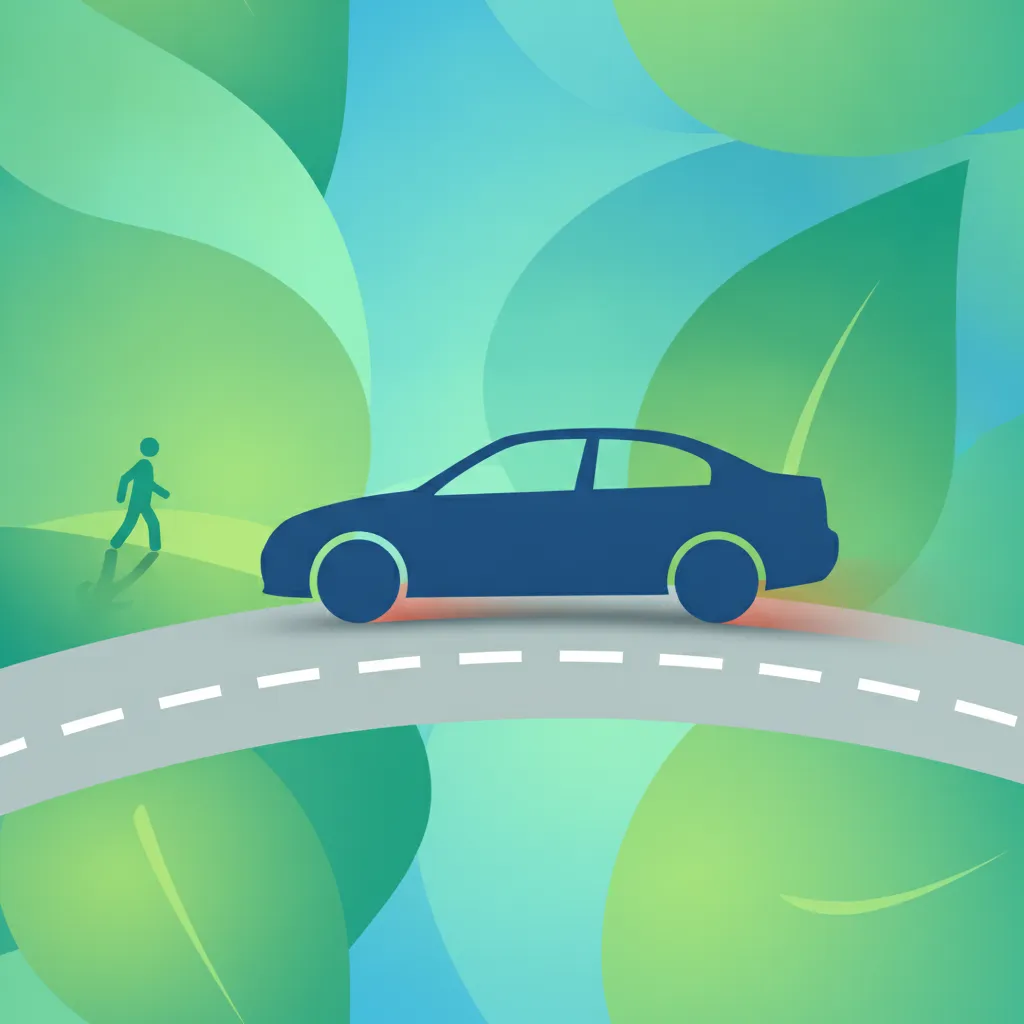
Navigating the roads safely in Switzerland, especially as a Category B license holder, requires a deep understanding of how to calculate and maintain safe distances from other vehicles and potential hazards. This lesson delves into the critical concepts of total stopping distance and appropriate following gaps, equipping you with the knowledge to prevent collisions and react effectively to unexpected situations. These principles are fundamental to defensive driving and are an essential part of the Comprehensive Swiss Driving Theory Course for Category B License.
Total stopping distance is the overall distance a vehicle travels from the moment a driver perceives a hazard until the vehicle comes to a complete halt. It is not a single, fixed value but rather a dynamic calculation influenced by numerous factors. This crucial distance is composed of two primary elements: the perception-reaction distance and the braking distance. Mastering the distinction and interaction between these components is vital for ensuring road safety.
The perception-reaction distance is the distance your vehicle covers during the time it takes for you, as the driver, to perceive a hazard, process that information, decide on an action, and then physically initiate the braking process. This initial segment of the total stopping distance highlights the human element in driving safety.
Under normal, ideal conditions, an alert driver typically has a reaction time of approximately 1.0 to 1.5 seconds. During this brief period, your vehicle continues to travel at its current speed. For example, if you are driving at 70 km/h, which is approximately 19.44 metres per second, a 1.5-second reaction time means your vehicle will cover around 29 metres before you even begin to apply the brakes.
However, various factors can significantly alter this reaction time. Fatigue, distraction (such as using a mobile phone), illness, or the influence of alcohol or drugs can extend this period considerably, sometimes beyond 2 seconds. Conversely, highly alert and experienced drivers in predictable situations might react slightly faster, potentially under 0.8 seconds. Understanding this variability is crucial because a longer perception-reaction time directly translates to a greater distance covered before any braking action can take place, thereby increasing the total stopping distance.
Braking distance is the distance your vehicle travels from the precise moment the brakes are applied until it comes to a complete stop. Unlike perception-reaction distance, which is primarily a function of human factors, braking distance is dictated by the laws of physics and the interaction between your vehicle, its tyres, and the road surface.
Several critical factors influence braking distance:
For instance, a vehicle travelling at 100 km/h (approximately 27.78 m/s) on a dry asphalt road might have a braking distance of around 37 metres. On a wet road, this could easily extend to 55 metres or more, highlighting the necessity of adjusting your driving to prevailing conditions.
The total stopping distance is the sum of your perception-reaction distance and your braking distance. It provides a comprehensive measure of the space you need to bring your vehicle to a complete stop safely under specific conditions.
A simplified formula for estimating total stopping distance (in metres, with speed in km/h) is:
Total Stopping Distance ≈ (Speed in km/h × Reaction Time in seconds × 1000/3600) + (Speed in km/h)² / (254 × Friction Coefficient)
Breaking down the formula:
(Speed in km/h × Reaction Time in seconds × 1000/3600): This converts speed from km/h to m/s and calculates the perception-reaction distance. For practical purposes in Switzerland, a common approximation is to multiply your speed (in km/h) by 3 and divide by 10 to get an approximate distance in metres for 1 second of reaction time, then adjust for actual reaction time.(Speed in km/h)² / (254 × Friction Coefficient): This is the simplified braking distance formula, where 254 is a constant derived from gravitational acceleration and unit conversions, and the friction coefficient (µ) reflects the grip between tyres and road.Practical Tip for Estimation: A common rule of thumb for quick estimation in metres (for dry conditions and 1 second reaction time) is to divide your speed in km/h by 10, then multiply the result by itself for braking distance, and multiply your speed (in km/h) by 3 for reaction distance. For example, at 100 km/h: (10 * 10) = 100m for braking, plus (100 * 3) = 30m for reaction, totaling 130m. While this is a rough estimate and varies greatly with friction, it highlights the significant distances involved. The precise formula is more accurate.
Understanding this formula and its components is crucial for judging safe following distances and adapting your speed. For example, at 80 km/h on dry asphalt (µ=0.7) with a 1.5-second reaction time:
This example clearly demonstrates that even at moderate speeds, a substantial distance is required to bring a vehicle to a complete stop.
Beyond understanding your own vehicle's stopping capabilities, maintaining a safe following gap (or headway) behind the vehicle in front is paramount. This gap provides the necessary time and space for you to perceive, react, and brake safely if the leading vehicle suddenly slows down or stops. Swiss driving regulations place a strong emphasis on this principle to prevent rear-end collisions, which are among the most common types of road accidents.
The primary purpose of a safe following gap is to provide an adequate safety margin, allowing you to react and stop without colliding with the vehicle ahead, even if they brake abruptly. When you follow too closely, often referred to as "tailgating," you severely reduce your perception-reaction time and eliminate any buffer for your braking distance. This significantly increases the risk of a rear-end collision, especially in dynamic traffic situations or adverse conditions.
Following gap can be expressed in two ways:
To measure a 2-second gap, select a fixed point on the road (e.g., a sign, a bridge, a specific tree) that the vehicle in front of you passes. As the leading vehicle passes that point, begin counting "one thousand one, one thousand two." If your vehicle reaches the same point before you finish counting, you are following too closely.
The "Two-Second Rule": This is a commonly taught and legally recognized minimum for safe following distance under ideal conditions. It provides sufficient time for most drivers to react and initiate braking if the vehicle ahead suddenly stops. However, it's a minimum, not always sufficient.
Swiss guidelines provide clear recommendations for following gaps, emphasizing the need to adapt to varying conditions. These temporal gaps are designed to accommodate the increased perception-reaction and braking distances under challenging circumstances.
It is always prudent to err on the side of caution and maintain an even larger gap if you feel uncomfortable or if conditions are particularly challenging.
Multiple elements coalesce to determine the actual stopping distance and the appropriate following gap. A skilled driver continuously assesses these factors and adjusts their driving behavior accordingly.
As discussed, speed is the most influential factor in braking distance. The kinetic energy of a moving vehicle increases with the square of its speed. This means that if you double your speed from 50 km/h to 100 km/h, your braking distance will not just double, but approximately quadruple (ignoring perception-reaction time for a moment). This exponential relationship underscores why even a slight increase in speed can have a profound impact on safety, especially when unexpected braking is required. Higher speeds also reduce the time available for perception and reaction, further compounding the challenge.
The road surface's friction coefficient (µ) directly dictates how effectively your tyres can grip and bring the vehicle to a halt.
Drivers must constantly assess the road surface and adjust their speed and following gap to match the prevailing friction levels.
As the foundation of perception-reaction distance, driver alertness is non-negotiable for road safety.
Maintaining an alert, focused state is the driver's responsibility and a crucial component in minimizing total stopping distance.
Reduced visibility limits your ability to perceive hazards early, thereby impacting your effective perception-reaction time.
The "Stopping Distance Must Not Exceed Visibility" Rule: In conditions of poor visibility, such as fog or heavy rain, your speed must be low enough that your total stopping distance is always less than the distance you can see ahead. If you can only see 30 metres, your vehicle must be able to stop within 30 metres.
The mechanical condition and loading of your vehicle directly influence its stopping capabilities.
Swiss road traffic laws rigorously enforce the principles of safe distances and appropriate speed, reflecting their critical role in accident prevention.
Violation of these regulations can lead to significant fines, license penalties, and, most importantly, greatly increases the risk of serious accidents.
Even experienced drivers can sometimes make errors regarding stopping distance and following gaps. Awareness of these common pitfalls is the first step towards safer driving.
Understanding the theory is one thing; applying it in dynamic driving situations is another. Here are some scenarios illustrating how these principles are put into practice.
These scenarios emphasize that safe driving involves constant vigilance and dynamic adjustment of speed and distance, not just adherence to fixed rules.
Stopping distance consists of perception-reaction distance (the distance covered during human reaction time) and braking distance (governed by physics and road friction), with speed being the dominant factor that increases both exponentially. Swiss guidelines recommend a minimum 2-second gap on dry roads, extending to 3 seconds in wet conditions and 4-5 seconds on snow or ice, with legal requirements under Article 40 SVG mandating that drivers maintain sufficient distance to stop safely. Key factors affecting braking include road surface friction (µ values from 0.7 on dry asphalt to 0.1 on ice), tyre condition, vehicle load, and visibility conditions that determine how early a hazard can be perceived. Real-world application requires continuously adjusting both speed and following gap based on weather, road conditions, and the specific capabilities of your vehicle.
A short set of high-value points that capture the most important learning from this lesson.
Total stopping distance equals perception-reaction distance plus braking distance, and speed affects both exponentially.
Braking distance increases with the square of speed, meaning doubling your speed quadruples braking distance.
Under normal conditions, maintain a minimum 2-second following gap; increase to 3 seconds in wet conditions and 4-5 seconds on snow or ice.
In poor visibility, your total stopping distance must always be less than the distance you can see ahead.
Heavier vehicle loads and worn tyres significantly increase braking distance by reducing grip and increasing inertia.
Explore all units and lessons included in this driving theory course.
Reaction time is typically 1.0-1.5 seconds for an alert driver, but fatigue, distraction, or alcohol can extend it significantly.
Dry asphalt offers friction coefficient (µ) of 0.7-0.8; wet roads drop to 0.5-0.6; snow and ice can be as low as 0.1-0.2.
The two-second rule provides the same reaction buffer regardless of speed because it measures time, not metres.
Article 40 SVG requires drivers to keep enough distance to stop without colliding with the vehicle ahead.
On downhill slopes, use engine braking and increase your following gap to compensate for gravity-assisted momentum.
Assuming a fixed physical gap (like 30 metres) is safe at all speeds, when only a time-based gap adjusts appropriately.
Tailgating in wet conditions where both reduced friction and closer following distance combine to create extreme danger.
Driving at the speed limit in fog without reducing speed to ensure stopping distance stays within visible range.
Ignoring vehicle load when calculating safe following distance; passengers and cargo increase stopping distance.
Over-relying on ABS or driver-assist systems instead of maintaining legally required following gaps and full attention.
Lesson content overview
A short set of high-value points that capture the most important learning from this lesson.
Total stopping distance equals perception-reaction distance plus braking distance, and speed affects both exponentially.
Braking distance increases with the square of speed, meaning doubling your speed quadruples braking distance.
Under normal conditions, maintain a minimum 2-second following gap; increase to 3 seconds in wet conditions and 4-5 seconds on snow or ice.
In poor visibility, your total stopping distance must always be less than the distance you can see ahead.
Heavier vehicle loads and worn tyres significantly increase braking distance by reducing grip and increasing inertia.
Explore all units and lessons included in this driving theory course.
Reaction time is typically 1.0-1.5 seconds for an alert driver, but fatigue, distraction, or alcohol can extend it significantly.
Dry asphalt offers friction coefficient (µ) of 0.7-0.8; wet roads drop to 0.5-0.6; snow and ice can be as low as 0.1-0.2.
The two-second rule provides the same reaction buffer regardless of speed because it measures time, not metres.
Article 40 SVG requires drivers to keep enough distance to stop without colliding with the vehicle ahead.
On downhill slopes, use engine braking and increase your following gap to compensate for gravity-assisted momentum.
Assuming a fixed physical gap (like 30 metres) is safe at all speeds, when only a time-based gap adjusts appropriately.
Tailgating in wet conditions where both reduced friction and closer following distance combine to create extreme danger.
Driving at the speed limit in fog without reducing speed to ensure stopping distance stays within visible range.
Ignoring vehicle load when calculating safe following distance; passengers and cargo increase stopping distance.
Over-relying on ABS or driver-assist systems instead of maintaining legally required following gaps and full attention.
Explore search topics learners often look for when studying Calculating Stopping Distance and Following Gap. These topics reflect common questions about road rules, driving situations, safety guidance, and lesson level theory preparation for learners in Switzerland.
Browse additional driving theory lessons that cover connected traffic rules, road signs, and common driving situations related to this topic. Improve your understanding of how different rules interact across everyday traffic scenarios.
Learn how road visibility, such as in fog or at night, directly impacts the required safe stopping distance. Understand the critical rule that your stopping distance must not exceed your visible range, a key concept for Swiss Category B theory.
This lesson focuses on the rules governing when and how to stop a vehicle safely. You will learn to calculate the required stopping distance, considering reaction time and braking distance. The content also covers how to adjust stopping behavior for different road conditions and safe stopping techniques on inclines to ensure the vehicle remains under control.

This lesson examines the impact of weather and visibility on driving safety and speed selection. It covers how fog, rain, snow, and darkness affect visibility and reaction times, providing guidelines on adjusting speed. It also includes strategies for improving visibility, such as proper headlamp use, to ensure you can adapt to varying weather conditions.

Buses and coaches require significantly more distance to stop than cars. This lesson explains why the 'two-second rule' is insufficient and teaches the appropriate methods for calculating a safe gap in various conditions. Maintaining an adequate safety cushion is one of the most important defensive driving skills.

This lesson examines the different lighting systems on a vehicle, including headlamps, fog lights, and turn signals. It explains the appropriate use of low-beam and high-beam headlights and the conditions for activating fog lights. Understanding proper lighting usage improves visibility and safety, especially in low-light or adverse weather conditions.

This lesson demonstrates how speed dramatically affects a motorcycle's total stopping distance, which includes both reaction time and braking distance. It explains the physics involved and teaches riders how to choose a safe speed based on traffic, weather, and visibility. Adhering to Swiss speed limits and adjusting for conditions is presented as a critical safety skill.

This lesson breaks down total stopping distance into its two components: thinking (reaction) distance and braking distance. You will learn how factors like speed, vehicle weight, driver fatigue, and road surface conditions dramatically affect how long it takes to come to a complete stop. This understanding is critical for proactive hazard management.

This lesson focuses on general driving safety in areas with a high concentration of children. It stresses the importance of significantly reducing speed, being prepared for unexpected events, and scanning for children between parked cars. The driver must exhibit maximum vigilance in these high-risk environments at all times.

This lesson teaches the importance of maintaining a safe following distance to allow adequate time to react and stop. It explains methods like the 'two-second rule' for gauging a safe gap in ideal conditions. The content emphasizes increasing this distance in adverse weather or poor visibility to ensure a sufficient safety margin.

The immense mass of a loaded truck means its braking distance is far greater than that of a car. This lesson breaks down total stopping distance into reaction distance and braking distance, explaining how speed, weight, and road conditions have an exponential effect. It reinforces the necessity of maintaining a significantly larger following distance to ensure enough space to stop safely in an emergency.

This lesson examines the impact of various weather conditions on driving safety. It explains how to adjust speed in low visibility and the risks of aquaplaning in heavy rain. The content also covers using snow chains in snowy conditions, handling icy surfaces, and dealing with strong winds, particularly on bridges and open roads.
Explore the key elements that influence your vehicle's braking distance, including speed, road surface conditions (wet, icy), tyre condition, and vehicle load. Essential knowledge for understanding safe following gaps and defensive driving in Switzerland.
The immense mass of a loaded truck means its braking distance is far greater than that of a car. This lesson breaks down total stopping distance into reaction distance and braking distance, explaining how speed, weight, and road conditions have an exponential effect. It reinforces the necessity of maintaining a significantly larger following distance to ensure enough space to stop safely in an emergency.
This lesson focuses on the rules governing when and how to stop a vehicle safely. You will learn to calculate the required stopping distance, considering reaction time and braking distance. The content also covers how to adjust stopping behavior for different road conditions and safe stopping techniques on inclines to ensure the vehicle remains under control.

Wet or icy roads drastically reduce tyre grip and can double or triple braking distances. This lesson stresses the importance of significantly reducing overall speed and increasing following distances in such conditions. It advises on using brakes with extreme care to avoid skidding and explains how the vehicle's retarder should be used with caution as it can cause the drive wheels to lock up on slippery surfaces.
This lesson examines the impact of weather and visibility on driving safety and speed selection. It covers how fog, rain, snow, and darkness affect visibility and reaction times, providing guidelines on adjusting speed. It also includes strategies for improving visibility, such as proper headlamp use, to ensure you can adapt to varying weather conditions.
This lesson breaks down total stopping distance into its two components: thinking (reaction) distance and braking distance. You will learn how factors like speed, vehicle weight, driver fatigue, and road surface conditions dramatically affect how long it takes to come to a complete stop. This understanding is critical for proactive hazard management.
This lesson demonstrates how speed dramatically affects a motorcycle's total stopping distance, which includes both reaction time and braking distance. It explains the physics involved and teaches riders how to choose a safe speed based on traffic, weather, and visibility. Adhering to Swiss speed limits and adjusting for conditions is presented as a critical safety skill.

Large passenger vehicles rely on powerful air brake systems. This lesson explains how these systems work, including the importance of monitoring air pressure. It also details the function and proper use of auxiliary braking systems (retarders) to control speed on long descents and reduce wear on the service brakes.
Buses and coaches require significantly more distance to stop than cars. This lesson explains why the 'two-second rule' is insufficient and teaches the appropriate methods for calculating a safe gap in various conditions. Maintaining an adequate safety cushion is one of the most important defensive driving skills.

Relying solely on the service brakes on a long downhill stretch can lead to overheating and complete brake failure (brake fade). This lesson explains the function of auxiliary brakes like retarders. You will learn how and when to engage them to maintain a safe, controlled speed, preserving the main brakes for when they are truly needed.

Driving in the Alps requires a high level of skill and vehicle sympathy. This lesson covers techniques for climbing steep gradients by selecting the correct gear to maintain momentum without straining the engine. It reiterates the critical importance of using low gears and auxiliary brakes for descending, to ensure the service brakes remain cool and effective for the entire descent.
Find clear answers to common questions learners have about Calculating Stopping Distance and Following Gap. Learn how the lesson is structured, which driving theory objectives it supports, and how it fits into the overall learning path of units and curriculum progression in Switzerland. These explanations help you understand key concepts, lesson flow, and exam focused study goals.
A good rule of thumb is the two-second rule. Under dry, ideal conditions, you should be at least two seconds behind the vehicle in front. In poor weather, rain, or snow, this distance must be increased significantly.
Stopping distance does not increase linearly with speed; it increases with the square of the speed. Doubling your speed roughly quadruples your braking distance, which is a key concept in many theory exam questions.
The exam focuses on understanding the principles and the relative impact of speed and environment. You should understand the ratios and the influence of external factors rather than doing complex mental arithmetic with decimals.
Yes, tunnels require special attention. You should maintain a larger safety gap than on standard roads, as visibility and braking performance can be impacted by air currents or moisture in tunnels.
Pinpoint specific Swiss traffic rules, road signs, or driving situations you need to master. Use the practice search to start a focused revision session now and build confidence for your official driving theory exam.