This lesson provides a comprehensive guide to understanding the physical factors that influence the total stopping distance of heavy goods vehicles. By mastering the relationship between mass, speed, and braking systems, you will be prepared to answer critical safety questions in your Category C or C1 theory exam.

Lesson content overview
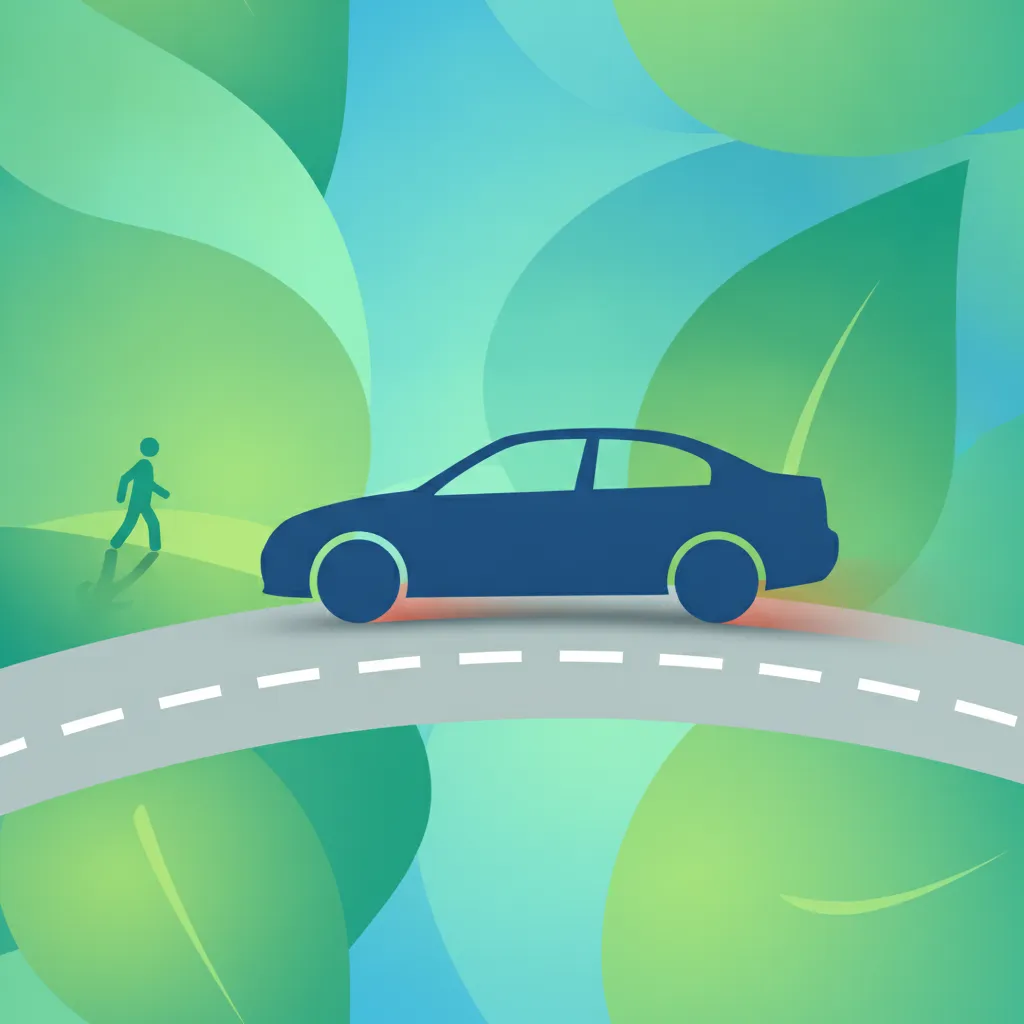
Operating heavy goods vehicles (HGVs) in Switzerland, whether Category C or C1, demands a profound understanding of vehicle dynamics, especially when it comes to stopping distances. Unlike passenger cars, the immense mass and momentum of a loaded truck mean that its total stopping distance is significantly greater, requiring professional drivers to apply advanced knowledge and conservative safety margins. This lesson delves into the crucial concepts of total stopping distance, breaking it down into its fundamental components: reaction distance and braking distance, and exploring how various factors exponentially influence these vital measurements. Mastering these principles is not merely a theoretical exercise; it is indispensable for ensuring safety on Swiss roads, from busy motorways to challenging mountain passes and urban environments.
Total stopping distance (TSD) represents the entire length a vehicle travels from the moment a driver perceives a hazard until the vehicle comes to a complete halt. For heavy goods vehicles, this distance is a critical safety parameter that dictates appropriate following distances and safe maneuvering. A thorough understanding of TSD is paramount for professional drivers, as underestimating it can lead to severe collisions, especially given the greater kinetic energy involved with large, heavy loads.
TSD is universally understood as the sum of two distinct phases:
The primary reason heavy vehicles require significantly longer stopping distances compared to passenger cars lies in their sheer mass and the resulting kinetic energy. Kinetic energy, which is directly proportional to mass and the square of velocity (KE = 0.5 * m * v²), must be entirely dissipated to bring a vehicle to a stop. A loaded truck, weighing many times more than a car, possesses vastly more kinetic energy at the same speed. Furthermore, heavy vehicle braking systems, while powerful, are designed for controlled deceleration rather than abrupt stops, to maintain stability and prevent load shift or loss of control, which inherently means a longer stopping distance. The combination of greater momentum, larger vehicle size, and the need for stable braking dictates these extended distances.
Reaction distance is the initial segment of the total stopping distance, representing the ground covered while the driver processes a situation and prepares to act. It is largely a human factor, influenced by the driver's state and cognitive abilities.
Reaction time for a driver is typically broken down into two parts:
Combined, the total reaction time for an HGV driver is conservatively estimated at around 2 seconds under normal conditions. This 2-second interval, though seemingly short, can translate into a substantial distance, particularly at higher speeds.
Calculating Reaction Distance: Reaction Distance (RD) = Speed (m/s) × Reaction Time (s)
For example, if a truck is traveling at 80 km/h (which is approximately 22.2 meters per second): RD = 22.2 m/s × 2 s = 44.4 meters.
This means that even before the brakes are engaged, the truck will have traveled over 44 meters from the moment the driver first recognized the need to stop.
Several factors can significantly extend an HGV driver's reaction time, thereby increasing the reaction distance:
Professional drivers must be acutely aware of these factors and take proactive measures, such as taking adequate rest breaks and eliminating distractions, to keep their reaction time as short as possible.
Swiss law recognizes the extended stopping distances of heavy vehicles and mandates specific minimum following distances. The Swiss Road Traffic Act (RS 820.0) stipulates that truck drivers must maintain:
These time-based rules are crucial because they automatically adjust the physical distance based on speed: the faster you go, the greater the physical distance required for a 2 or 4-second gap. Failure to adhere to these mandatory distances is a serious offense and can lead to significant penalties.
Maintaining a safe following distance is one of the most effective ways to compensate for the inherent limitations of heavy vehicle braking and driver reaction time.
Braking distance is the phase where the vehicle's kinetic energy is converted into heat through friction, bringing the vehicle to a complete stop. This distance is governed by the laws of physics and is influenced by a multitude of vehicle-specific and environmental factors.
The fundamental formula for calculating braking distance is:
BD = v² / (2 · a)
Where:
This formula highlights two critical relationships:
Understanding the variables that impact deceleration (a) is key to predicting and managing braking distance.
As demonstrated by the formula, speed is the most significant factor affecting braking distance. Even small increases in speed result in disproportionately longer stopping distances. This is due to the quadratic relationship with kinetic energy: a truck traveling at 80 km/h has four times the kinetic energy of the same truck traveling at 40 km/h, requiring four times the braking effort and distance to stop. This principle underscores the importance of adjusting speed, especially when approaching hazards or driving in challenging conditions.
The greater the mass of the vehicle, the greater its momentum (mass × velocity) and kinetic energy. A fully loaded heavy vehicle has significantly more momentum to overcome than an empty one. While brake systems are designed to handle heavy loads, the increased mass inherently translates to a longer braking distance, even with maximum braking effort. Load distribution also plays a critical role, as an unbalanced load can compromise tire grip and brake effectiveness on certain axles.
The friction coefficient (µ) between the tires and the road surface is a dominant factor in determining how effectively a vehicle can decelerate.
Drivers must constantly assess road conditions and adjust their speed and following distance accordingly.
Typical deceleration rates (a) for heavy vehicles are lower than those for passenger cars to ensure stability and control.
Regulatory guidance, such as the Swiss Road Traffic Ordinance (ORO), specifies minimum deceleration values for vehicle inspection (e.g., at least 3 m/s² for service brakes on vehicles over 3.5 t on dry roads), ensuring a basic level of braking performance.
The way cargo is distributed within a heavy vehicle directly impacts the weight on each axle, which in turn affects tire grip and braking efficiency.
Modern heavy vehicles are equipped with sophisticated braking technologies that significantly influence braking performance:
These systems, when properly maintained and used, enhance a heavy vehicle's ability to stop safely and maintain control. However, they do not negate the fundamental laws of physics regarding mass, speed, and friction.
The slope of the road significantly influences braking distance:
Two specific phenomena associated with heavy vehicle braking systems are critical to understand:
Brake fade is a serious risk. Always use auxiliary braking systems on long descents to avoid overheating your service brakes.
Combining the reaction distance and braking distance gives us the total stopping distance, which is the ultimate measure of the space a heavy vehicle needs to stop safely.
TSD = RD + BD
This simple equation has profound implications for safe driving. For instance, at 80 km/h on a dry road, with an RD of 44.4 m and a BD of, say, 80 m (for a loaded truck), the TSD would be approximately 124.4 m. On a wet road, where the BD might increase to 120 m, the TSD jumps to around 164.4 m. These distances are far greater than most drivers intuitively estimate.
Accurate estimation of TSD is a skill that heavy vehicle drivers must develop. It requires constant assessment of:
A conservative approach, always overestimating TSD rather than underestimating it, is the hallmark of a safe professional driver. This is particularly crucial when interacting with vulnerable road users, in dense traffic, or when adverse weather conditions prevail.
Compliance with Swiss regulations is not just a legal obligation; it's a fundamental aspect of safe and responsible heavy vehicle operation. These rules are designed to mitigate the inherent risks associated with the extended stopping distances of large vehicles.
As previously mentioned, the Swiss Road Traffic Act (RS 820.0) mandates specific minimum following distances for trucks:
These time-based rules are directly linked to the calculation of TSD, as they provide a practical, adaptable method for ensuring enough space to react and brake safely. For instance, a truck travelling at 70 km/h (approx. 19.4 m/s) in the rain should maintain a gap of at least 4 seconds, meaning a physical distance of at least 77.6 meters (19.4 m/s * 4 s).
To ensure that heavy vehicles possess adequate braking capabilities, the Swiss Road Traffic Ordinance (ORO) sets minimum performance standards. Specifically, it requires that the service brakes of vehicles exceeding 3.5 tonnes must achieve a deceleration of at least 3 m/s² on a dry road during vehicle inspections. This regulation ensures a baseline of braking effectiveness, but drivers must remember that actual performance can vary significantly with load, road conditions, and brake maintenance.
To prevent dangerous brake fade on descents, Swiss Driving Regulations include specific requirements for the use of auxiliary braking systems. It is mandatory to use retarders or engine brakes on gradients exceeding 4%, or whenever speed exceeds 40 km/h on a descent. This rule is crucial for preserving the effectiveness of the service brakes for emergency situations and ensuring controlled, safe descent.
While not always explicitly mandating the installation of ESC on older vehicles, Swiss regulations (in line with EU standards) require that any heavy vehicle equipped with ABS must have a fully functional system. Furthermore, ESC is highly recommended for vehicles over 3.5 tonnes. These systems are integral to modern heavy vehicle safety, helping to maintain steering control during emergency braking (ABS) and preventing skids or loss of stability during sudden maneuvers (ESC). Drivers must ensure these systems are operational before every journey.
Understanding the theory of braking distance is vital, but applying this knowledge in real-world scenarios requires diligent practice and awareness of common pitfalls.
One of the most frequent errors is maintaining a following distance that is inadequate for the vehicle's mass, speed, and prevailing conditions. Drivers often underestimate the actual TSD required, especially in adverse weather or with a heavy load.
Best Practice: Always use the 2-second (dry) or 4-second (adverse) rule, visually checking fixed points on the road, and increase this gap further when heavily loaded, visibility is poor, or conditions are particularly challenging.
Failing to use auxiliary braking systems (retarders, engine brakes) on long or steep descents is a dangerous mistake that can lead to complete brake fade and loss of control.
Select an appropriate lower gear before starting the descent to utilize engine braking effectively.
Engage the retarder early and maintain a controlled, safe speed.
Use the service brakes sparingly and with short, firm applications to avoid continuous heating, if additional braking is needed.
Monitor brake temperature indicators if available.
Ignoring load distribution and exceeding axle limits can severely compromise braking efficiency and vehicle stability. An unevenly distributed load can lead to reduced tire grip on certain axles or make the vehicle prone to jackknifing.
Best Practice: Always distribute cargo evenly and within legal axle weight limits. Verify load security before departure.
Assuming an instantaneous brake response or neglecting potential brake system deficiencies is risky. Brake lag, though short, adds to the total distance before deceleration begins.
Best Practice: Be aware of brake lag and factor it into your mental calculations for following distances, especially in situations requiring rapid braking. Regularly inspect brake components and ensure proper maintenance.
Calculating and understanding braking distance for heavy vehicles is a cornerstone of professional driving safety. The interplay of driver reaction time, vehicle speed, immense mass, road conditions, and advanced braking technologies creates a complex dynamic that demands constant vigilance and a highly conservative approach. By diligently applying the principles of reaction distance, braking distance, and total stopping distance, and by strictly adhering to Swiss regulations regarding following distances, retarder use, and vehicle maintenance, heavy vehicle drivers can significantly reduce the risk of accidents. Safety on the road is not just about getting from point A to point B; it's about doing so with the utmost care and respect for the physics that govern every mile traveled.
This lesson explains the physics and practical implications of braking distance for heavy vehicles, distinguishing between reaction distance (the distance traveled during perception and decision time, typically ~2 seconds) and braking distance (governed by the formula BD = v²/(2a) where speed has an exponential effect). It emphasizes that Swiss regulations require truck drivers to maintain a 2-second gap in normal conditions and a 4-second gap in adverse weather or on gradients, with mandatory retarder use on steep descents. The content also covers critical safety concepts including brake lag in pneumatic systems, brake fade prevention through auxiliary braking, and the importance of load distribution for maintaining braking efficiency. Mastering these principles is essential for both safe driving practice and passing the Swiss Category C/C1 theory exam.
A short set of high-value points that capture the most important learning from this lesson.
Total stopping distance (TSD) equals reaction distance plus braking distance; both components must be understood to appreciate the full picture
Speed increases braking distance quadratically (v²), meaning doubling speed roughly quadruples the braking distance required
Swiss law mandates a minimum 2-second following distance for trucks in normal conditions and 4 seconds in adverse conditions (wet, icy, steep gradients)
Heavy vehicles require significantly more stopping distance than passenger cars due to greater mass and momentum, even with advanced braking systems
Brake fade is a dangerous reduction in braking efficiency caused by overheating; auxiliary braking systems must be used proactively on long descents
Explore all units and lessons included in this driving theory course.
Retarders or engine brakes are mandatory on gradients exceeding 4% or when speed exceeds 40 km/h on descents per Swiss Driving Regulations
The friction coefficient (µ) drops dramatically: dry asphalt ~0.8, wet road ~0.5, snow/ice ~0.15-0.2, significantly increasing braking distance
Brake lag of 0.1-0.3 seconds exists in pneumatic braking systems before full braking force is achieved
Kinetic energy (KE = 0.5 × m × v²) must be entirely dissipated to stop; a loaded truck has vastly more energy than a car at the same speed
Heavy vehicle deceleration rates are lower than passenger cars (3-5 m/s² dry, often below 1 m/s² on ice) to maintain stability and prevent load shift
Maintaining insufficient following distance by underestimating how mass and speed combine to extend stopping distance
Failing to engage retarders or engine brakes early on descents, leading to service brake overheating and fade
Assuming brake response is instantaneous and not accounting for pneumatic brake lag in emergency situations
Overloading or unevenly distributing cargo, which reduces axle grip and brake effectiveness, increasing stopping distance
Ignoring the exponential relationship between speed and braking distance, leading to dangerous reactions when speed increases slightly
Lesson content overview
A short set of high-value points that capture the most important learning from this lesson.
Total stopping distance (TSD) equals reaction distance plus braking distance; both components must be understood to appreciate the full picture
Speed increases braking distance quadratically (v²), meaning doubling speed roughly quadruples the braking distance required
Swiss law mandates a minimum 2-second following distance for trucks in normal conditions and 4 seconds in adverse conditions (wet, icy, steep gradients)
Heavy vehicles require significantly more stopping distance than passenger cars due to greater mass and momentum, even with advanced braking systems
Brake fade is a dangerous reduction in braking efficiency caused by overheating; auxiliary braking systems must be used proactively on long descents
Explore all units and lessons included in this driving theory course.
Retarders or engine brakes are mandatory on gradients exceeding 4% or when speed exceeds 40 km/h on descents per Swiss Driving Regulations
The friction coefficient (µ) drops dramatically: dry asphalt ~0.8, wet road ~0.5, snow/ice ~0.15-0.2, significantly increasing braking distance
Brake lag of 0.1-0.3 seconds exists in pneumatic braking systems before full braking force is achieved
Kinetic energy (KE = 0.5 × m × v²) must be entirely dissipated to stop; a loaded truck has vastly more energy than a car at the same speed
Heavy vehicle deceleration rates are lower than passenger cars (3-5 m/s² dry, often below 1 m/s² on ice) to maintain stability and prevent load shift
Maintaining insufficient following distance by underestimating how mass and speed combine to extend stopping distance
Failing to engage retarders or engine brakes early on descents, leading to service brake overheating and fade
Assuming brake response is instantaneous and not accounting for pneumatic brake lag in emergency situations
Overloading or unevenly distributing cargo, which reduces axle grip and brake effectiveness, increasing stopping distance
Ignoring the exponential relationship between speed and braking distance, leading to dangerous reactions when speed increases slightly
Explore search topics learners often look for when studying Calculating Braking Distance for Heavy Vehicles. These topics reflect common questions about road rules, driving situations, safety guidance, and lesson level theory preparation for learners in Switzerland.
Browse additional driving theory lessons that cover connected traffic rules, road signs, and common driving situations related to this topic. Improve your understanding of how different rules interact across everyday traffic scenarios.
Understand how speed, mass, road surface, and vehicle condition exponentially impact heavy vehicle stopping distances. Essential knowledge for Swiss Category C and C1 drivers to ensure road safety and legal compliance.
This lesson focuses on the rules governing when and how to stop a vehicle safely. You will learn to calculate the required stopping distance, considering reaction time and braking distance. The content also covers how to adjust stopping behavior for different road conditions and safe stopping techniques on inclines to ensure the vehicle remains under control.

This lesson breaks down total stopping distance into its two components: thinking (reaction) distance and braking distance. You will learn how factors like speed, vehicle weight, driver fatigue, and road surface conditions dramatically affect how long it takes to come to a complete stop. This understanding is critical for proactive hazard management.

This lesson focuses on calculating total stopping distance, incorporating perception-reaction distance and the vehicle's braking distance. You will also learn to determine an appropriate following gap based on speed, visibility, and road conditions. The content emphasizes maintaining a safe distance to avoid collisions, especially in adverse weather.

Buses and coaches require significantly more distance to stop than cars. This lesson explains why the 'two-second rule' is insufficient and teaches the appropriate methods for calculating a safe gap in various conditions. Maintaining an adequate safety cushion is one of the most important defensive driving skills.

Wet or icy roads drastically reduce tyre grip and can double or triple braking distances. This lesson stresses the importance of significantly reducing overall speed and increasing following distances in such conditions. It advises on using brakes with extreme care to avoid skidding and explains how the vehicle's retarder should be used with caution as it can cause the drive wheels to lock up on slippery surfaces.

This lesson demonstrates how speed dramatically affects a motorcycle's total stopping distance, which includes both reaction time and braking distance. It explains the physics involved and teaches riders how to choose a safe speed based on traffic, weather, and visibility. Adhering to Swiss speed limits and adjusting for conditions is presented as a critical safety skill.

Overloading is a serious offence with severe safety and legal ramifications. This lesson details how excess weight drastically increases braking distances, puts extreme stress on tyres leading to blowouts, and negatively affects steering and overall stability. Furthermore, it discusses the substantial fines, potential license withdrawal, and driver liability that result from violating Swiss weight regulations.

Driving in the Alps requires a high level of skill and vehicle sympathy. This lesson covers techniques for climbing steep gradients by selecting the correct gear to maintain momentum without straining the engine. It reiterates the critical importance of using low gears and auxiliary brakes for descending, to ensure the service brakes remain cool and effective for the entire descent.

Large passenger vehicles rely on powerful air brake systems. This lesson explains how these systems work, including the importance of monitoring air pressure. It also details the function and proper use of auxiliary braking systems (retarders) to control speed on long descents and reduce wear on the service brakes.

Two critical issues can affect air brake performance. This lesson explains brake lag, the slight delay between pressing the pedal and the brakes applying, and brake fade, a dangerous loss of braking power caused by overheating from prolonged or heavy use. It emphasizes that using endurance brakes and selecting the correct gear on descents are key techniques to prevent brake fade.
Explore the principles of compressed-air brakes, ABS, ESC, and retarders in heavy vehicles. Learn how these systems affect braking distance and driver control, crucial for safe operation in Switzerland.
Large passenger vehicles rely on powerful air brake systems. This lesson explains how these systems work, including the importance of monitoring air pressure. It also details the function and proper use of auxiliary braking systems (retarders) to control speed on long descents and reduce wear on the service brakes.

Modern lorries are equipped with advanced electronic safety systems. This lesson explains how the Anti-lock Braking System (ABS) prevents wheels from locking up during hard braking, allowing the driver to maintain steering control. It also covers Electronic Stability Control (ESC), which can detect and mitigate skids or potential rollovers by automatically applying individual brakes and reducing engine power.

This lesson explores the function and benefits of ABS and ESC, focusing on how these systems enhance vehicle control during emergency braking. It explains how ABS prevents wheel lock-up and how ESC maintains vehicle stability. Understanding these safety systems helps drivers respond appropriately during emergencies, ensuring optimal brake performance.
Wet or icy roads drastically reduce tyre grip and can double or triple braking distances. This lesson stresses the importance of significantly reducing overall speed and increasing following distances in such conditions. It advises on using brakes with extreme care to avoid skidding and explains how the vehicle's retarder should be used with caution as it can cause the drive wheels to lock up on slippery surfaces.

To prevent the service brakes from overheating and failing on long downhill gradients, heavy vehicles are equipped with endurance (or auxiliary) braking systems. This lesson explains the function of engine brakes (which alter valve timing) and retarders (which use hydrodynamic or electromagnetic force). These systems allow the driver to maintain a safe, controlled speed without relying solely on the service brakes.

Relying solely on the service brakes on a long downhill stretch can lead to overheating and complete brake failure (brake fade). This lesson explains the function of auxiliary brakes like retarders. You will learn how and when to engage them to maintain a safe, controlled speed, preserving the main brakes for when they are truly needed.

This lesson details the function of the two primary braking circuits. The service brake (Betriebsbremse) is the main system operated by the foot pedal for slowing and stopping the vehicle. The parking brake (Feststellbremse) is a powerful spring-applied system that is held off by air pressure, meaning it engages automatically if a major air leak occurs, serving as a critical fail-safe.
Two critical issues can affect air brake performance. This lesson explains brake lag, the slight delay between pressing the pedal and the brakes applying, and brake fade, a dangerous loss of braking power caused by overheating from prolonged or heavy use. It emphasizes that using endurance brakes and selecting the correct gear on descents are key techniques to prevent brake fade.
Driving in the Alps requires a high level of skill and vehicle sympathy. This lesson covers techniques for climbing steep gradients by selecting the correct gear to maintain momentum without straining the engine. It reiterates the critical importance of using low gears and auxiliary brakes for descending, to ensure the service brakes remain cool and effective for the entire descent.
This lesson focuses on the rules governing when and how to stop a vehicle safely. You will learn to calculate the required stopping distance, considering reaction time and braking distance. The content also covers how to adjust stopping behavior for different road conditions and safe stopping techniques on inclines to ensure the vehicle remains under control.
Find clear answers to common questions learners have about Calculating Braking Distance for Heavy Vehicles. Learn how the lesson is structured, which driving theory objectives it supports, and how it fits into the overall learning path of units and curriculum progression in Switzerland. These explanations help you understand key concepts, lesson flow, and exam focused study goals.
A heavy vehicle has significantly more mass and momentum. Kinetic energy increases with the square of the speed, meaning that even small increases in speed or weight drastically increase the work the brakes must do to bring the vehicle to a halt.
You do not need to perform complex calculus, but you must understand the relationships between variables. The exam tests your ability to identify how doubling speed or increasing weight proportionally or exponentially affects your safety and stopping distance.
Road surface friction is critical; wet, icy, or snow-covered roads in Switzerland reduce tire grip. Because heavy vehicles are prone to locking wheels or sliding if not handled correctly, the braking distance increases significantly compared to dry asphalt.
Endurance brakes like retarders help maintain control on long descents by preventing brake fade, but they do not shorten the emergency braking distance in the same way the service brake system does. They are meant for speed management and stability.
Pinpoint specific Swiss traffic rules, road signs, or driving situations you need to master. Use the practice search to start a focused revision session now and build confidence for your official driving theory exam.