This lesson guides you through the complex interface of your lorry’s dashboard, a critical skill for both your theory exam and daily professional operation. You will learn to identify key gauges and interpret warning signals, ensuring you can maintain vehicle safety and compliance on Swiss roads.

Lesson content overview
The dashboard is more than just a cluster of lights and needles; it is the vital communication hub between your heavy goods vehicle and you, the driver. For operators of Category C and C1 goods vehicles in Switzerland, accurately interpreting this information is paramount for safety, operational efficiency, and legal compliance. This lesson will guide you through the essential gauges, the critical language of warning lights, and the underlying diagnostic systems that ensure your vehicle is roadworthy and safe.
The dashboard in a lorry, often referred to as the instrument panel, serves as the primary interface for real-time monitoring of vehicle performance and system health. It consolidates crucial data from various sensors and systems, presenting it in an easily digestible format for the driver. This continuous flow of information is essential for making informed decisions on the road, adjusting driving behavior, and responding promptly to potential issues.
For professional drivers operating heavy goods vehicles, the consequences of overlooking dashboard indicators can be severe. A minor fault, if ignored, can escalate into a major mechanical failure, leading to costly repairs, significant delays, and, most critically, dangerous situations on the road. Proactive monitoring helps prevent breakdowns, ensures optimal fuel efficiency, and extends the lifespan of critical vehicle components. Understanding these indicators is a core competency for maintaining the roadworthiness of Category C and C1 vehicles, directly connecting to daily pre-drive inspections and overall vehicle maintenance protocols.
Heavy goods vehicles are equipped with a range of gauges that provide continuous feedback on vital operational parameters. Unlike passenger cars, lorries have additional, specialized instruments that reflect the complexity and demands of heavy-duty operation. Regular observation of these gauges allows drivers to detect anomalies before they trigger critical warning lights.
For Category C and C1 goods vehicles, which predominantly use air brake systems, the air pressure gauges are arguably the most crucial instruments on the dashboard. These gauges display the air pressure in the separate circuits of the braking system, typically for the front axle, rear axle, and trailer brakes. Maintaining adequate air pressure is non-negotiable for safe braking. A sudden drop or a consistent reading below the minimum safe operating pressure indicates a leak or compressor fault, severely compromising braking capability. Drivers must ensure these gauges show sufficient pressure before starting a journey and monitor them constantly while driving, particularly during repeated braking or on long descents.
The tachometer measures the engine's rotational speed in revolutions per minute (RPM). For heavy vehicles, the tachometer is essential for selecting the correct gear, preventing engine over-revving, and ensuring efficient fuel consumption. Operating the engine within its optimal RPM range—often indicated by a green or specific band on the tachometer—maximizes power delivery while minimizing wear and fuel usage. Exceeding the redline on the tachometer can lead to severe engine damage, especially under heavy load or during prolonged downhill braking when using engine retarders.
The fuel level indicator provides an estimate of the remaining fuel in the tank. For long-haul commercial operations, accurate fuel monitoring is critical for route planning and avoiding fuel starvation, which can leave a heavy vehicle stranded and create road hazards. The temperature gauge, typically monitoring engine coolant temperature, is another vital instrument. It helps prevent engine overheating, a common issue under heavy loads, during prolonged climbs, or in hot weather. Maintaining the engine within its optimal temperature range (usually around the middle of the gauge) is crucial for engine health and performance. High temperatures can lead to engine damage or breakdown.
The oil pressure gauge displays the hydraulic pressure of the engine oil. Engine oil is vital for lubricating moving parts, reducing friction, and dissipating heat. A healthy oil pressure reading indicates proper lubrication, while a low reading suggests a problem, such as insufficient oil level, a faulty oil pump, or an internal engine issue. Sustained low oil pressure can quickly lead to catastrophic engine failure due to metal-on-metal contact.
Modern vehicle dashboards communicate critical information through a system of universally recognized warning lights. These lights are color-coded to convey the urgency and severity of the underlying issue, allowing drivers to make rapid decisions.
Red warning lights signify a critical fault that requires immediate attention. These indicators mean the vehicle is unsafe to continue operating and poses a significant risk to the driver, other road users, or the vehicle's integrity. When a red warning light illuminates, the driver's legal and safety obligation is to stop the vehicle safely and promptly. Continuing to drive with a red warning light active can lead to severe accidents, catastrophic mechanical failure, and significant legal penalties under Swiss road traffic regulations. Examples include severe brake system faults, dangerously low engine oil pressure, or critical engine overheating.
Amber (or yellow) warning lights indicate a non-critical fault or a system malfunction that requires prompt inspection or service. While these lights usually do not demand an immediate stop, they signal a condition that could worsen or affect vehicle performance and safety if ignored. Drivers should proceed with caution, adjust their driving style if necessary, and arrange for the vehicle to be inspected and serviced as soon as possible. Examples include issues with the Anti-lock Braking System (ABS), engine management faults that are not immediately critical, or a low fuel warning.
Green and blue lights are typically informational or status indicators. They confirm that a specific system is active or operating normally. For instance, a green light indicates activated turn signals or dipped beam headlights, while a blue light signifies that the high beam headlights are engaged. These lights serve as helpful reminders of active vehicle functions and typically do not signal a fault.
Understanding the specific symbols and their meanings is crucial for the safe operation of Category C and C1 vehicles. Here, we detail some of the most common and important warning lights.
Indicates a fault in the vehicle's hydraulic or air brake system, severely impacting stopping capability.
A red brake system warning light is among the most critical alerts. This light can signify dangerously low air pressure in the air brake reservoirs, a hydraulic fluid leak, or a major fault within the braking mechanism itself. For heavy vehicles, a common specific red light indicates low air pressure, meaning there might not be enough compressed air to operate the brakes effectively. In such cases, the vehicle's braking performance is severely compromised, demanding an immediate and safe stop. Ignoring this light is extremely dangerous, as it directly affects the vehicle's ability to decelerate and stop, especially when fully loaded.
Alerts the driver to dangerously low engine oil pressure, which can cause severe engine damage.
A red engine oil pressure light indicates that the engine is not receiving adequate lubrication. This is a critical warning, as prolonged operation with low oil pressure can lead to rapid and irreversible damage to engine components, potentially causing an engine seizure. If this light illuminates, the driver must immediately pull over to a safe location, shut off the engine, and check the oil level. If the level is correct, the issue is more serious (e.g., a faulty oil pump), and professional assistance is required. Some systems may use an amber light for a less critical, but still serious, oil-related issue.
Indicates that the engine coolant temperature has exceeded safe operating limits, risking engine overheating.
The coolant temperature warning light, typically red or amber, signals that the engine's operating temperature is dangerously high. Overheating can be caused by a low coolant level, a faulty thermostat, a broken fan belt, or excessive engine load. If this light illuminates (especially if red), the driver should reduce speed, use engine braking to slow down, and find a safe place to stop. Continuing to drive an overheating engine can lead to head gasket failure, engine seizure, or other extensive damage. Once safely stopped, the engine should be allowed to cool down before attempting to check coolant levels or identify the cause.
Indicates a fault in the vehicle's charging system, meaning the battery is not being recharged.
A red battery charge warning light indicates a problem with the vehicle's electrical charging system, usually a faulty alternator or a broken alternator belt. When this light is on, the vehicle is running solely on battery power, which will eventually deplete. Once the battery dies, critical electrical functions such as lighting, engine control, and even power steering assistance may cease to operate. While not an immediate stop requirement unless other critical systems fail, drivers should proceed to a service center promptly to avoid a complete electrical shutdown.
Indicates a malfunction in the Anti-lock Braking System, meaning ABS may be inactive.
The amber ABS warning light signifies a fault within the Anti-lock Braking System. While the vehicle's conventional brakes will usually remain operational, the ABS feature (which prevents wheel lock-up during hard braking) will be deactivated. This means that under emergency braking or on slippery surfaces, the wheels may lock, leading to a loss of steering control and potentially longer stopping distances. Drivers should be aware of this reduced braking enhancement and adjust their driving style, allowing for greater following distances and braking more gently, especially on adverse road conditions. This light usually does not require an immediate stop but warrants prompt inspection.
A red warning light indicating that the air pressure in the braking system has fallen below safe operating levels.
This specific red air pressure warning light for air brake systems is distinct from the general brake system light and is critically important for heavy goods vehicles. It illuminates when the air reservoirs lack sufficient pressure to operate the brakes safely. Before moving a Category C or C1 vehicle, the driver must ensure the air pressure gauges are at the correct operating level. If this light comes on during driving, it means the vehicle is no longer safe to operate. The driver must immediately stop the vehicle in a safe location, identify the cause of the pressure loss (e.g., a leak), and re-pressurize the system before continuing.
Amber flashing lights indicate the activation of turn signals (or indicators). A faster flash rate than usual may signal a blown bulb. A blue or green high beam indicator light shows that the vehicle's high beam headlights are currently on. Drivers must use high beams responsibly, dimming them for oncoming traffic and when following other vehicles to prevent dazzling.
A red or amber light that flashes or remains steady when a seat belt is not fastened.
The seat belt reminder light, typically red or amber, alerts the driver and sometimes passengers if their seat belts are not fastened. In Switzerland, wearing a seat belt is mandatory for all occupants, and this light serves as a crucial safety reminder. The traction control light, usually amber, indicates that the vehicle's traction control system is actively intervening to prevent wheel spin or that there is a fault with the system. When flashing, it means the system is engaged, helping maintain traction; if it remains steady, it indicates a fault, similar to the ABS light, requiring cautious driving and eventual inspection.
Modern heavy goods vehicles are equipped with sophisticated On-board Diagnostic (OBD) systems, specifically designed for commercial vehicles (often referred to as OBD-C or heavy-duty OBD). These systems are crucial for monitoring a multitude of sensors and electronic control units (ECUs) throughout the vehicle.
The OBD system continuously monitors engine performance, emissions controls, and other critical systems. When a sensor detects a reading outside of its normal operating parameters, or if a component malfunctions, the OBD system registers a Diagnostic Trouble Code (DTC). This code then triggers a corresponding warning light on the dashboard, typically the "Check Engine" or "Malfunction Indicator Lamp (MIL)," which is usually amber. The primary purpose of the OBD system is to enable technicians to quickly and precisely identify faults, streamlining the repair process.
DTCs are standardized alphanumeric codes that pinpoint the exact nature and location of a fault. For example, a code might indicate a specific sensor failure, an issue with the exhaust gas recirculation (EGR) system, or a misfire in a particular cylinder. While drivers are generally not expected to interpret these codes directly, understanding that an illuminated MIL light signifies an OBD-detected fault is important. Reading and clearing these codes usually requires specialized diagnostic tools and professional service, emphasizing that simply resetting a warning light without addressing the underlying issue is not a solution and can mask recurring problems.
Swiss road traffic regulations (e.g., those within the SVG – Strassenverkehrsgesetz) place strict requirements on drivers, particularly those operating Category C and C1 goods vehicles, to respond appropriately to dashboard warnings. These rules are in place to ensure public safety and vehicle roadworthiness.
The most stringent rule is that any red warning light illuminating on the dashboard requires an immediate and safe stop of the vehicle. This is not merely a recommendation but a legal obligation. For heavy vehicles, specifically, a red brake pressure warning light indicating insufficient air pressure in the braking system is a direct order to stop. Failure to comply can result in severe penalties, including substantial fines, license suspension, and liability in the event of an accident caused by the vehicle defect. Drivers must maneuver the vehicle to the nearest safe stopping area (e.g., hard shoulder on a motorway, a safe parking bay on a rural road) and investigate the cause before proceeding.
While amber lights do not typically mandate an immediate stop, they do require a prompt response. Drivers are expected to acknowledge amber warnings, assess their potential impact on vehicle operation, and arrange for inspection or repair within a reasonable timeframe. For instance, an amber ABS light means the driver must drive with increased caution, aware that the anti-lock function is compromised. Ignoring amber warnings can lead to the deterioration of a component, potentially escalating into a critical red warning situation or causing a breakdown.
Ignoring critical dashboard warnings, especially red ones, can have significant legal ramifications in Switzerland. Beyond immediate traffic fines, a driver could be held liable for any damages or injuries resulting from a vehicle fault that was indicated by a warning light. Repeated non-compliance could also impact a driver's professional license (Category C/C1). Regular maintenance checks and adherence to warning light protocols are therefore part of a professional driver's responsibility.
Drivers, especially those new to operating heavy vehicles, can sometimes misinterpret or mishandle dashboard warnings. Awareness of these common errors can prevent serious incidents.
One of the most dangerous mistakes is to continue driving with a red brake warning light, particularly one indicating low air pressure. The misconception might be that "there's still some pressure," or "I'm almost at my destination." However, heavy vehicles require immense braking force, and a compromised air system dramatically increases stopping distances and the risk of complete brake failure. Always prioritize safety by stopping immediately.
Another common error is to dismiss amber warning lights as non-critical or "just a sensor." While amber lights allow for continued driving, they indicate a real problem that needs addressing. Ignoring an amber engine management light, for instance, could lead to increased emissions, reduced fuel economy, or eventually, a more severe engine fault that triggers a red warning.
Many drivers focus only on warning lights. However, the gauges provide crucial early indicators of impending problems. A slow, gradual drop in air pressure on the gauge, or a creeping rise in coolant temperature before a warning light illuminates, offers a window for proactive intervention. Relying solely on the warning lights is reactive, whereas monitoring gauges is proactive.
The appropriate response to a dashboard warning can also be influenced by the specific driving conditions and the vehicle's state. Professional drivers must consider these factors when making decisions.
A fully loaded Category C or C1 vehicle places much greater stress on its systems. An amber coolant temperature warning, for example, is more urgent when climbing a steep hill with a heavy load than when driving empty on flat terrain. Similarly, a minor brake system fault becomes significantly more dangerous on a wet or icy road. Drivers must adjust their interpretation and response based on these amplified risks.
Adverse weather conditions like heavy rain, snow, or fog can compromise cooling efficiency, affect tire traction, and obscure road signs. In such conditions, monitoring gauges like the temperature and oil pressure becomes even more critical. Reduced visibility also makes it harder to find safe stopping areas if a red warning light illuminates, requiring earlier decision-making.
Many Category C and C1 drivers operate with trailers. It's important to remember that trailers also have their own braking and electrical systems, which can trigger warning lights on the tractor unit's dashboard (e.g., trailer ABS fault). Drivers must monitor these in conjunction with the primary vehicle's warnings, as a fault in the trailer's systems directly impacts the stability and safety of the entire combination.
The relationship between dashboard information and driver action is a direct cause-and-effect chain that dictates safety.
Understanding how to react to dashboard alerts in practical situations is key for Category C and C1 drivers.
Situation: You are driving a fully loaded lorry up a long, steep mountain pass. Suddenly, the engine coolant temperature gauge moves into the red zone, and an amber warning light illuminates. Correct Action: You immediately reduce throttle input, shift to a lower gear to reduce engine strain, and activate your engine brake (if applicable) to assist in slowing down. You look for the first safe opportunity to pull off the road and allow the engine to cool down, ensuring not to open the radiator cap while the engine is hot. You then check the coolant level once it has cooled. Incorrect Action: You continue to push the vehicle, hoping to reach the summit quickly, ignoring the warning. This risks severe engine damage due to overheating.
Situation: While cruising on a Swiss motorway with a heavy load, the red air brake pressure warning light illuminates, and an audible alarm sounds. Correct Action: Without hesitation, you activate your hazard warning lights, safely signal and move to the hard shoulder or the nearest emergency stopping area. You bring the vehicle to a controlled stop, engage the parking brake, and immediately check the air pressure gauges to confirm the low pressure. You then visually inspect the air lines for any obvious leaks and attempt to re-pressurize the system. If the problem persists, you contact roadside assistance. Incorrect Action: You attempt to continue to the next service station or exit, gambling with severely compromised braking capability, especially dangerous at motorway speeds.
Situation: You are driving your lorry on a rainy day, and an amber ABS warning light illuminates on the dashboard. You are approaching a busy urban intersection. Correct Action: You immediately acknowledge the ABS warning. Knowing that ABS assistance is unavailable, you increase your following distance from other vehicles and mentally prepare for longer stopping distances. You brake earlier and more gently than usual as you approach the intersection, feathering the brakes to avoid wheel lock-up. You plan to have the system inspected at your earliest convenience. Incorrect Action: You ignore the amber light, assume the brakes are fine, and continue to drive as normal, potentially braking too hard and skidding on the wet surface.
The dashboard of a Category C or C1 goods vehicle is your most critical tool for ensuring safe and compliant operation. Mastering its information involves:
By diligently monitoring the dashboard and acting decisively on its alerts, you enhance your safety, protect your vehicle from costly damage, and uphold your responsibilities as a professional driver in Switzerland.
The dashboard of a Category C or C1 goods vehicle serves as the driver's primary communication interface for monitoring vehicle health and safety systems. Understanding color-coded warning lights—red for critical faults requiring immediate stops, amber for advisory conditions needing prompt inspection, and green/blue for informational status—is essential for safe operation. Key instruments include air pressure gauges (critical for air brake systems), tachometers, temperature gauges, and oil pressure gauges, all of which should be monitored proactively rather than reactively. On-board Diagnostics (OBD) systems detect faults and generate Diagnostic Trouble Codes (DTCs) that trigger warning lights, requiring professional assessment rather than simple resets. Swiss regulations impose strict legal obligations on Category C/C1 drivers to respond immediately to red warning lights, with significant penalties for non-compliance. Common learner mistakes include dismissing amber warnings as non-urgent, neglecting gauge monitoring, and continuing to drive with critical brake system alerts.
A short set of high-value points that capture the most important learning from this lesson.
Red warning lights require immediate and safe stopping; they indicate critical safety faults where continued driving is both illegal and dangerous.
Amber warning lights signal non-critical issues requiring prompt inspection but not necessarily an immediate stop.
Air pressure gauges for brakes are the most critical instruments in heavy goods vehicles with air brake systems and must be monitored constantly.
On-board Diagnostics (OBD) systems generate Diagnostic Trouble Codes (DTCs) when faults are detected, requiring professional diagnostic tools for interpretation.
Gauges provide early warning indicators before actual warning lights activate, making proactive monitoring essential for preventing breakdowns.
Explore all units and lessons included in this driving theory course.
Red = immediate stop required; Amber = caution and prompt service; Green/Blue = informational only.
A red air pressure warning means insufficient compressed air to operate brakes safely—immediate stop is mandatory.
Ignoring amber warning lights can cause problems to escalate into critical red warning situations.
With an amber ABS fault light, conventional brakes still work but wheel lock prevention is disabled—adjust braking style accordingly.
Swiss SVG regulations mandate immediate stops for any red warning light on Category C/C1 vehicles, with legal consequences for non-compliance.
Continuing to drive with a red brake pressure warning, assuming there is still sufficient air pressure to reach the destination.
Underestimating amber warning lights as minor issues and delaying inspection until they escalate.
Relying solely on warning lights without regularly monitoring gauges that can indicate developing problems earlier.
Attempting to reset or clear warning lights without addressing the underlying mechanical or electrical fault.
Forgetting to account for trailer systems when operating a truck-trailer combination, as trailer faults can trigger warnings on the tractor unit's dashboard.
Lesson content overview
A short set of high-value points that capture the most important learning from this lesson.
Red warning lights require immediate and safe stopping; they indicate critical safety faults where continued driving is both illegal and dangerous.
Amber warning lights signal non-critical issues requiring prompt inspection but not necessarily an immediate stop.
Air pressure gauges for brakes are the most critical instruments in heavy goods vehicles with air brake systems and must be monitored constantly.
On-board Diagnostics (OBD) systems generate Diagnostic Trouble Codes (DTCs) when faults are detected, requiring professional diagnostic tools for interpretation.
Gauges provide early warning indicators before actual warning lights activate, making proactive monitoring essential for preventing breakdowns.
Explore all units and lessons included in this driving theory course.
Red = immediate stop required; Amber = caution and prompt service; Green/Blue = informational only.
A red air pressure warning means insufficient compressed air to operate brakes safely—immediate stop is mandatory.
Ignoring amber warning lights can cause problems to escalate into critical red warning situations.
With an amber ABS fault light, conventional brakes still work but wheel lock prevention is disabled—adjust braking style accordingly.
Swiss SVG regulations mandate immediate stops for any red warning light on Category C/C1 vehicles, with legal consequences for non-compliance.
Continuing to drive with a red brake pressure warning, assuming there is still sufficient air pressure to reach the destination.
Underestimating amber warning lights as minor issues and delaying inspection until they escalate.
Relying solely on warning lights without regularly monitoring gauges that can indicate developing problems earlier.
Attempting to reset or clear warning lights without addressing the underlying mechanical or electrical fault.
Forgetting to account for trailer systems when operating a truck-trailer combination, as trailer faults can trigger warnings on the tractor unit's dashboard.
Explore search topics learners often look for when studying Dashboard Instruments, Warning Lights, and On-board Diagnostics. These topics reflect common questions about road rules, driving situations, safety guidance, and lesson level theory preparation for learners in Switzerland.
Browse additional driving theory lessons that cover connected traffic rules, road signs, and common driving situations related to this topic. Improve your understanding of how different rules interact across everyday traffic scenarios.
Understand the critical red and caution amber warning lights on your lorry's dashboard. Learn what each symbol signifies and the immediate actions required for safe driving and legal compliance in Switzerland.

Proper visibility is paramount for the safety of large vehicles, especially at night or in poor weather. This lesson covers the full range of required lights, including headlights, indicators, brake lights, and side and rear marker lights. It also explains the function of reflectors and the mandatory high-visibility conspicuity markings that outline the vehicle's shape to other drivers.

This lesson focuses on warning signs that alert drivers to potential hazards ahead, such as curves, steep descents, and roadwork zones. You will understand how these signs prompt anticipatory driving behavior, allowing for adjustments in speed and position. The content also discusses the typical placement of warning signs to help you react safely to changing conditions.

Many urban areas have restrictions to manage traffic and protect infrastructure. This lesson teaches drivers to identify and interpret traffic signs that prohibit access based on gross vehicle weight, axle load, height, or width. It also covers the growing prevalence of environmental or low-emission zones, which may restrict entry for older, more polluting vehicles.

Motorway driving requires constant concentration due to high speeds. This lesson emphasizes the importance of staying in the right-hand lane unless overtaking and the specific restrictions on lorry overtaking in Switzerland. It reinforces the need for a following distance of at least four seconds to compensate for the vehicle's long stopping distance and provides guidance on safely merging and exiting.

This lesson provides a clear definition of the Swiss heavy goods vehicle license categories. It details the weight limits and vehicle configurations for Category C (lorries over 3.5t) and C1 (lorries from 3.5t to 7.5t). Furthermore, it explains how categories CE and C1E grant the entitlement to tow heavy trailers, forming articulated vehicles or road trains, which is crucial for professional transport operations.

This lesson examines the different lighting systems on a vehicle, including headlamps, fog lights, and turn signals. It explains the appropriate use of low-beam and high-beam headlights and the conditions for activating fog lights. Understanding proper lighting usage improves visibility and safety, especially in low-light or adverse weather conditions.

Unlike cars, heavy vehicles cannot travel on every road. This lesson stresses the importance of using HGV-specific satellite navigation systems or carefully checking maps to plan routes that avoid low bridges, weak bridges, and roads with weight or width restrictions. Proper planning saves time, fuel, and prevents dangerous situations or costly damage.

Fatigue is a major cause of accidents in the transport industry. This lesson teaches drivers to identify the early warning signs of tiredness, such as frequent yawning, heavy eyelids, and difficulty concentrating. It emphasizes that the only effective cure for fatigue is sleep and reinforces the legal and personal responsibility to take required breaks and never drive while tired.
The driver is legally responsible for the roadworthiness of their vehicle at the start of and during every journey. This lesson outlines the formal process for reporting any identified defects to the transport manager or maintenance staff. It stresses the critical rule that a vehicle with a known safety-critical defect must not be driven until it has been professionally repaired and declared safe.

After stopping for an emergency, making the scene safe is the top priority. This lesson details the procedure: activate hazard warning lights, put on high-visibility clothing before exiting the cab, and place the warning triangle at the correct distance behind the vehicle (at least 100m on motorways). This warns approaching traffic and creates a safer environment for the driver and emergency responders.
Explore the role of on-board diagnostic (OBD) systems and how to interpret fault codes. Understand your responsibilities for vehicle roadworthiness and maintenance based on dashboard indicators for Swiss C and C1 licenses.
The driver is legally responsible for the roadworthiness of their vehicle at the start of and during every journey. This lesson outlines the formal process for reporting any identified defects to the transport manager or maintenance staff. It stresses the critical rule that a vehicle with a known safety-critical defect must not be driven until it has been professionally repaired and declared safe.

Many modern lorries are equipped with technologies designed to improve safety. This lesson introduces common systems like reversing cameras, blind spot detection sensors, and lane departure warnings. It is crucial for drivers to understand that while these systems are valuable aids, they do not replace the need for fundamental skills of all-round observation and mirror use.

This lesson outlines the mandatory documentation required during any professional transport journey in Switzerland. Drivers must be able to present the vehicle registration document ('Fahrzeugausweis'), their valid driving license, and the OACP qualification card upon request. It also touches upon transport-specific documents like consignment notes, which are crucial for legal compliance during roadside inspections by authorities.

Operating a heavy goods vehicle involves a significant responsibility for the safety of all road users. This lesson emphasizes the professional driver's enhanced duty of care due to the vehicle's size, mass, and potential impact in a collision. It covers the importance of a professional attitude, constant vigilance, and adherence to all traffic regulations to prevent incidents and maintain a high standard of road safety.

This lesson details the specific documents that must be present in the vehicle and on the driver's person during service. It covers the driving license, OACP card, vehicle registration, and tachograph records. You will learn the importance of ensuring all paperwork is current and correct to ensure legal compliance at all times.

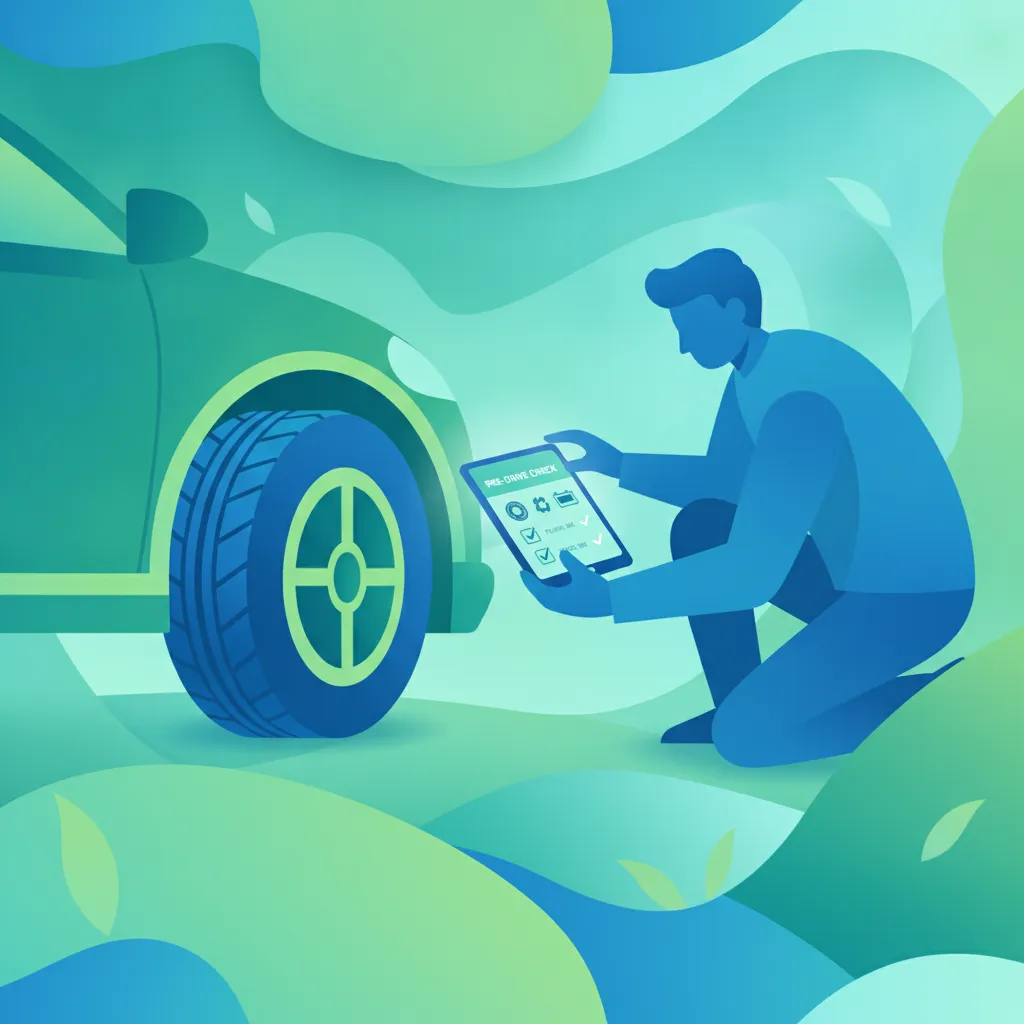
Before starting any journey, a professional driver must conduct a thorough pre-drive inspection. This lesson teaches a systematic walk-around method to check critical components like tyres, wheels, lights, mirrors, fluid levels, and safety equipment. This daily routine is a legal requirement and is crucial for identifying potential defects before they become a danger on the road.

The condition of tyres and wheels is paramount to safety. This lesson details how to check tyre pressures, tread depth, and sidewalls for any damage or defects. You will also learn to inspect wheel nuts for security and look for signs of issues with the suspension system.

This lesson explores the requirements for maintaining vehicle roadworthiness, including regular technical inspections (MFK) and compliance with emission standards. It outlines the inspection criteria, such as brake performance, steering condition, and lighting system functionality. Understanding these inspections helps ensure safety and compliance with Swiss regulations.
Proper visibility is paramount for the safety of large vehicles, especially at night or in poor weather. This lesson covers the full range of required lights, including headlights, indicators, brake lights, and side and rear marker lights. It also explains the function of reflectors and the mandatory high-visibility conspicuity markings that outline the vehicle's shape to other drivers.

While others may have loaded the vehicle, the driver holds the final legal responsibility for the security of the load once on the public highway. This lesson clarifies this crucial point of law, explaining that the driver must inspect the load and its securing arrangements before departure and re-check them during the journey. The consequences of a load shifting or falling can be catastrophic and result in severe legal penalties for the driver.
Find clear answers to common questions learners have about Dashboard Instruments, Warning Lights, and On-board Diagnostics. Learn how the lesson is structured, which driving theory objectives it supports, and how it fits into the overall learning path of units and curriculum progression in Switzerland. These explanations help you understand key concepts, lesson flow, and exam focused study goals.
Red lights indicate a serious fault or safety risk that requires you to stop as soon as it is safe to do so. Amber lights indicate a warning that a system may be failing or needs attention soon, but generally does not require an immediate emergency stop.
Because heavy vehicles use compressed-air braking systems, the air pressure gauge is vital. If pressure drops below the safety threshold, the brakes may not function correctly, making it a critical safety failure.
No, the dashboard displays real-time mechanical and safety data. OACP professional qualifications are separate regulatory requirements, though the tachograph, often linked to the dashboard, displays your driving time data.
Never ignore a warning light. In a heavy goods vehicle, a small warning could be a precursor to a major mechanical failure, such as brake fade or suspension issues, which could lead to an accident on a mountain pass or motorway.
Pinpoint specific Swiss traffic rules, road signs, or driving situations you need to master. Use the practice search to start a focused revision session now and build confidence for your official driving theory exam.